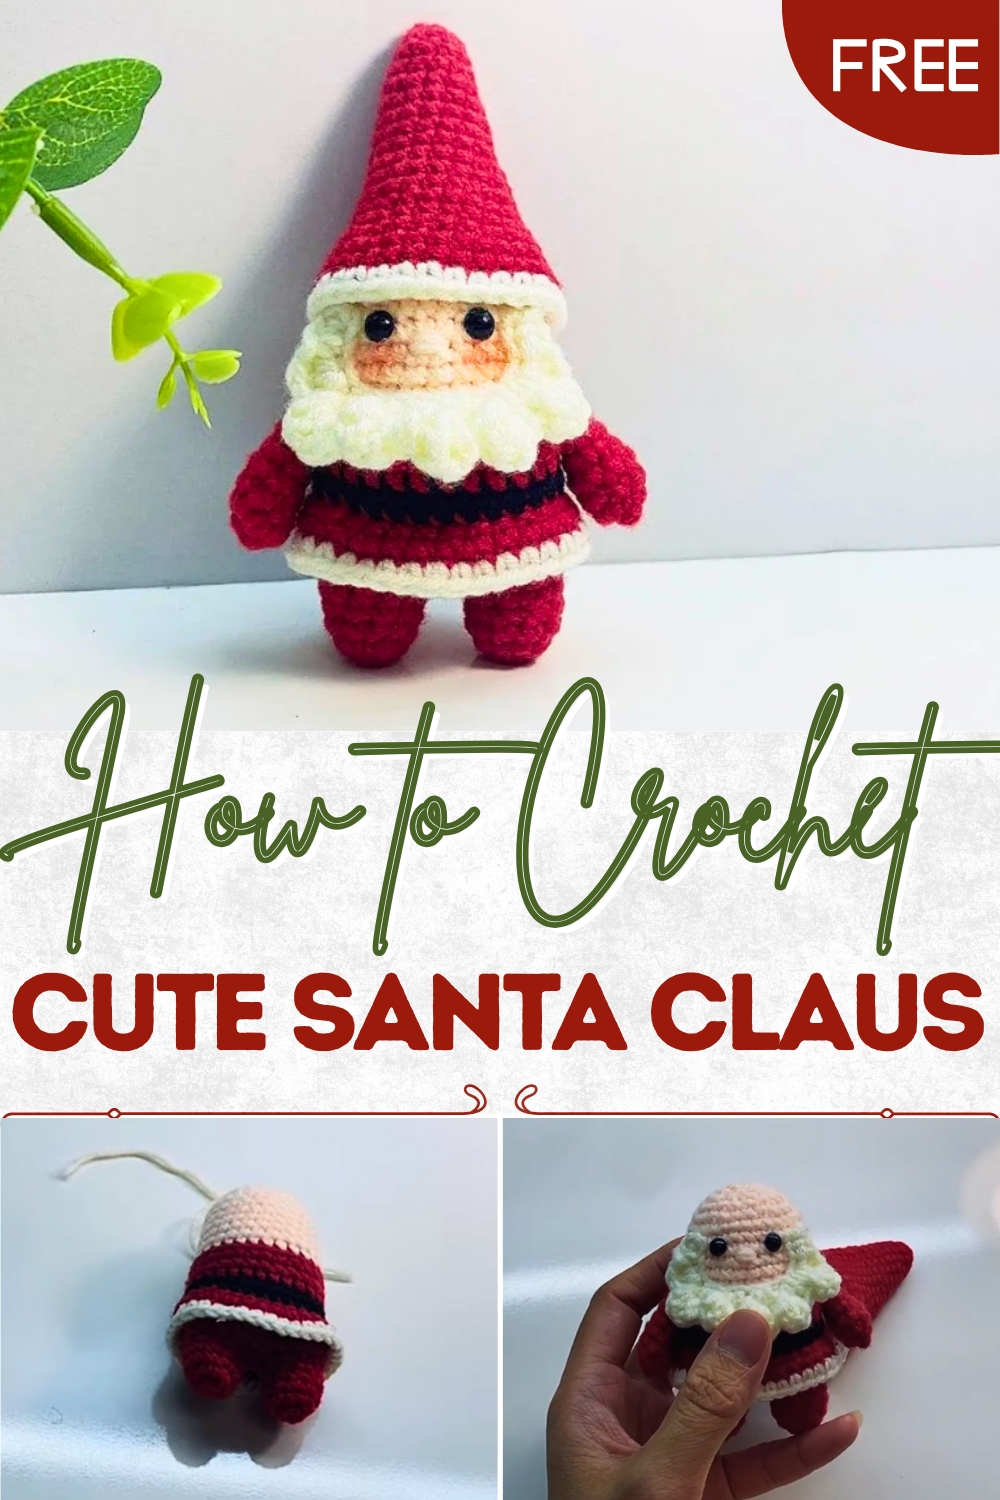
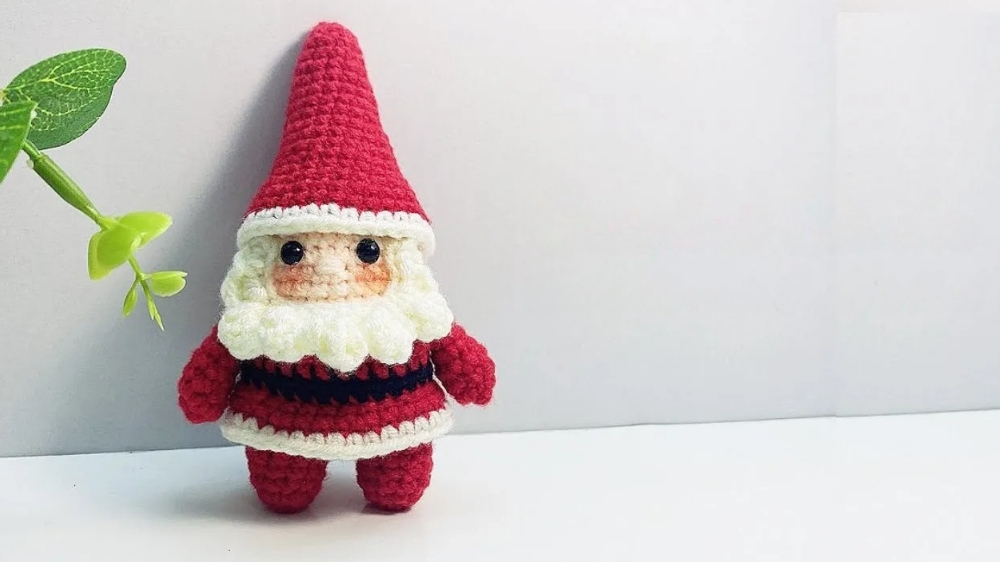
Lovely Crochet Santa Claus Pattern for Special Gift
Delight in the holidays with this Crochet Santa Claus Pattern for a festive, charming accessory that brings joy to any décor or project.
The figure of Santa Claus has long brought smiles and anticipation to children and adults alike, symbolizing generosity, warmth, and festive cheer. The crochet Santa Claus pattern captures this beloved character in a charming, handmade form, turning simple yarn into a timeless holiday accent. Each figure is carefully stitched to provide structure, texture, and durability, ensuring it maintains shape and appeal through many seasons of display. Classic details such as the red suit, snowy beard, and signature hat create a recognizable and playful charm, while the soft material makes the figure approachable and delightful to hold.
Magical Crochet Santa Claus With Creative Touch
Beyond serving as a decorative piece for mantels, shelves, or Christmas trees, the crochet Santa Claus can become part of a themed centerpiece or a thoughtful gift, spreading joy and festive spirit to family and friends. Its compact size and lightweight construction allow for versatile placement, while the handmade nature adds individuality and a personal touch to each piece.
Ideal for both children and collectors, this Santa Claus pattern offers a combination of aesthetic appeal and sentimental value. Every stitch contributes to a figure that brings warmth, tradition, and holiday magic into homes, turning seasonal décor into an enduring expression of cheer and celebration.
Materials You Will Need
- Yarn:
- Red (for Santa’s body, arms, and hat)
- White (for beard, hat trim, and details)
- Black (for belt)
- Skin-colored yarn (for the face and nose)
- Crochet Hook: 2.5 mm hook
- Safety Eyes: Small or medium size, depending on the desired look
- Stuffing: Cotton or polyester fiberfill for stuffing the body and arms
- Yarn Needle: For sewing the pieces together and weaving in ends
- Scissors: For cutting the yarn
- Optional: Hot glue gun to attach smaller details like safety eyes or beard (as an alternative to sewing)
Step-by-Step Instructions
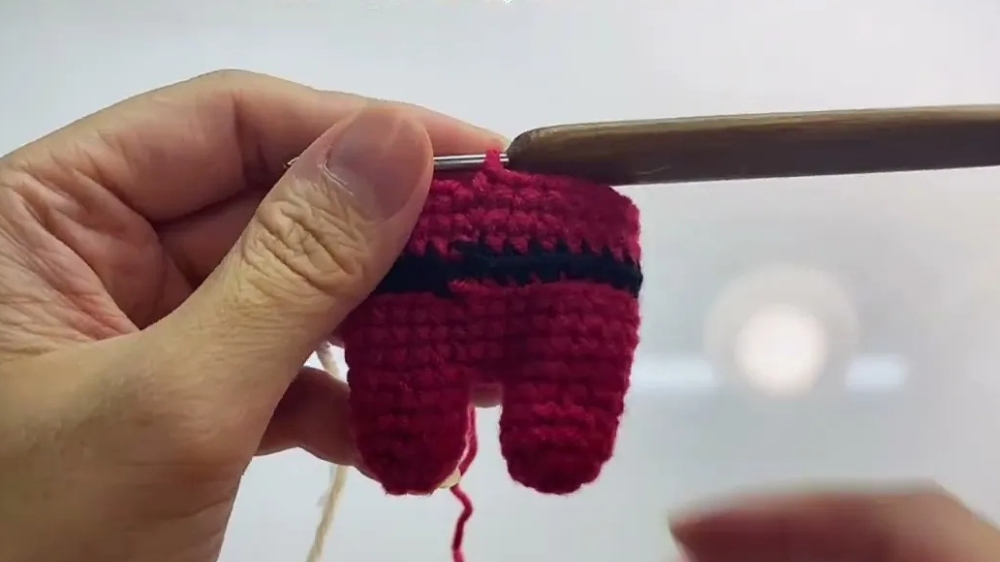
1. Feet and Legs
- Start with the Feet:
- Create a magic circle with red yarn.
- Inside the magic circle, crochet 5 single stitches. Pull the yarn tight to close the circle.
- End the row with a slip stitch to secure the circle.
- Second Row:
- In the 2nd row, crochet 2 single stitches into each stitch (increase), for a total of 10 stitches.

- In the 2nd row, crochet 2 single stitches into each stitch (increase), for a total of 10 stitches.
- Rows 3-4:
- Crochet 10 single stitches in each row (maintain the number of stitches).
- Switch to Black Yarn:
- At the 5th row, switch to black yarn for the “belt” section. Crochet 10 single stitches.
- Create a Second Leg:
- Repeat the above steps to make the second leg but do not cut the yarn.
- Connect the two legs together with a chain stitch and continue crocheting the body.
2. Body
- Lower Body:
- After connecting the two legs, start building up the body by crocheting 28 single stitches (11 stitches from each leg + 2 stitches from the connecting chain).
- Continue crocheting in rounds, alternating rows with increases to give the body a slightly rounded shape.
- Middle Body:
- Crochet rows of red yarn to build the body’s middle section.
- Switch to black again for Santa’s belt and crochet one row in the back loop only, creating a slight rim for attaching an overlay later.
- Upper Body/Face:
- Switch to the skin-colored yarn for the face.
- Crochet several rows with 28 single stitches, then start decreasing to taper the body toward the neck.
- Stuff the body with fiberfill as you go to maintain an even shape.
3. Arms
- Use red yarn to create the arms:
- Make a magic circle with 6 single stitches.
- Continue crocheting in the round, alternating between 1 single stitch and an increase for the first few rows to widen the arm.
- Crochet 9 single stitches per row for a few rows to add length.
- Switch to white yarn or skin-colored yarn for the hands and taper the arm by crocheting decrease stitches.
- Create two arms, leaving a long tail on each for attaching them to the body.
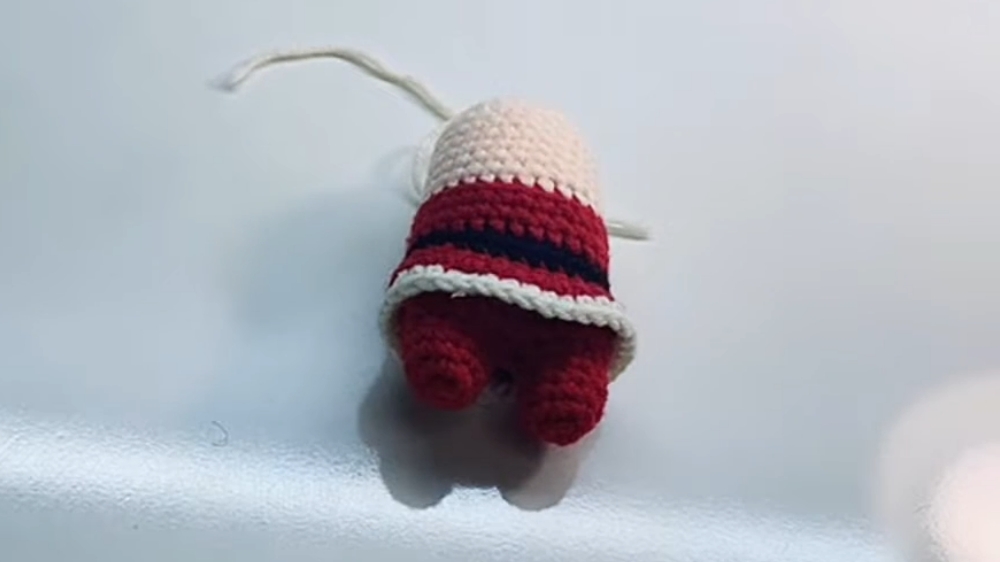
4. Hat
- Start with a magic circle and crochet 6 single stitches in red yarn.
- Gradually increase stitches in each row to widen the hat, following this pattern:
- Row 2: Alternate a single stitch and an increase.
- Rows 3-6: Continue increasing evenly until you’ve reached the desired width for Santa’s hat.
- Crochet several rows without increases to elongate the hat.
- Finish the bottom edge with a trim of white yarn to create the fluffy white edge.
5. Beard and Nose
- Beard:
- Use white yarn to crochet the beard. Chain a foundation of 18 stitches and crochet into this foundation, alternating slip stitches and double crochets to create a textured look.
- Attach the beard to the face using a yarn needle or hot glue.
- Nose:
- Use skin-colored yarn to create a small nose.
- Stitch a small bump between the eyes using a yarn needle.
6. Assembly
- Attach the arms to the sides of the body using a yarn needle to sew them securely.
- Sew the hat to the top of the head, ensuring it slightly tilts for a playful look.
- Position the beard and glue or sew it in place over the face.
- Attach the safety eyes just above the beard, ensuring symmetry.
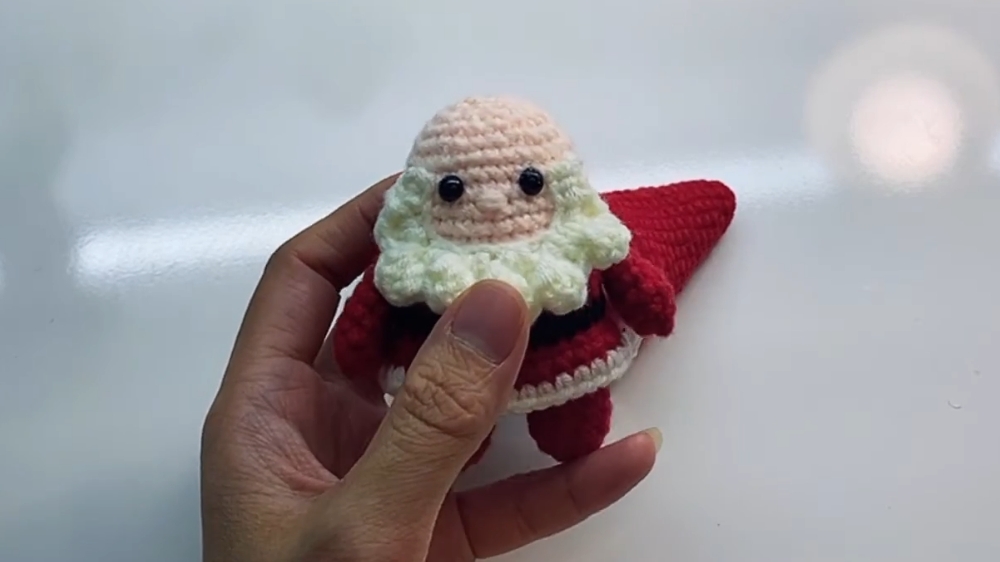
Special Features
- Realistic Design: The project includes thoughtful details such as Santa’s belt, beard, and rosy nose.
- Color Changes: Learn how to switch yarn colors seamlessly, creating a polished look for the plushie.
- Multiple Techniques: Features techniques like crocheting in the front/back loop only, creating decreases, and shaping specific components.
Level of Difficulty
The project is suitable for intermediate crocheters, though advanced beginners can still attempt it with some patience. Mastery of basic stitches (e.g., single crochet, slip stitch) and understanding of increases/decreases are required.
Tutor’s Suggestions
- Use a Marking Pin: To track the start of each row, use a row marker if you prefer continuous rounds over finishing rows.
- Stuff Gradually: Insert filling gradually to ensure even distribution and proper shaping.
- Secure the Beard and Nose: Sew the beard and nose carefully to avoid them detaching later. Hot glue is great for added security.
Uses of the Santa Claus Plushie
- Holiday Decoration: Place it on tables, mantels, or your Christmas tree for a festive touch.
- Gift Idea: Present this handmade Santa to friends and family for a heartfelt gift.
- Kids’ Toy: Makes a safe and adorable toy for children when securely assembled.
Tip
To make your Santa extra festive, you can add small embellishments such as a pompom at the tip of the hat, felt boots, or even a little sack of yarn gifts.
Conclusion
This Santa Claus crochet pattern is a fantastic project that combines creativity and fun. While the steps may seem detailed, each component is manageable when approached systematically. The finished product is a charming, festive plushie that is perfect for spreading Christmas cheer. Whether you’re making it for your home, a gift, or a crochet project, this Santa crochet doll is sure to bring smiles all around. So grab your yarn and hook, and get started on this delightful holiday project.