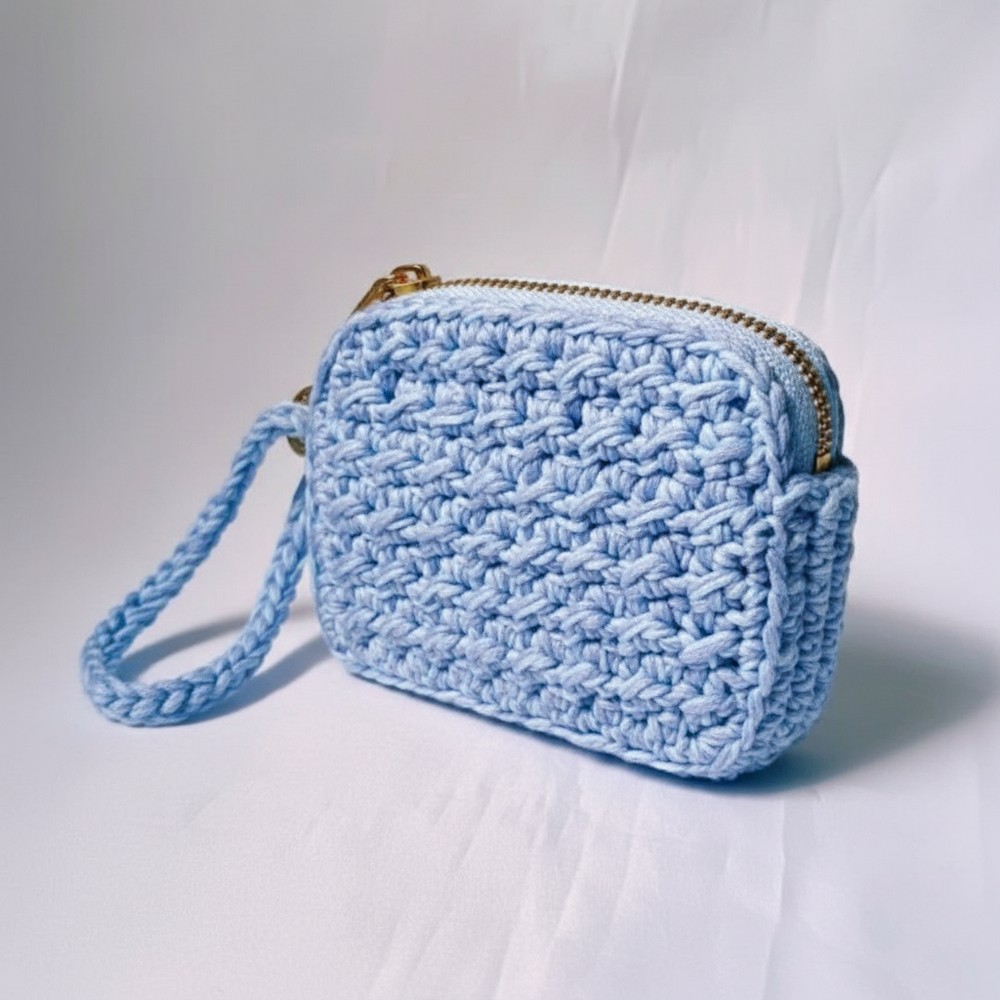
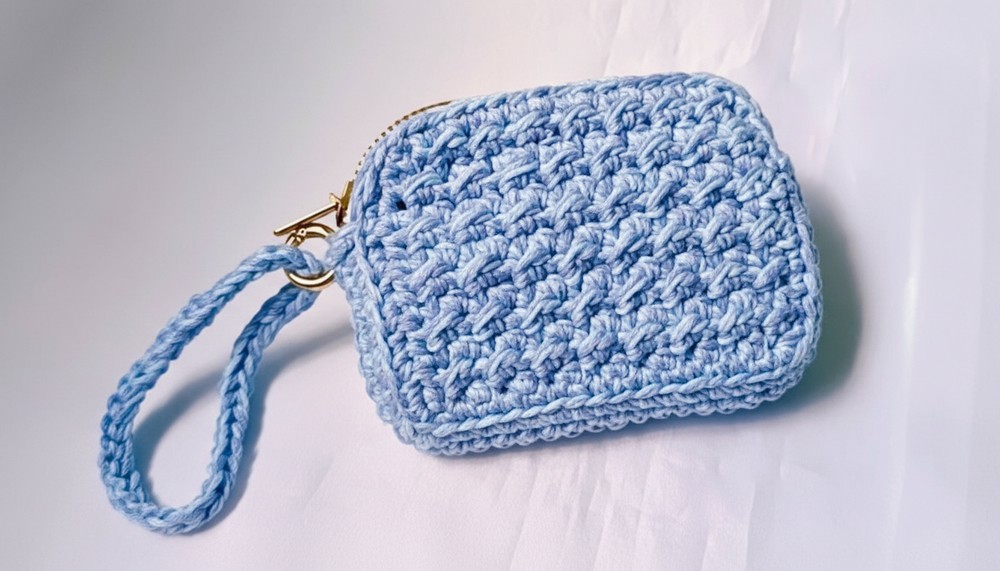
Learn This Quick Crochet Coin Purse Pattern for Daily Use
Beginner-Friendly Crochet a Coin Purse Pattern for Charming Looks
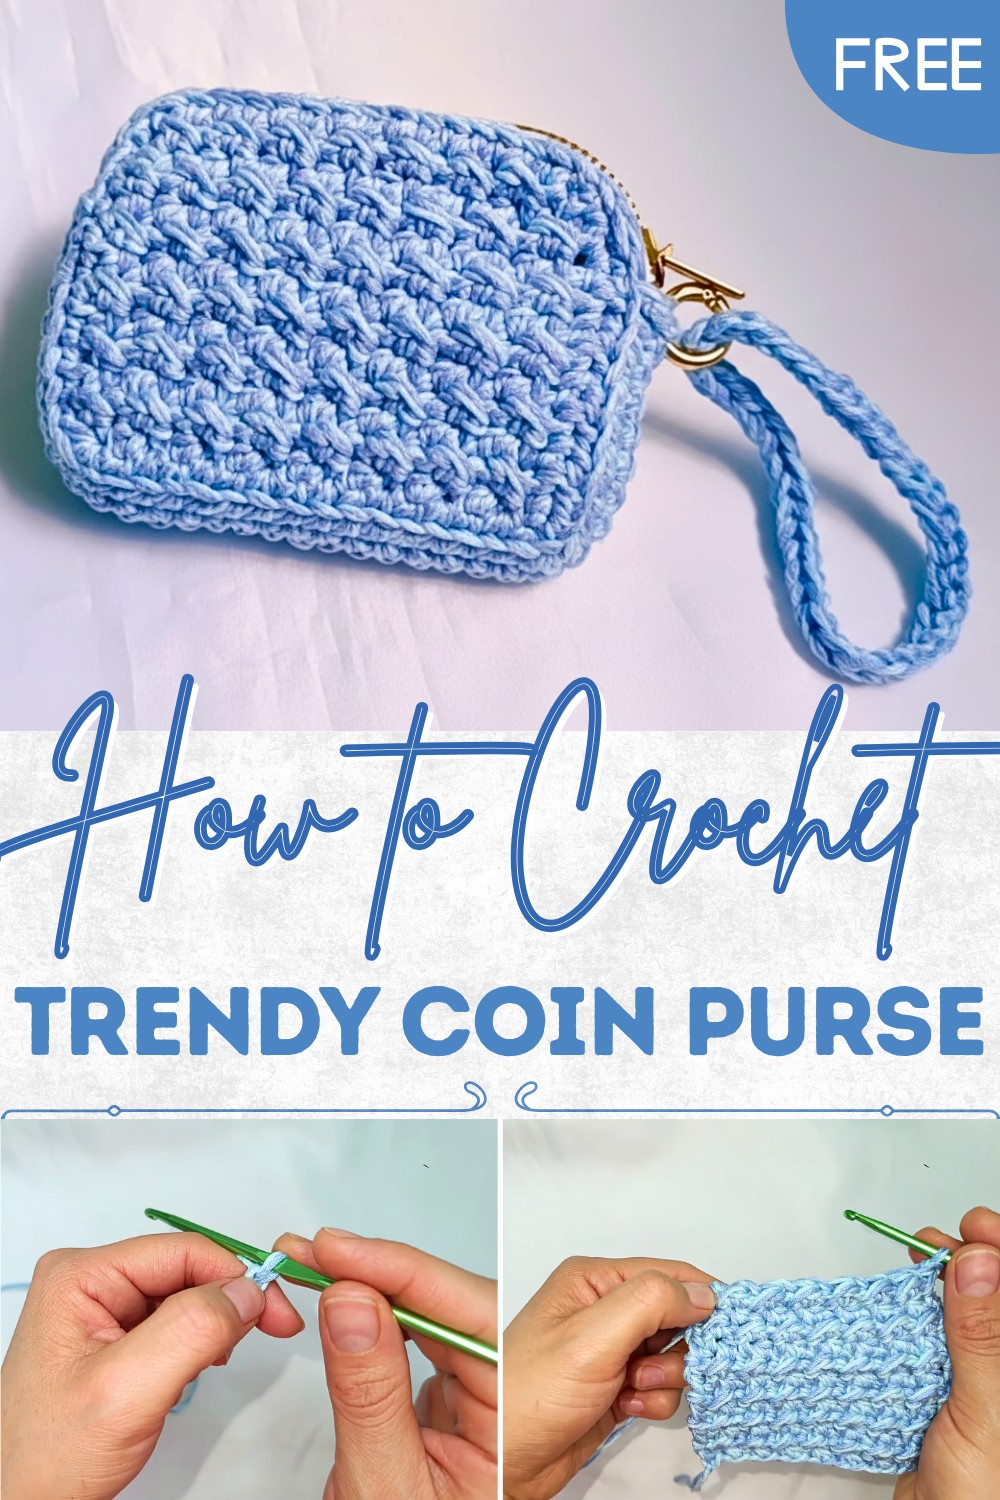
Ideal for experienced crocheters and those new to the skill, this pattern employs simple techniques like single and double crochets, slip stitches, and increases to build its neat shape. Particularly enjoyable is the step-by-step approach that makes even intricate designs manageable while allowing for easy customization. Add a personal touch by experimenting with colors, zippers, or decorative charms to suit your aesthetic.
This crochet pattern also makes an elegant and heartfelt handmade gift—perfect for birthdays, holidays, or special occasions. Thoughtful details like a smooth zipper closure and double strands of yarn enhance its utility and durability, ensuring it can withstand daily use. Whether for yourself or a loved one, this timeless pattern combines function and flair to create a delightful addition to everyday life.
Materials
The materials needed for this project include:
- Two different shades of symphony yarn. (Alternatively, choose your preferred colors and use two strands together for added thickness.)
- A crochet hook (4 mm in this tutorial, but adjust based on your yarn).
- Scissors for trimming the yarn.
- Sewing needle and thread for attaching the zipper.
- A sturdy zipper to close the purse securely.
- Wool needle to hide loose threads on the finished product.
Special Features
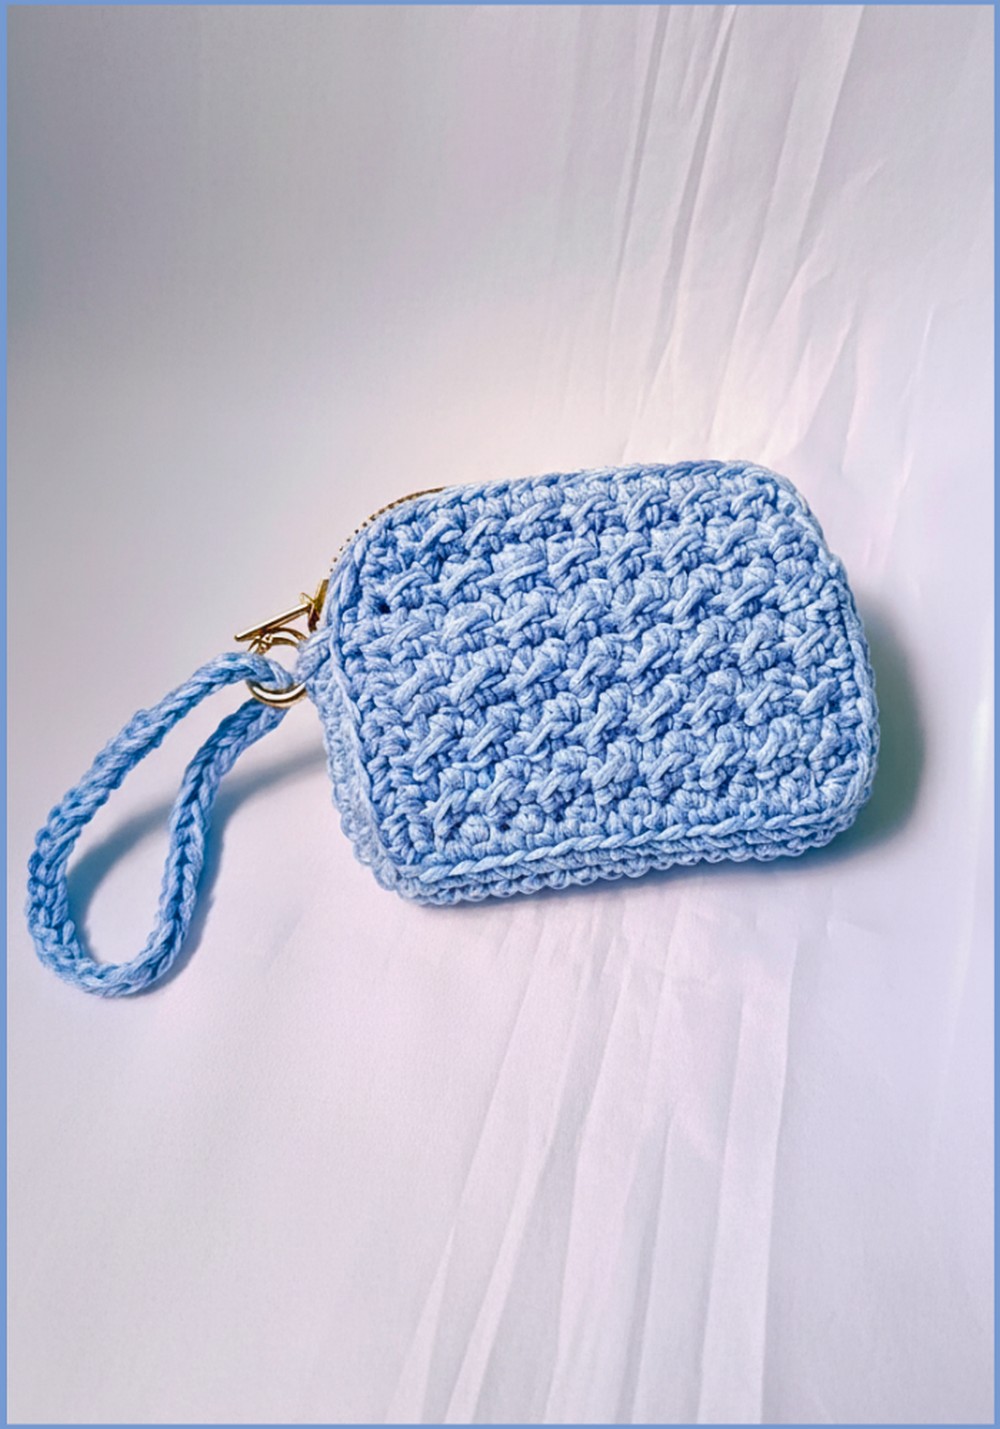
- Symmetrical Design: The step-pattern stitching creates a textured, neat appearance.
- Dual-Strand Yarn: Provides added thickness and durability to the purse.
- Customizable Size: The dimensions of the purse can be adjusted easily by altering the number of chains.
- Optional Additions: You can personalize the purse further by adding a strap or decorative features such as buttons or rings.
Level of Difficulty
This project is suitable for beginners but requires familiarity with basic crochet techniques such as slip knots, single crochet stitches, half double crochet stitches, and slip stitches, as well as basic sewing skills. Clear steps provided in the tutorial make it easier to learn.
Step-by-Step Process
Step 1: Gathering Materials
Before starting, ensure you have all the required tools and materials ready, including yarn, a hook, scissors, a needle, and a zipper.
Step 2: Making the First Side of the Purse
- Begin by creating a slipped knot to start the base.
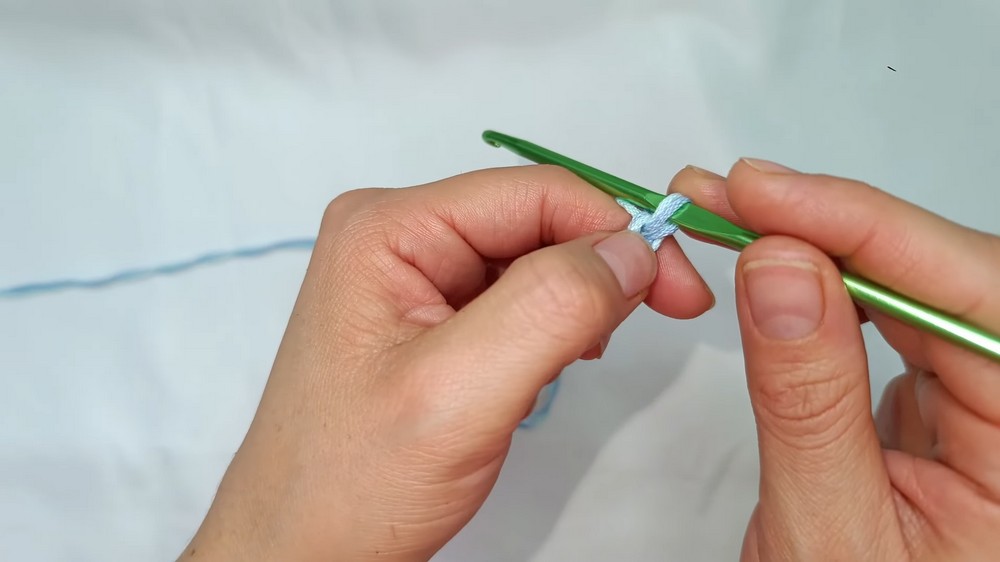
- Knit 17 chains, ensuring they are loose enough to work around later. You can adjust the length by choosing an odd number for the chains according to your desired size.
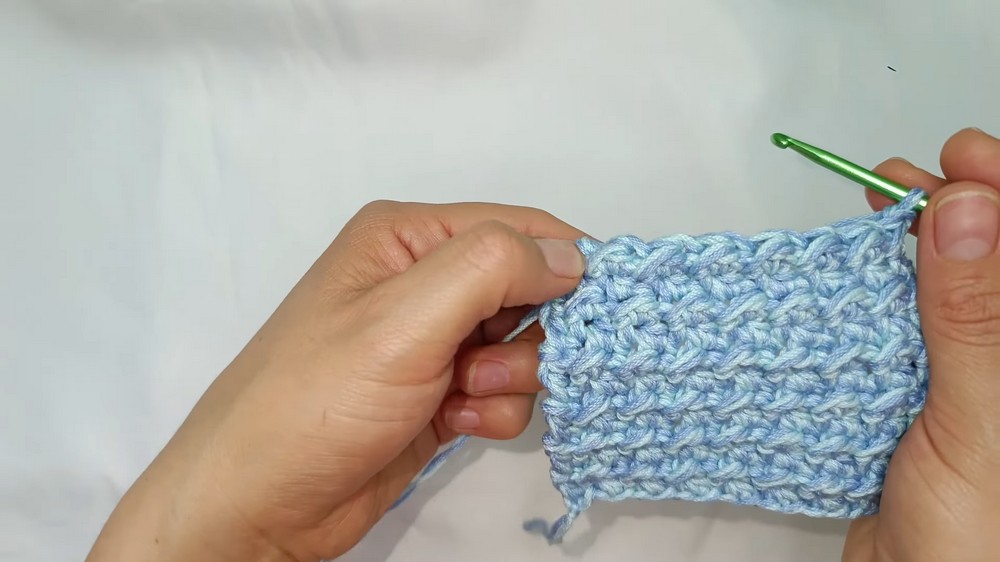
- Skip one chain and start alternating between slip stitches and half double crochets to create a neat texture along the chains. Continue this process for a total of 16 stitches. Finish the row with a half double crochet.
- Chain one to start the next row and alternate again between slip stitches (for half double crochets) and half double crochets (for previous slip stitches). Continue this alternating pattern for a total of 10 rows, creating a rectangular shape.
3: Adding Decreases and Single Crochets
- Add a decrease round after completing your rectangle to create a slight taper at one end of the purse. Use slip stitches and half double crochets, skipping the first stitch of the row. Continue this pattern until two stitches are left, where the final stitch should be a half double crochet.
- For the next two rounds, work single crochet stitches across the decreased edges.
4: Completing the First Side
Work single crochets along the edges of the purse using an outside loop technique to maintain a clean border. Add corner stitches (two single crochets in one stitch) to help transition between edges. Once you finish, leave a long yarn tail for further sewing.
Step 5: Making the Second Side
Repeat Steps 2–4, creating another identical rectangle for the second side of the purse. Ensure both pieces align properly before stitching them together.
6: Attaching the Zipper
- Use pins or safety pins to align the zipper with the top edge of both purse sides. This ensures precise placement for sewing.
- Cut off any extra length from the zipper if necessary, but ensure it fits properly within the purse’s width.
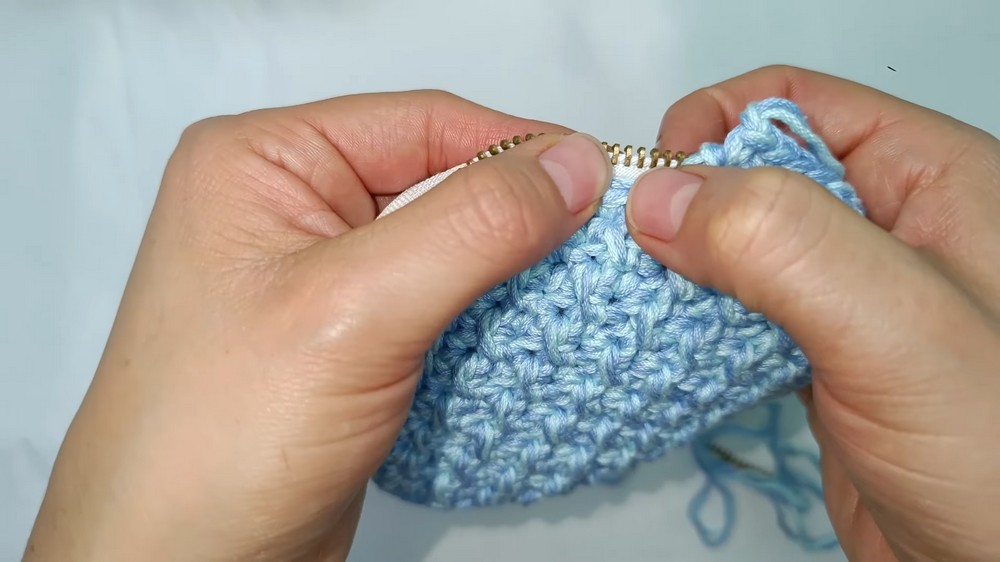
- Use a standard needle and thread to meticulously sew the zipper onto the fabric. Work with small stitches to keep the zipper in place and make the seam as invisible as possible.
Step 7: Joining Both Sides
- Start sewing the perimeters of the purse together using a simple seam technique.
- Thread the wool needle and pass through the appropriate stitches: two loops from the front side and one back loop from the opposite side.
- Work all the way around, ensuring both sides are securely joined. Carefully stitch up the last point and hide the remaining thread for a clean finish.
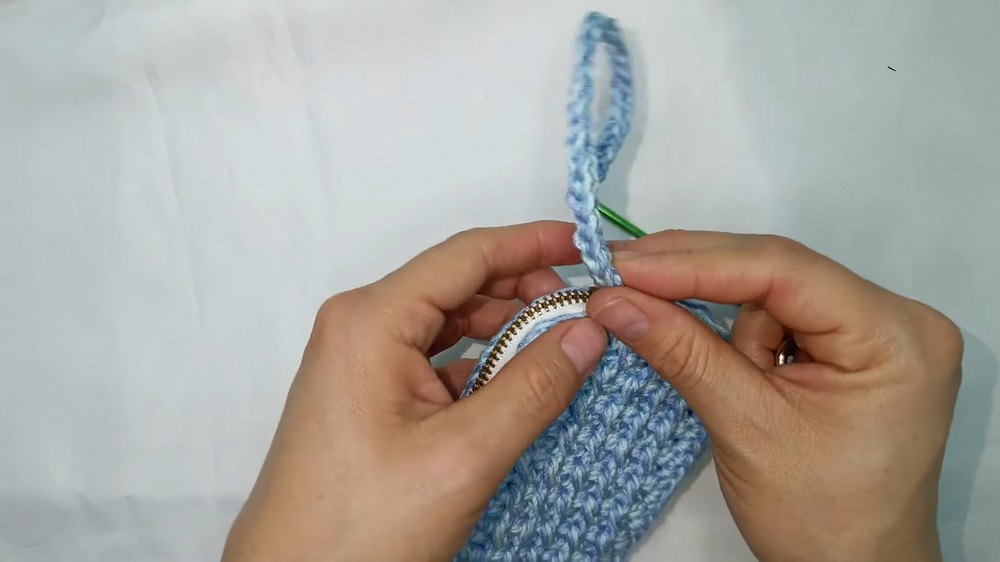
8: Optional Strap and Decoration
- For the strap, crochet a long cord of 30–40 cm using double strands: make a series of knots and loops similar to how you work slip and single crochets.
- Attach a ring or button for added flair and utility, sewing it securely to the purse.
Tutor’s Suggestions
- Adjust the Size: Make chains in odd numbers to customize the size of your purse—more chains for a larger purse or fewer chains for a smaller one.
- Loose Starting Chains: Begin with loose chains to ensure easier weaving and a smooth finish.
- Neat Edging: Focus on the edges of your work by using the correct outside loops for a clean and organized look.
- Securing the Zipper: Use pins to fit and hold the zipper tight while sewing, ensuring clean and precise alignment.
Uses and Benefits
- Storage: This beautiful purse is perfect for keeping coins, keys, or small personal items.
- Gifting: An excellent handmade gift for all kinds of occasions, such as birthdays or holidays.
- Fashion Statement: The elegant design gives a pop of color and complements casual outfits.
- Skill Practice: It’s a great project for beginners looking to strengthen techniques like slip knot, slip stitches, and half double crochet.
Conclusion
With its simplicity and functionality, this beautiful knitted purse is perfect for everyday use or as a thoughtful gift. The symmetry, customized style, and durability make it ideal for carrying small essentials securely in a fashionable way. This step-by-step process, from forming the base with slip knots to attaching the closure and optional strap, shows how easy and rewarding it is to make your own purse.
Pro Tip!
To achieve a sturdy purse, use double strands of thread as shown in the tutorial. When sewing the edges and zipper, work patiently with close rows—this ensures a strong and durable finish while keeping the structure neat. Adding optional decorative elements like a strap or ring lets you make your purse stand out even more!