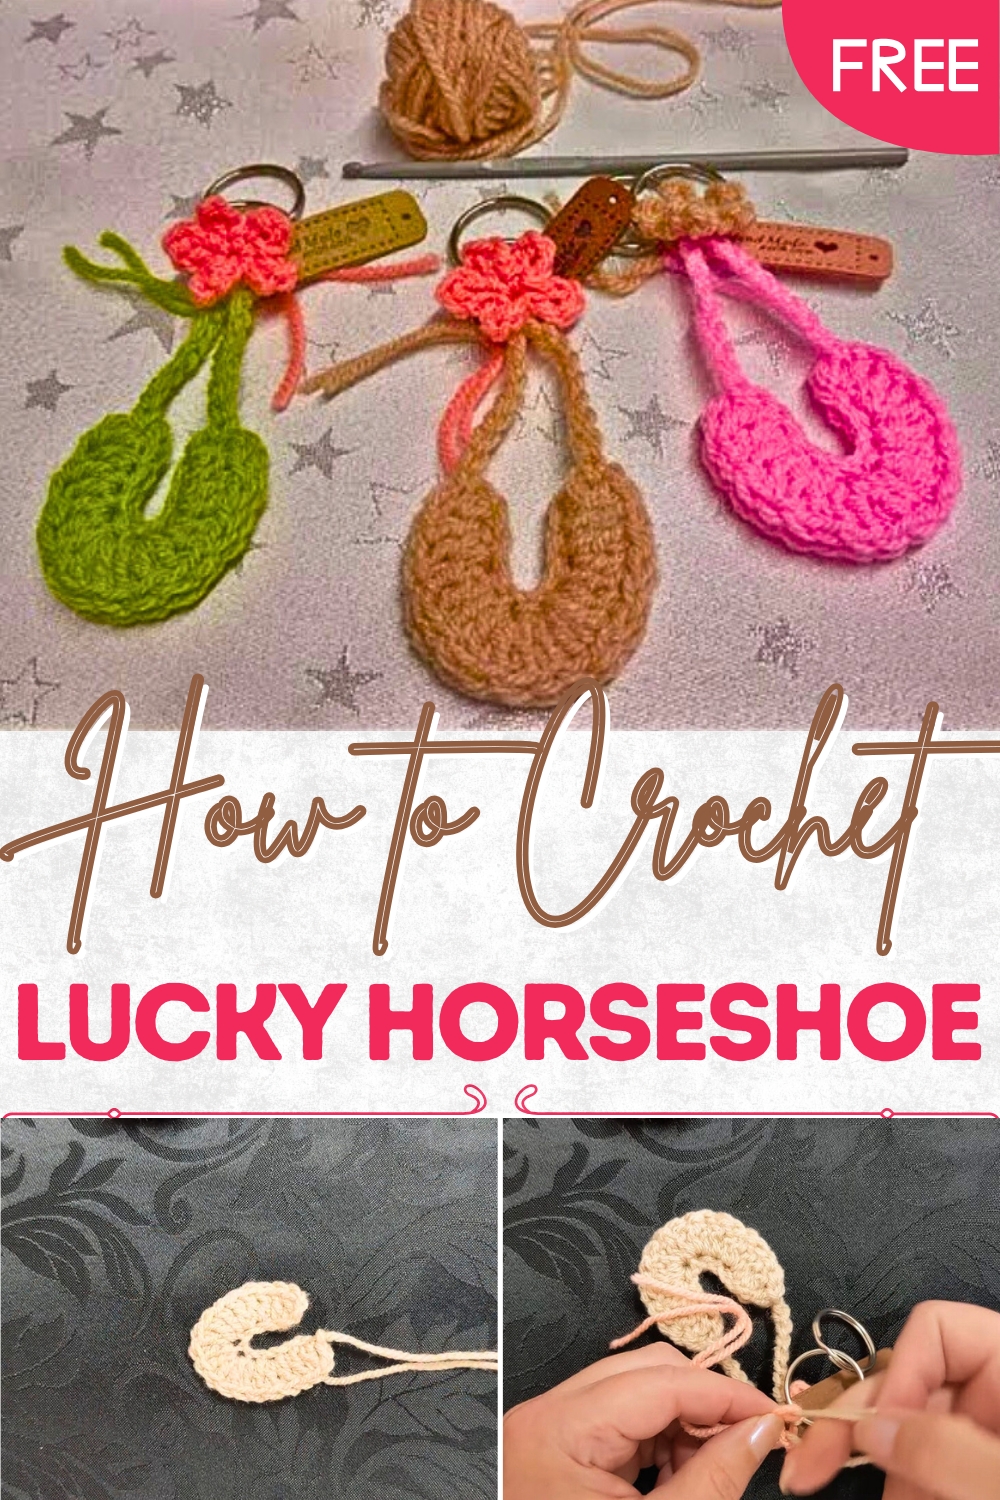
Fresh Crochet Lucky Horseshoe for Seasonal Styling
Invite good fortune with this Crochet Lucky Horseshoe Pattern for a charming, playful accessory that enhances festive décor and gifts.
Symbols of luck have fascinated cultures for centuries, and the horseshoe has become a widely recognized token of good fortune. The crochet lucky horseshoe pattern captures this iconic symbol in a handmade, tangible form that brings charm, positivity, and aesthetic appeal to any space. Each piece is carefully stitched to provide structure, texture, and durability, creating a decorative item that holds its shape while exuding warmth and personality. Lightweight yet sturdy, the crochet horseshoe can be displayed on walls, doors, or shelves, or incorporated into home décor, gift wrapping, or festive arrangements.
Vibrant Crochet Lucky Horseshoe With Cheerful Energy
Its versatile size allows for both subtle accents and statement pieces, while the choice of vibrant or neutral yarns makes it adaptable to personal taste or seasonal themes. Beyond decoration, these horseshoes serve as thoughtful gifts, tokens of encouragement, or meaningful keepsakes, offering a handmade touch that carries intention and care.
The pattern allows every piece to possess individuality, reflecting the personality of the maker and adding a unique charm to any setting. Combining visual appeal, functionality, and symbolic meaning, the crochet lucky horseshoe pattern transforms simple yarn into a piece that spreads positivity, beauty, and a sense of handmade artistry, bringing luck and joy to homes and loved ones alike.
Materials Needed
To make the Lucky Horseshoe Crochet Charm, you’ll need:
- Yarn – Any leftover scraps will do. Karen recommends using what’s already on hand.
- Crochet Hook – A 4 mm hook is used in the tutorial.
- Keyring Hardware (optional) – If you plan to use this as a keyring.
- Darning Needle – For sewing and weaving in ends.
- Scissors – For trimming yarn.
Special Features
- Creative Use of Yarn Scraps: A great way to reduce waste by turning small leftover yarn pieces into beautiful charms.
- Customizable Design: Add embellishments like small flowers, gems, or personalized keychains.
- Multi-Functional: Can be used as a keyring, bag charm, or even attached to blankets as part of a grid design.
- Beginner-Friendly: Uses simple stitches like chains, double crochet (US)/treble crochet (UK), and slip stitches.
Skill Level
Level of Difficulty: Easy
This project is beginner-friendly, as Karen provides clear instructions and works with basic crochet stitches. Additionally, the horseshoe is simple to assemble, making it a quick and rewarding project.
Step-by-Step Instructions
Step 1: Create the Horseshoe Shape
- Start with a Long Tail: Leave a long tail about three hook lengths to use for sewing later.
- Chain 12: Begin with a slip knot, and chain 12 stitches.
- Double Crochet Stitches (US) / Triple Crochet Stitches (UK):
- Skip the first two chains.
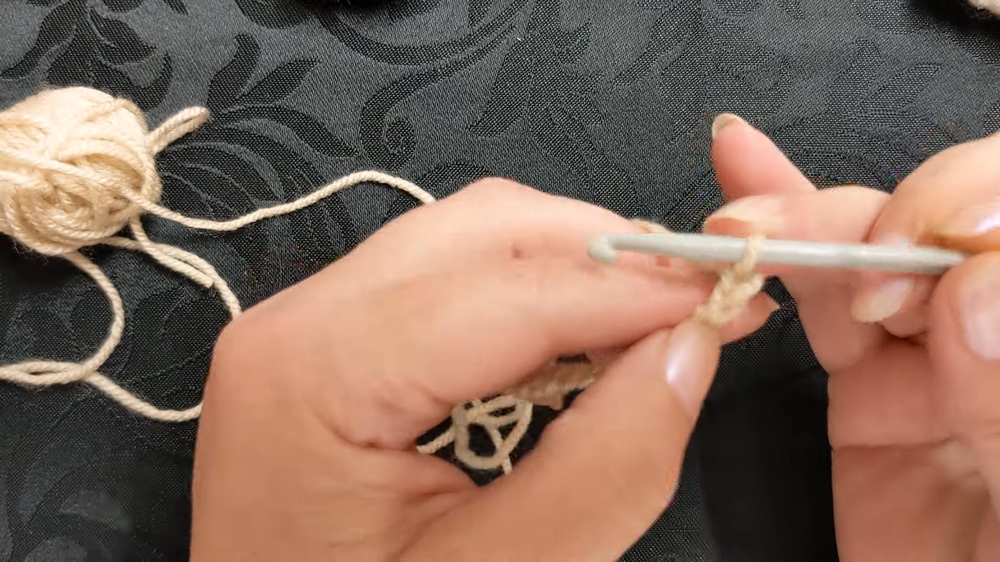
- Perform 1 double crochet in the next stitch, and another one in the following stitch.
- Skip the first two chains.
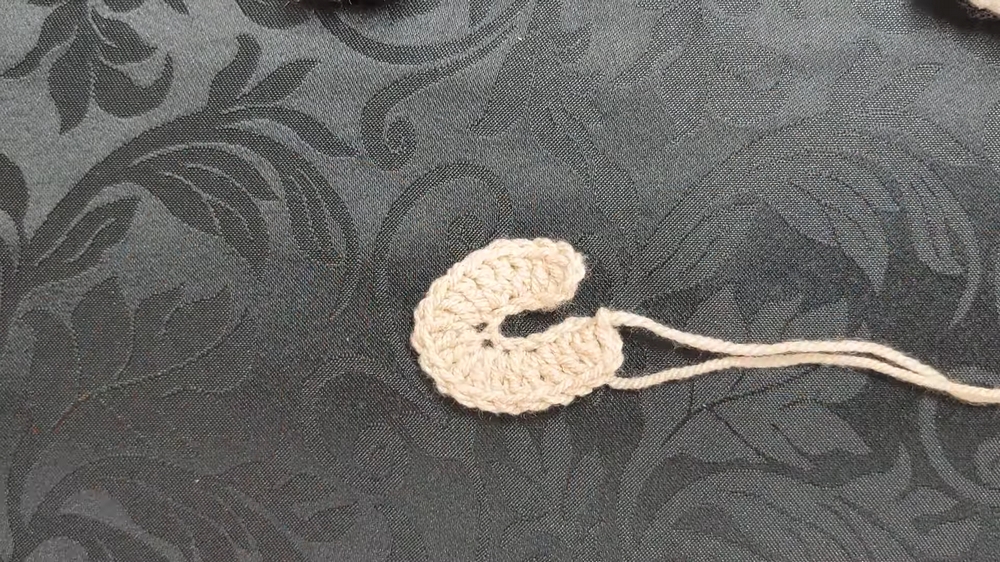
- Increase for the Curve:
- Work 2 double crochets into the next two chains.
- Into the following two chains, work 3 double crochets each. At this halfway point, the shape begins to curve naturally.
- Mirror the Curve:
- Work 3 double crochets into the next chain.
- Then, 2 double crochets each into the following two chains.
- Finish with 1 double crochet into the last two chains.
2: Finish the Horseshoe
- Round the Edge: To give the straight edge a more rounded appearance, chain 2 and slip stitch into the first stitch of the starting chain.
- Make Two Horseshoes: Create a second, identical horseshoe to pair with the first.
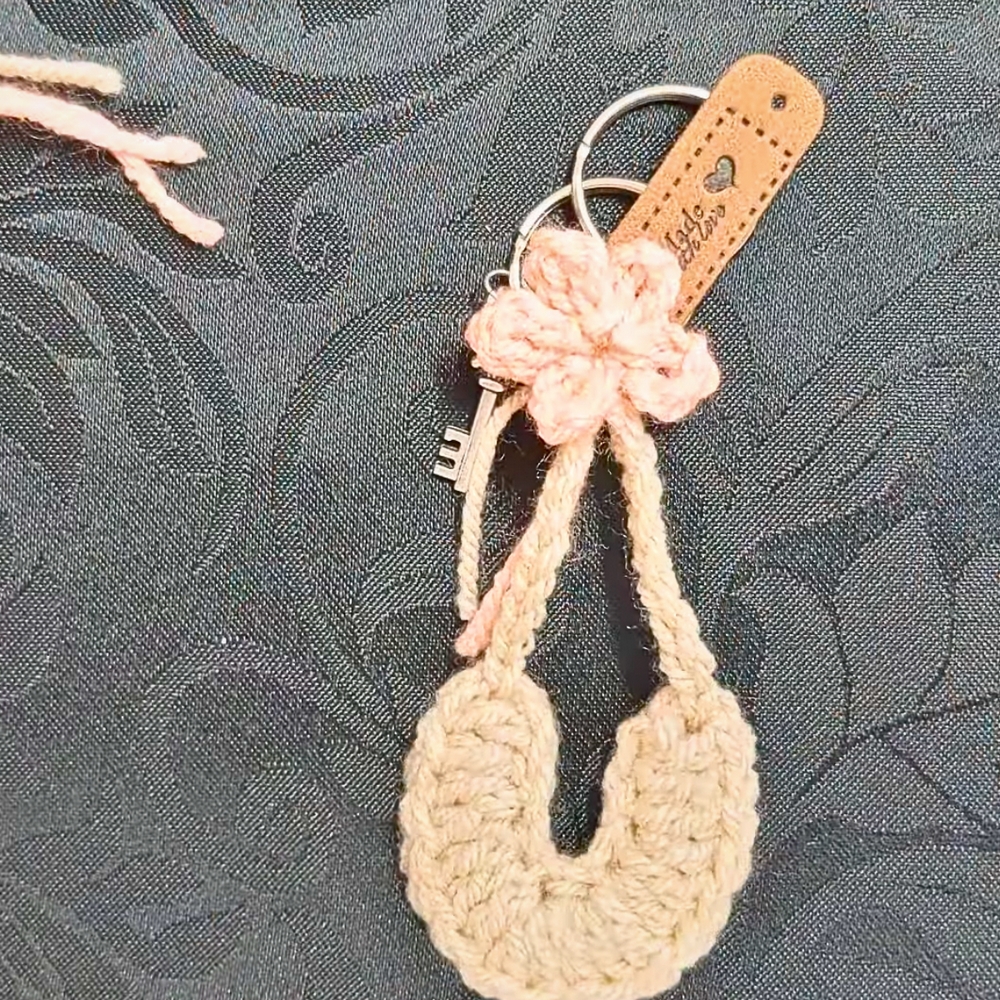
3: Assemble the Horseshoe
- Align the Two Pieces: Place the two horseshoes together to “sandwich” them.
- Sew the Edges: Using the long tail from one piece, start sewing the edges together. Use a running stitch, aligning the holes of each chain for uniformity.
- Reinforce the Curve: Use the second tail to reinforce the opposite side, ensuring both pieces are securely attached.
4: Add Embellishments and Chains
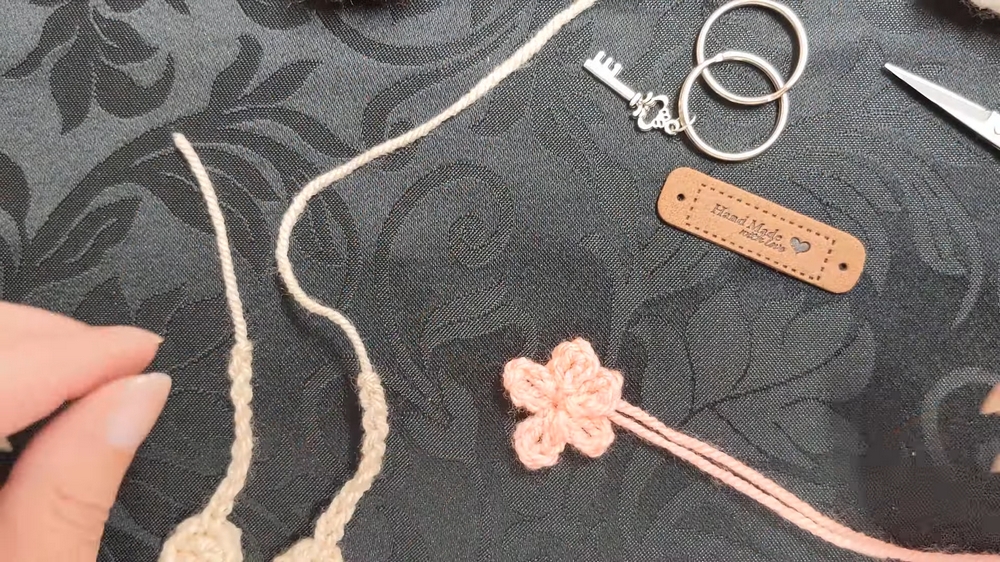
- Create Hanging Chains:
- Use one of the leftover tails to crochet two chain loops at the base of the horseshoe (each about 10 chains long).
- This creates additional loops for attachment to keyrings or other items.
- Optional Small Flower:
- Use a small piece of scrap yarn to create a simple flower (chain 6 and use slip stitches to form petals) and attach it to your charm for added decoration.
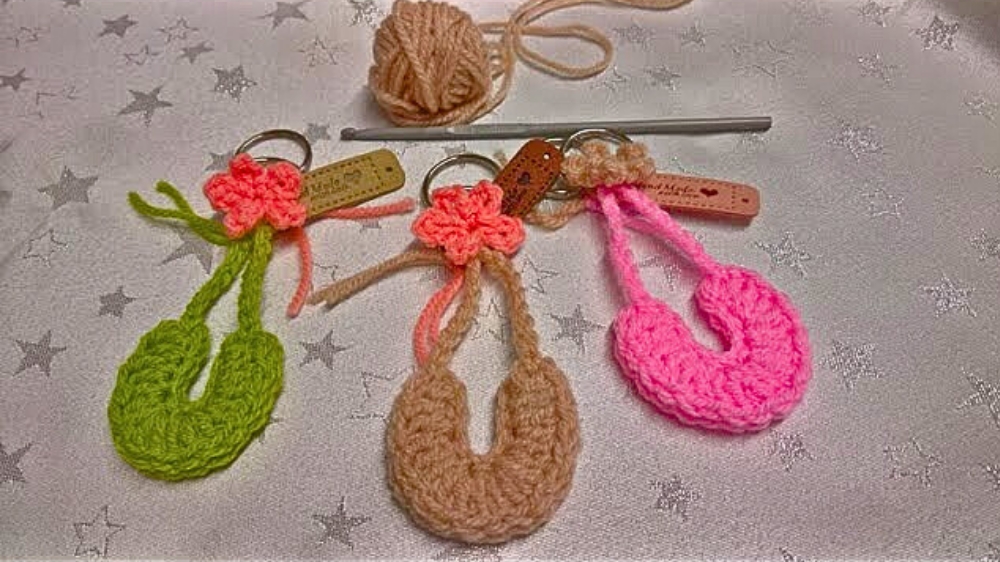
- Attach the Keyring or Clip: Add your keyring hardware or leave the charm as is for use as an appliqué.
5: (Optional) Attach to Other Projects
Karen mentions that these horseshoes can be added to blankets as part of a Lucky Horseshoe Grid with numbers or letters. The grid can be used to create specific names, dates, or messages.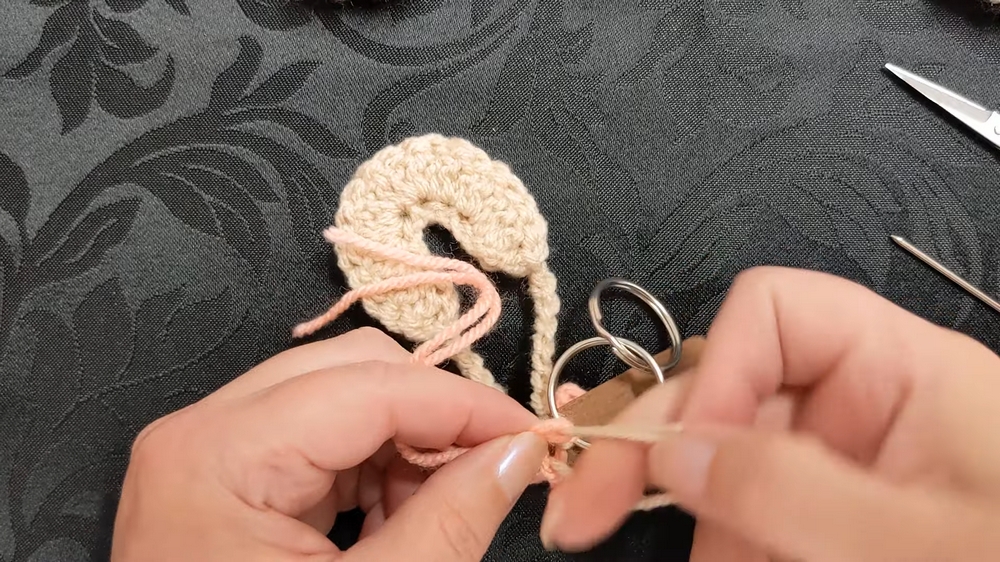
Tutor’s Suggestions
- Tail Length: When crocheting the horseshoes, leave long tail ends to make sewing easier.
- Custom Embellishments: Personalize the charm by adding small gems, ribbons, or other decorations.
- Grid Use: This charm is part of a larger Lucky Horseshoe Blanket pattern, which can be used to design custom grids for names, dates, or secret messages.
- Practical Uses: Use the charm as a keyring, a bag ornament, or as part of decorative gifts. You can even create bundles of these as stocking stuffers or birthday presents.
Tip
When sewing the two halves together, take your time to match the stitches precisely. This ensures a neat and uniform edge that enhances the overall look of the charm.
Conclusion
The Lucky Horseshoe Crochet Charm is a simple yet versatile project that allows crocheters to repurpose leftover yarn into unique, handmade creations. Whether used as a keyring, bag charm, or part of a larger project, this charm is sure to bring good luck and joy to its maker and recipient alike.