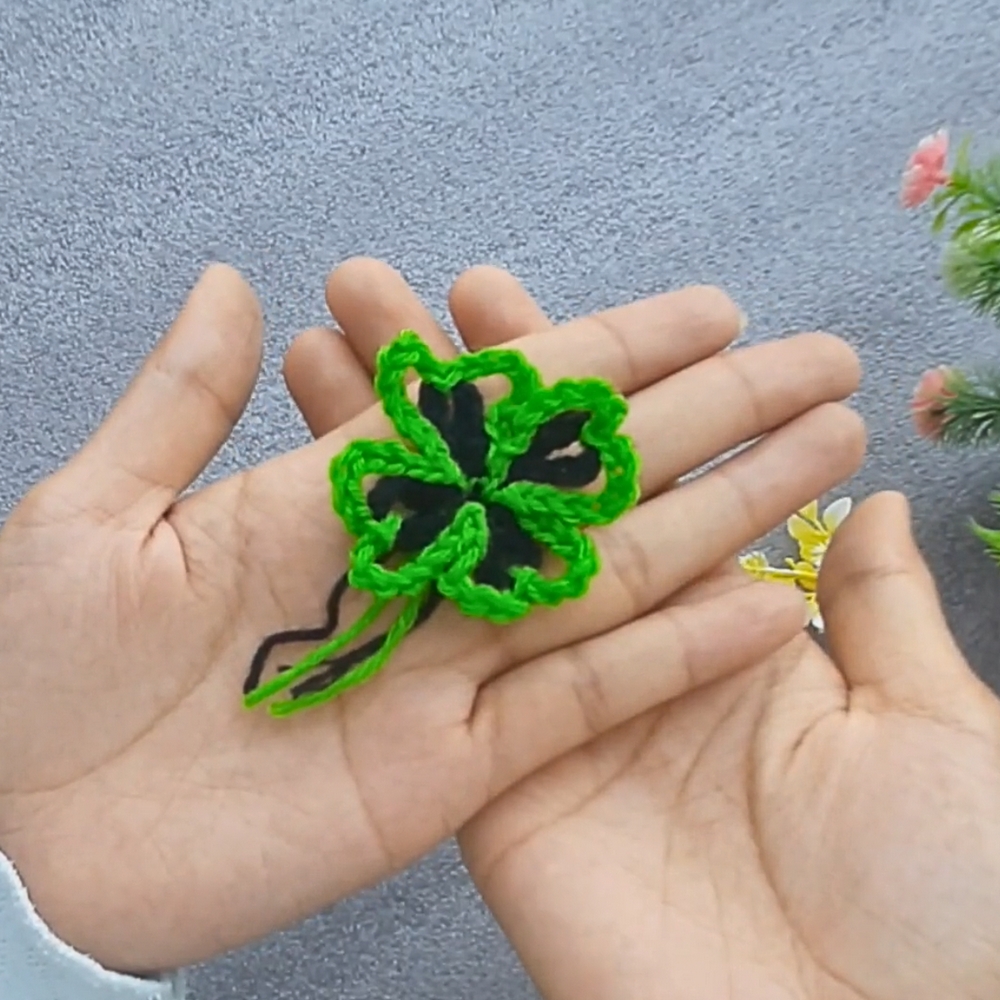
Fresh Crochet Flower Designed for Fashion
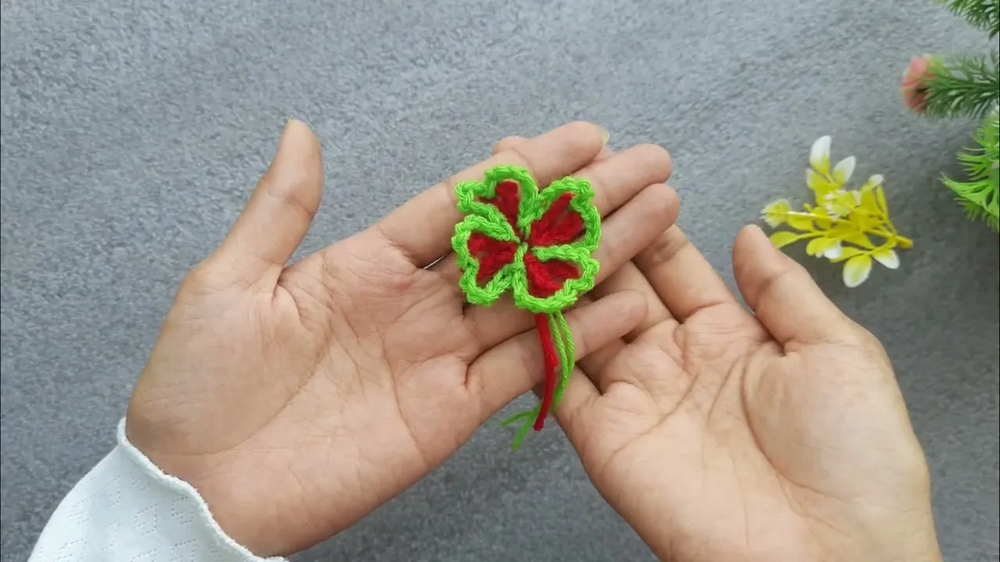
Bloom with creativity using this Crochet Flower Pattern for a colorful, charming design that brightens any project or décor effortlessly.
Flowers have long been celebrated for their natural beauty and symbolic meanings, inspiring countless ways to bring their charm into everyday life. The crochet flower pattern captures this timeless appeal in a versatile and tactile form, offering a handmade element that can enhance a variety of items. Each flower is created with careful stitches that provide both texture and durability, making it suitable for decorating clothing, accessories, home décor, or gifts.
Vibrant Crochet Flower Pattern That Inspire Joy
Its compact size and lightweight nature allow it to be attached to headbands, bags, cushions, or even used as a standalone accent on a table setting. With a wide array of color choices, each flower can reflect seasons, moods, or personal style, offering endless creative possibilities. Beyond aesthetic charm, these crochet flowers bring a sense of warmth and thoughtful craftsmanship, making them perfect for gifting or adding a personal touch to any item.
The sturdy yet soft structure ensures that the flowers maintain their shape and appeal over time, while their delicate appearance adds elegance to everyday surroundings. The crochet flower pattern combines beauty, functionality, and versatility, transforming simple yarn into timeless decorative pieces that celebrate nature’s charm in a handmade, enduring form.
Materials Required
- Threads/Yarns: Two different colors of yarn (e.g., one base color and one contrasting color, such as green).
- Crochet Hook: Any size suitable for your yarn/thread.
- Scissors: For cutting yarn.
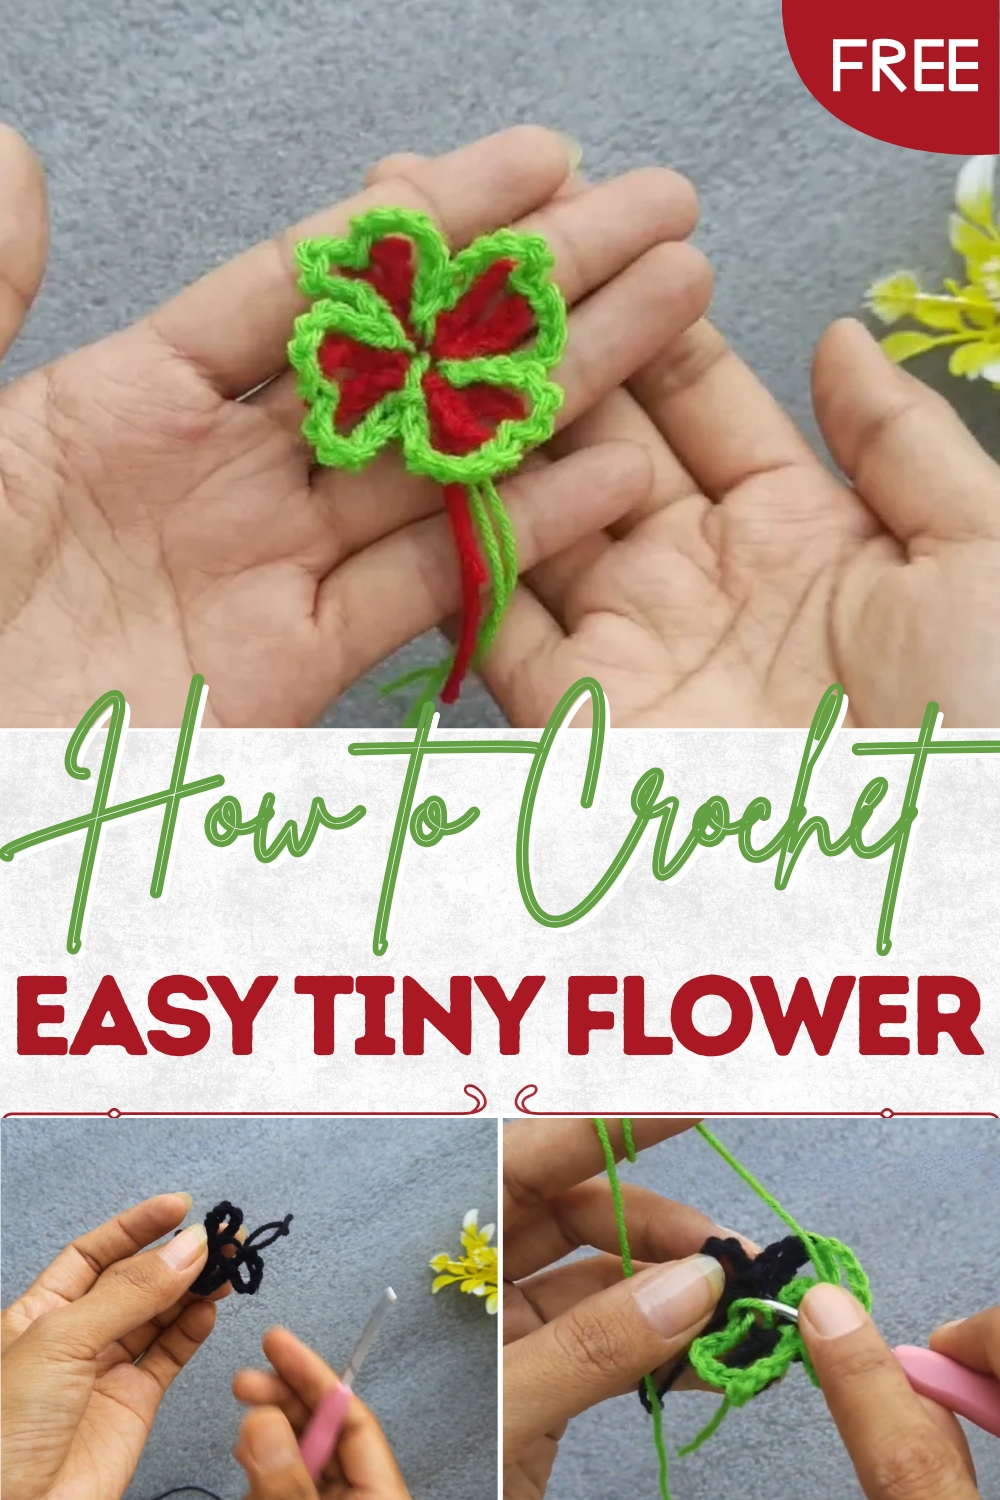
Step-by-Step Details of the Crochet Design
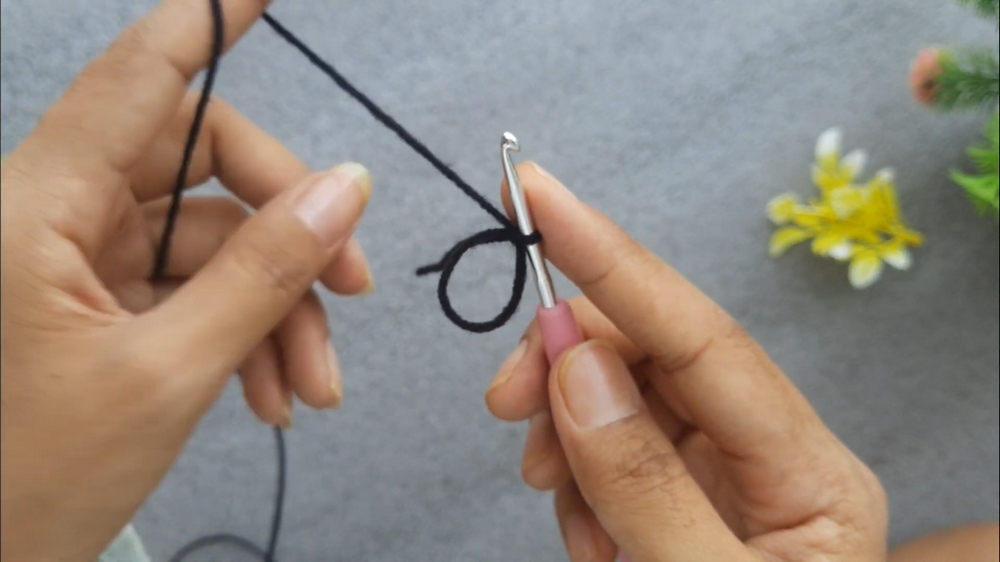
Step 1: Starting with the Magic Ring
- Create a Magic Ring:
- Begin by making a magic ring. (This is the base that will hold the loops.)
- Begin by making a magic ring. (This is the base that will hold the loops.)
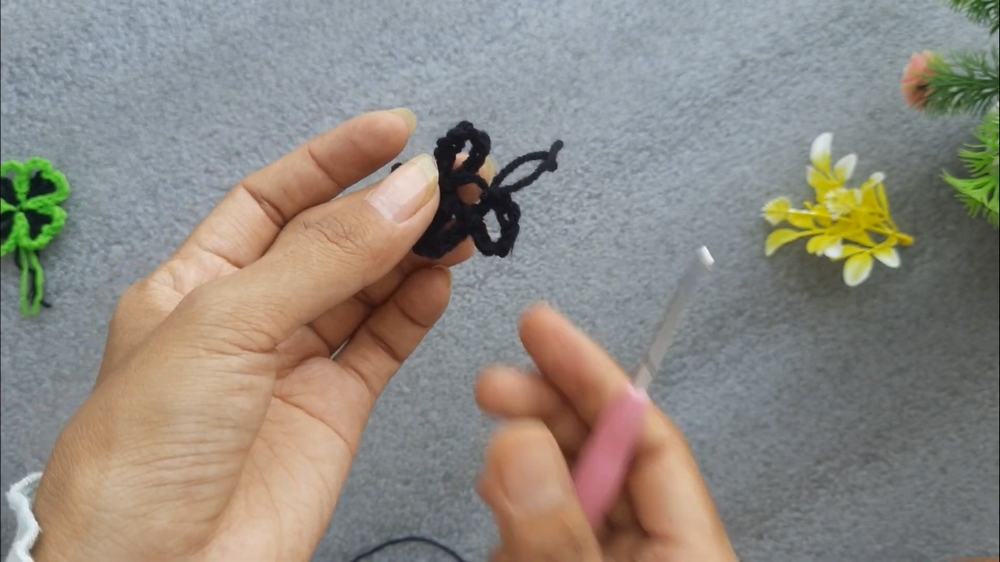
- Make the First Set of Chains:
- Chain 7 stitches.
- Count your chains: one, two, three, four, five, six, seven.
- Chain 7 stitches.
- Make the First Slip Stitch:
- Insert your hook into the magic ring and slip stitch to anchor the chain into the ring.
- Repeat for Additional Loops:
- Chain 7 again and then slip stitch into the magic ring.
- Repeat this process two more times to complete a total of 4 loops around the magic ring.
- Close the Magic Ring:
- Pull the thread of the magic ring lightly to close the center and secure the loops.
- Pull the thread of the magic ring lightly to close the center and secure the loops.
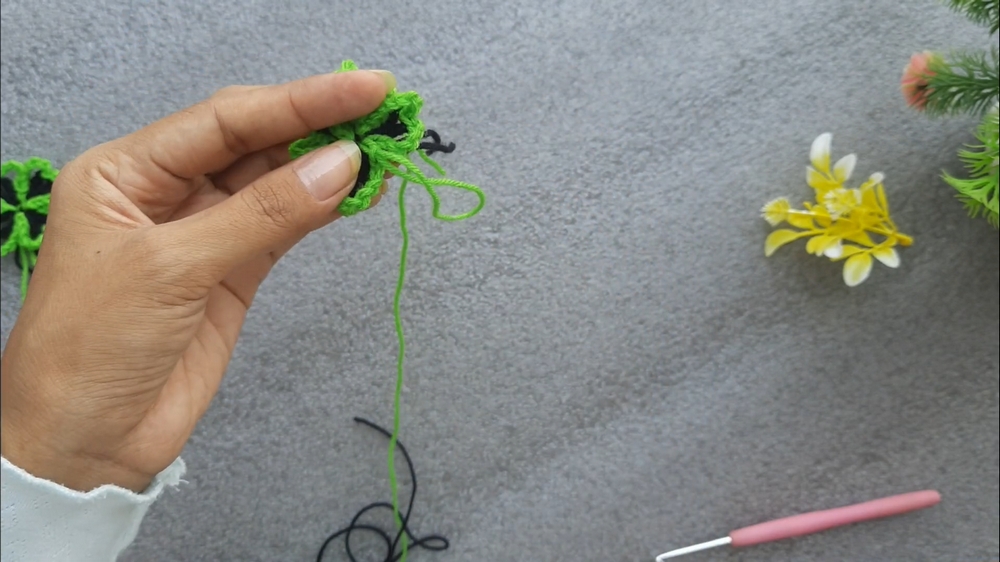
2: Adding the Second Thread
- Cut Off the Initial Thread:
- After completing the first color, cut the thread, leaving a small tail.
- Join the Second Thread (e.g., Green Yarn):
- Introduce the second thread by slip stitching it securely into the magic ring.
- Begin the Second Layer of Loops:
- Chain 7 stitches using the new color.
- Slip stitch into one of the loops from the first layer.
- Repeat for Additional Loops:
- Continue chaining 7 stitches and slip stitching into the next loop of the first layer.
- Repeat these steps until you have created 4 loops with the second thread.

3: Completing the Design
- Add Final Touches:
- After finishing the second layer of loops, complete one final slip stitch to secure the design.
- Tighten any remaining loose ends and pull the magic ring thread to close the center firmly.
- Cut and Secure Threads:
- Cut the loose ends and use a crochet hook or yarn needle to hide them neatly within the loops.
- Cut the loose ends and use a crochet hook or yarn needle to hide them neatly within the loops.
Special Features
- Layered Loops: The design includes two layers of interconnected loops, creating depth and visual interest.
- Customization: The use of two different thread colors allows for endless customization and personalization.
- Light and Decorative: Its lightweight design makes it suitable for decorating home items, garments, or accessories.
Level of Difficulty
This project is beginner-friendly, as it relies on simple techniques such as creating a magic ring, chaining, and slip stitching. However, a basic understanding of crochet terminology is required.
Tutor’s Suggestions
- Tighten the Magic Ring: Ensure the magic ring is pulled tight enough to minimize gaps in the center.
- Uniform Tension: Keep an even tension while creating the chains to achieve consistent loops.
- Handle Color Changes Carefully: Tie secure knots when changing threads to ensure the layers remain sturdy.
Uses
- Coasters: The completed design can be used as a small decorative coaster.
- Embellishments: Attach it to hats, bags, or clothing as an embellishment.
- Garlands: Create multiple designs in different colors and join them to form a festive garland.
- Keychains or Ornaments: Add a keyring or hanging loop for decorative purposes.
Tip
For a more polished and durable design, use cotton yarn instead of acrylic. Cotton maintains its structure and shape better for small, intricate projects like this one.
Conclusion
This pattern showcases how to create a beautiful, layered crochet design with two threads and a magic ring. The simple structure, customizable color options, and versatility in usage make this an excellent project for beginners and seasoned crocheters alike. Follow the step-by-step guide, experiment with colors, and enjoy creating this charming piece to decorate your home or accessories!