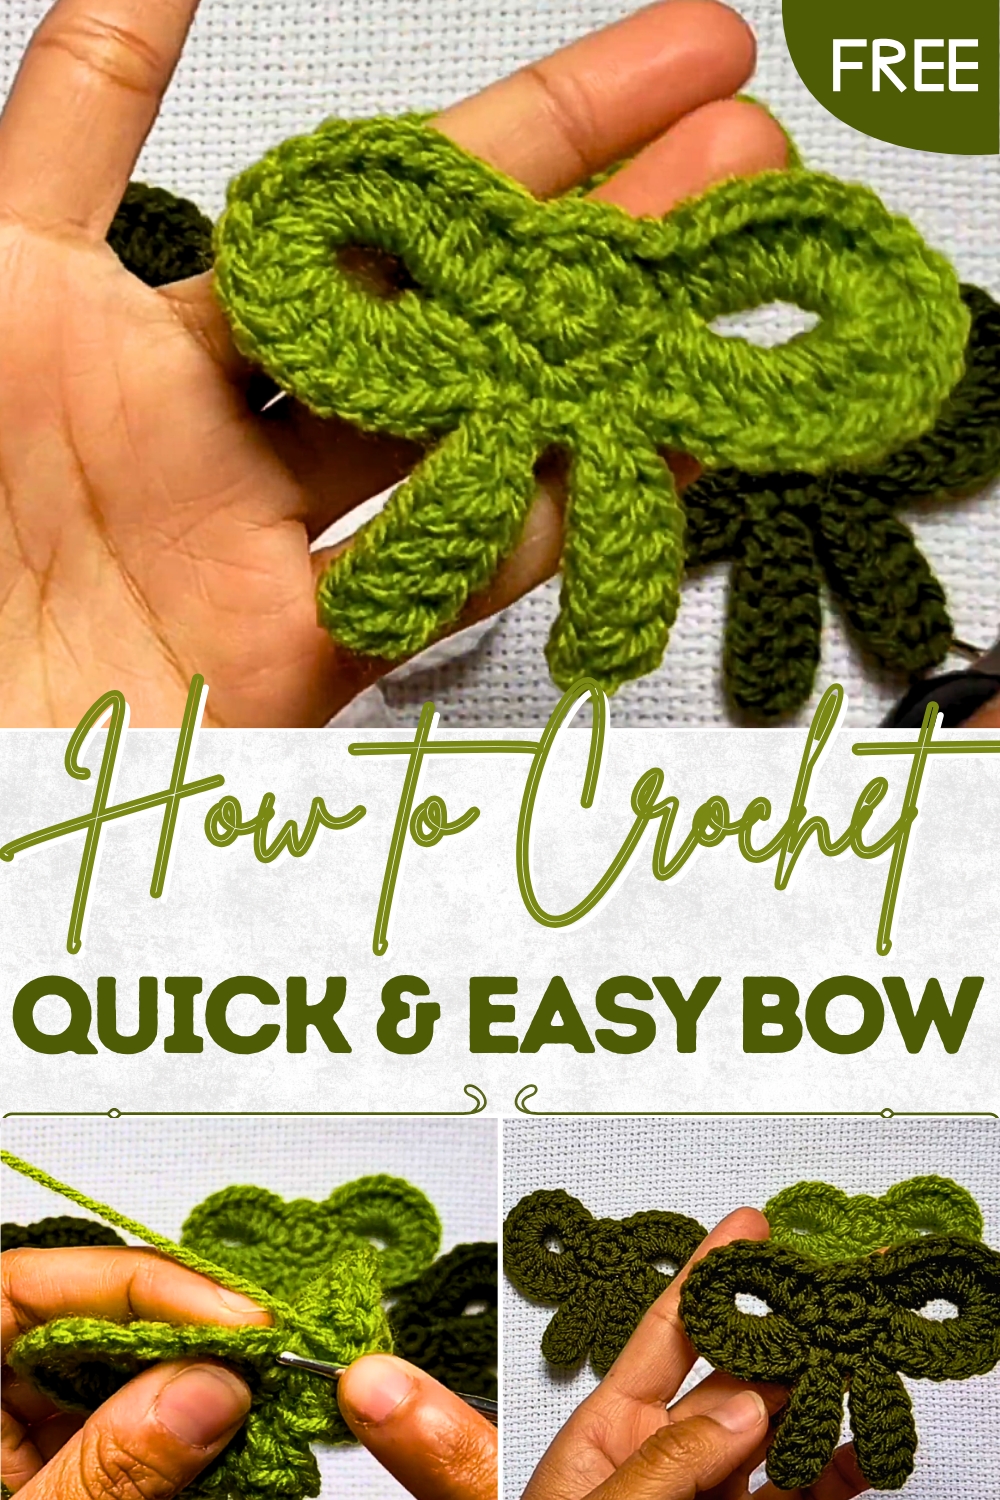
Fresh Crochet Bow for Adding Delight in Seasonal Creations
Tie elegance together with this Crochet Bow Pattern for a stylish, versatile accessory that adds charm to any outfit or project
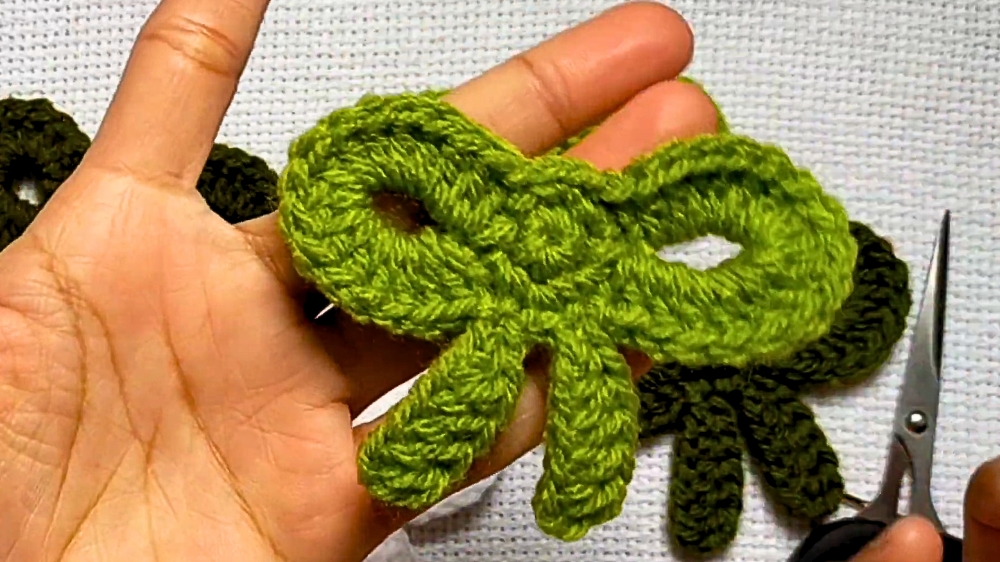
An accessory as timeless as the bow has always carried a sense of elegance, often seen adorning hair, clothing, and even special keepsakes. When brought to life with yarn, this familiar symbol takes on a fresh charm, combining softness with durability in a way that feels both stylish and versatile. The crochet bow stands out for its graceful loops and neat form, offering a touch of sophistication while remaining wonderfully simple. With endless options in color and size, it adapts easily—whether you prefer a delicate pastel accent or a bold statement in brighter hues.
Stylish Crochet Bow Designed for Hair Accessories With Flair
Beyond its beauty, the bow is remarkably practical, serving as a hair clip, bag embellishment, clothing detail, or even festive decoration for occasions that call for something personal and refined. Its lightweight nature ensures comfort, while its sturdy shape allows it to hold up beautifully through repeated use. A single bow can instantly elevate an accessory, while a collection can bring harmony and charm to everyday items.
Thoughtful yet stylish, it also makes a meaningful addition to handmade gifts, carrying with it warmth and care. The crochet bow pattern offers a classy, versatile detail that blends charm, function, and timeless appeal in one elegant piece.
Materials Needed
- Yarn: Any type of yarn in the color of your choice.
- Crochet Hook: Match the hook size to your yarn, or use a standard hook.
- Scissors: For cutting the yarn.
- Darning Needle: To hide the loose ends.
Special Features
- Quick Project: The bow can be crocheted in just 2–5 minutes.
- Beginner-Friendly: Even new crocheters can follow along and complete the project with ease.
- Customizable: Use any yarn type and color of your choice to suit your specific project or preferences.
- Multi-Purpose: The bow can be used as part of larger projects, such as embellishments on clothes, bags, or hats, or as standalone accessories.
Difficulty Level
The project is easy and specifically beginner-friendly. The tutorial covers fundamental crochet techniques, such as the magic ring, single crochet, slip stitch, and double crochet, explained in a simple, step-by-step manner.
Tutor’s Suggestions and Recommendations
- Yarn and Hook: Use any yarn and hook you have on hand, as the bow design doesn’t require specific materials. Select colors that suit your intended project.
- Tighten Magic Ring Well: Make sure to pull the magic ring tightly to avoid gaps in the center of the bow.
- Step Clarity: Follow each step slowly and carefully, especially when making multiple crochets in the same stitch, to maintain neat and even stitches.
- Hide Yarn Ends: At the end of the project, properly hide the remaining yarn for a polished and professional look.
Step-by-Step Instructions
1. Start with a Magic Ring
- Wrap the yarn around your fingers to create a loop. Insert your hook into the loop, pull the yarn through, and make a knot. This forms the magic ring.
2. Row 1: Crochet Inside the Magic Ring
- Make 6 single crochets (SC) inside the magic ring. A single crochet involves:
- Inserting the hook through the loop.
- Yarning over (wrapping the yarn around the hook).
- Pulling the yarn through (you now have 2 loops on the hook).
- Yarning over again and pulling through both loops.
- Pull the string of the magic ring tightly to close the circle.
- Slip stitch into the first stitch to close Row 1.
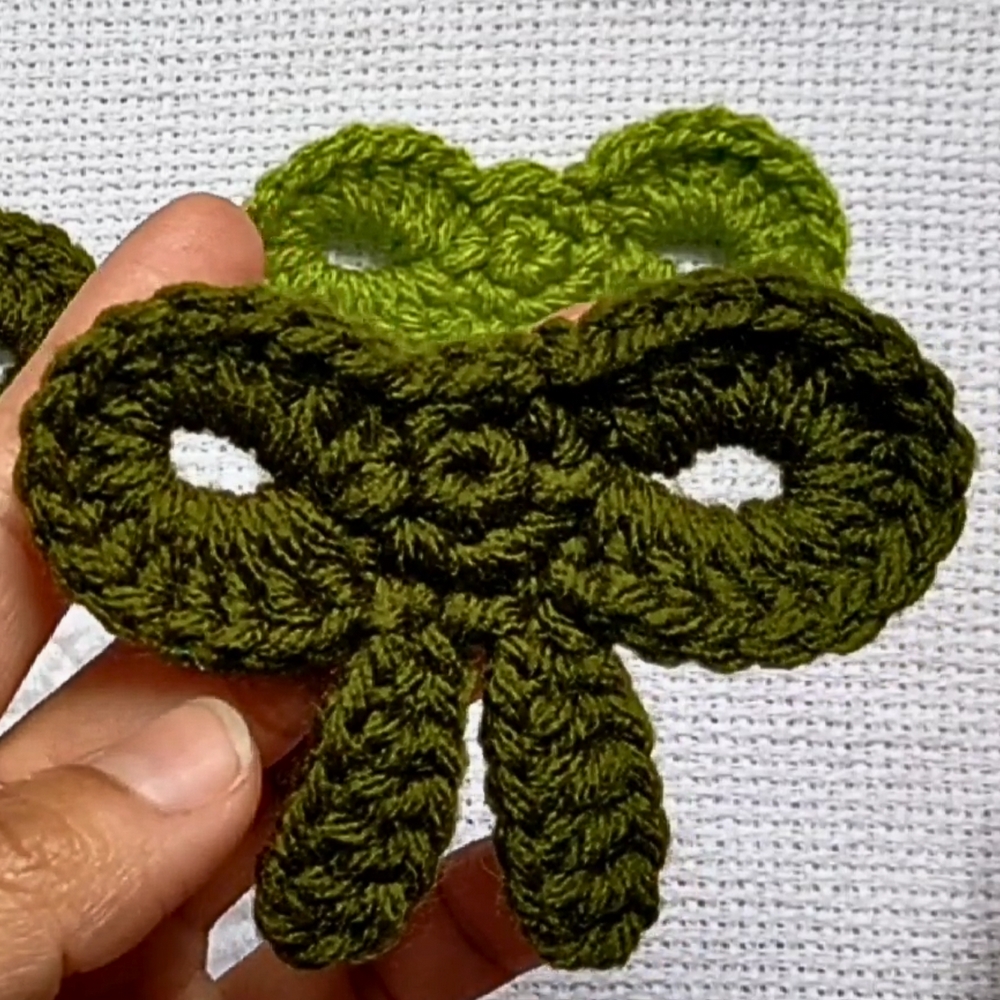
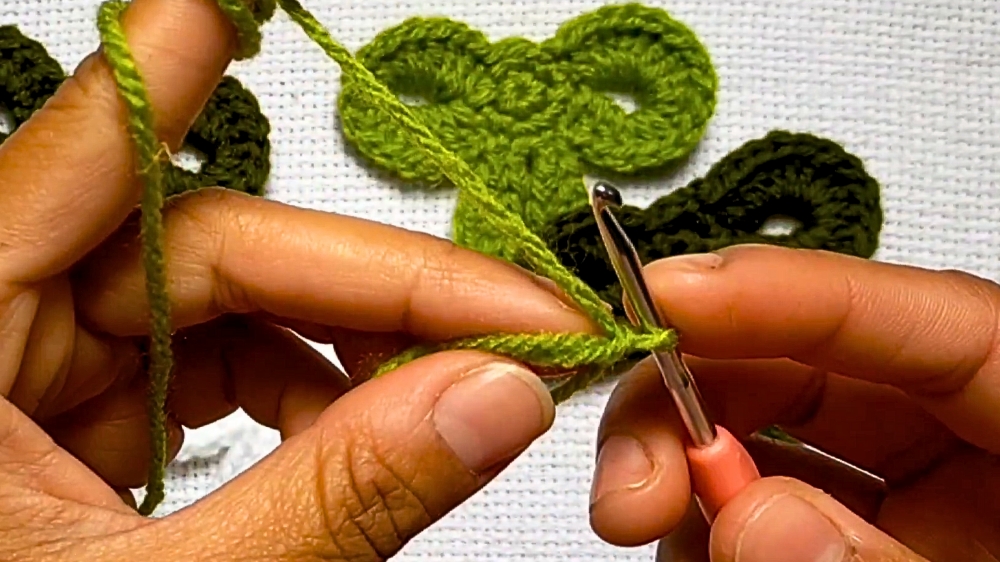
3. Row 2: Build the Bow Shape
- Start with Chain 1.
- Make 2 single crochets in the first stitch (increase).
- Continue making 2 single crochets in each of the next stitches to total 6 additional stitches.
- Create the First Chain Loop:
- Chain 8 and slip stitch into the first stitch to form the first loop.
- Create the Second Chain Loop:
- Make 2 single crochets in each of the next two stitches.
- Chain 8 and slip stitch into the first chain to form the second loop.
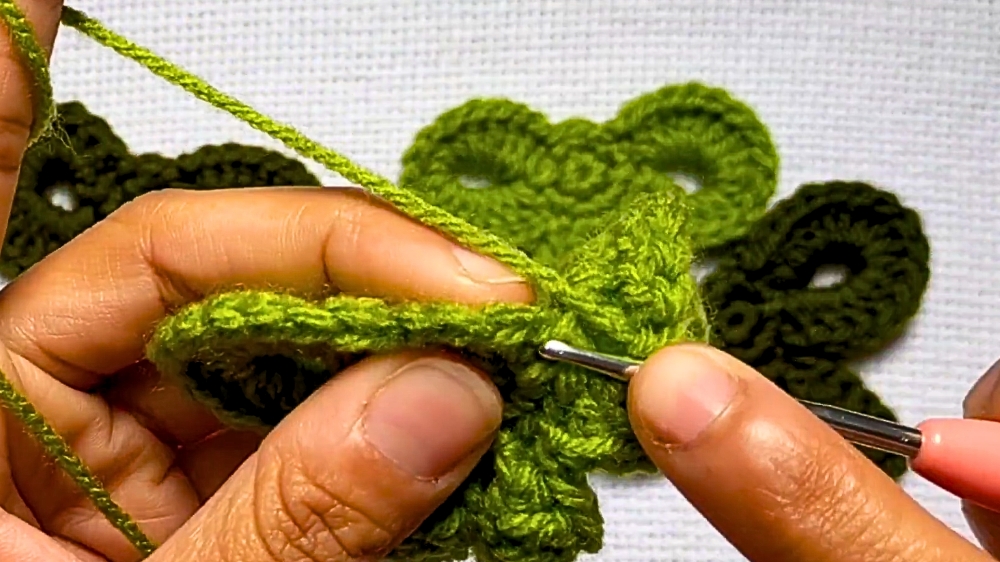
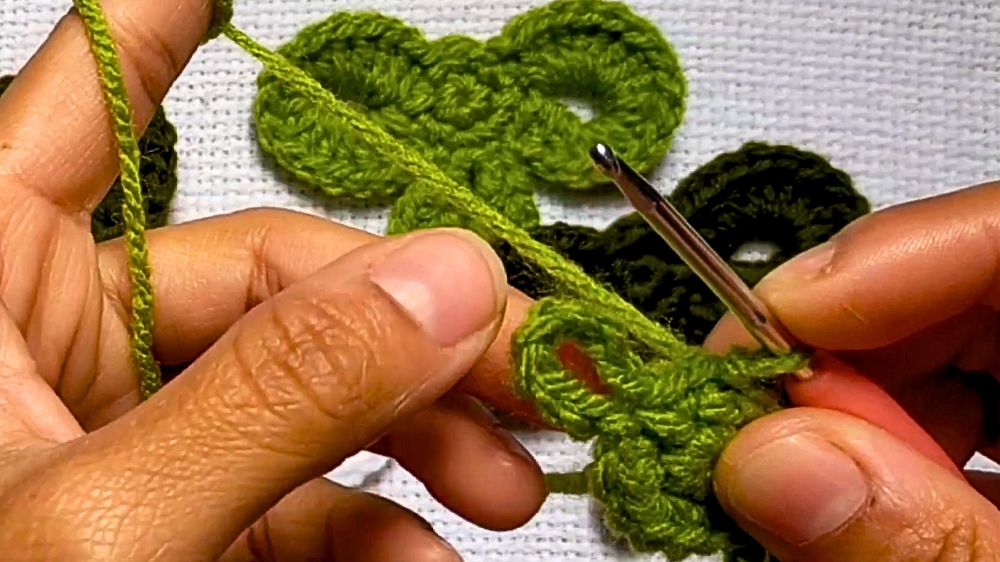
4. Row 3: Finalize the Bow Loops
- Create Double Crochet Loops:
- In the first chain loop created earlier, make 15 double crochets (DC). A double crochet involves:
- Yarn over, insert the hook into the loop, and pull the yarn through.
- Yarn over and pull through the first two loops on the hook.
- Yarn over again and pull through the remaining two loops.
- After completing the 15 double crochets, skip one stitch and slip stitch into the next stitch.
- Chain 8 and repeat the process on the second loop.
- In the first chain loop created earlier, make 15 double crochets (DC). A double crochet involves:
- Half Double Crochet Edge (Optional):
- Add edge stitches such as half double crochet or slip stitch around the loops for structure.
5. Complete the Bow
- Slip stitch into the final stitch and chain one to finish. Cut off the yarn and pull it through.
- Use the darning needle to hide the loose yarn ends.
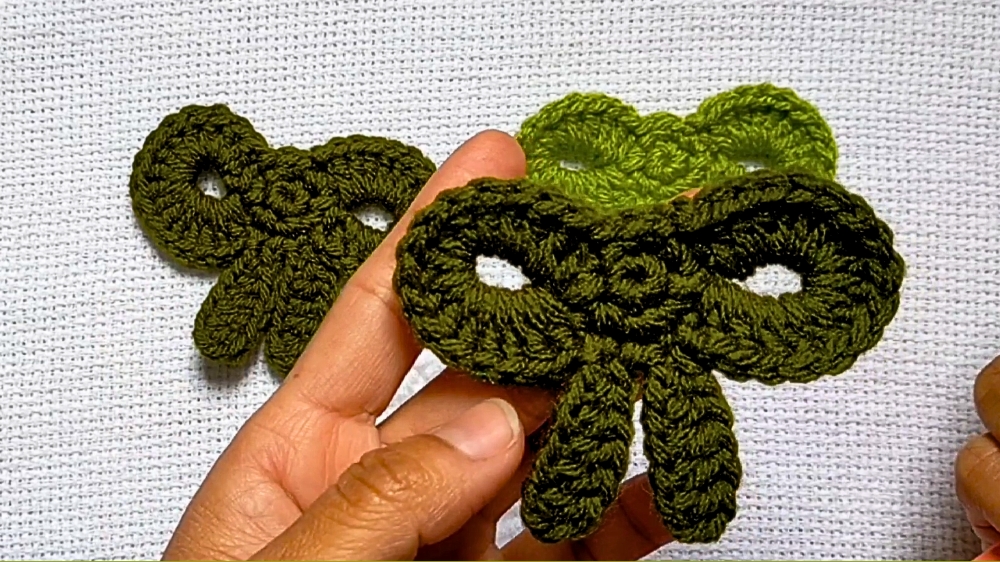
Uses of the Bow
- Decorative Embellishment: Attach to clothes, hats, or bags as a stylish accessory.
- Hair Accessories: Glue or sew the bow to hairpins for a simple and elegant hair accessory.
- Gift Toppers: Use the bow as a decorative touch on wrapped gift boxes or baskets.
- Part of a Larger Project: Incorporate the bow into blankets, crochet crafts, or other handmade decor items.
Conclusion
This crochet pattern shows how to make a charming and versatile bow in just a few minutes. It’s an ideal project for beginners and is highly customizable to suit various uses. Whether you’re creating it for a larger project or as a standalone accessory, this small bow is a fast and satisfying craft. With consistent practice, you’ll be able to create these bows effortlessly.
Bonus Tip
For added flair, consider using two different yarn colors by changing the yarn halfway through the project. This creates a dual-toned bow that adds an extra touch of uniqueness to your design.