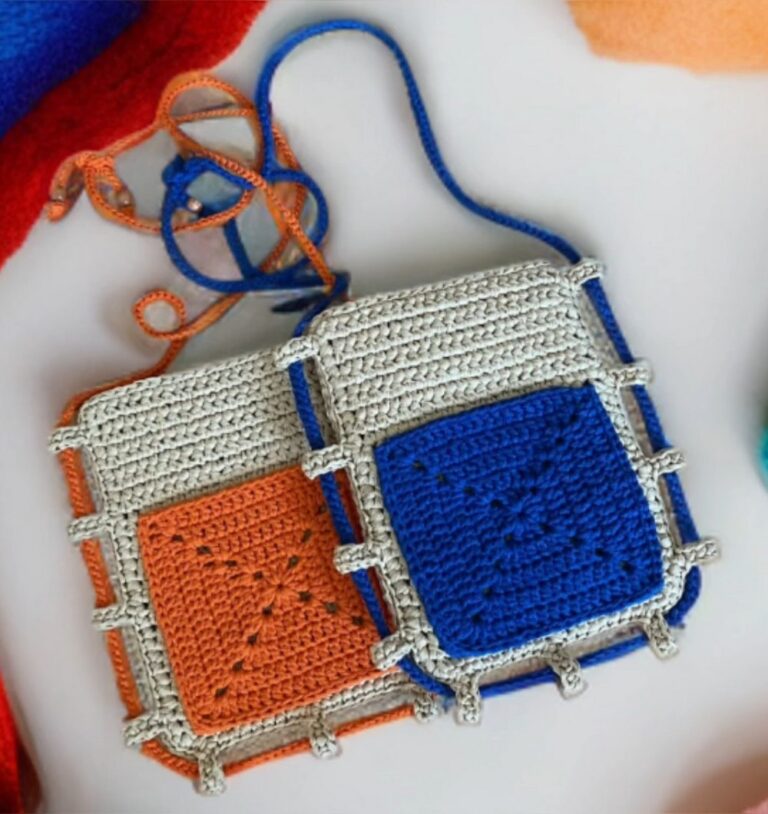
Free Crochet Pugmallow Plushie Pattern For Kids
Learn to crochet a Pugmallow Plushie with this crochet dog amigurumi pattern. It is an adorable and extra-soft recreation of the pug – a cute dog species! It has a round, chubby body, short legs, a curly tail, big eyes, and a flat nose. You will need pink, cream, and brown chunky velvet yarn. It’s the perfect cuddle buddy for any pug lover! So, go through the complete procedure below, and you will have a cute plushy in no time!
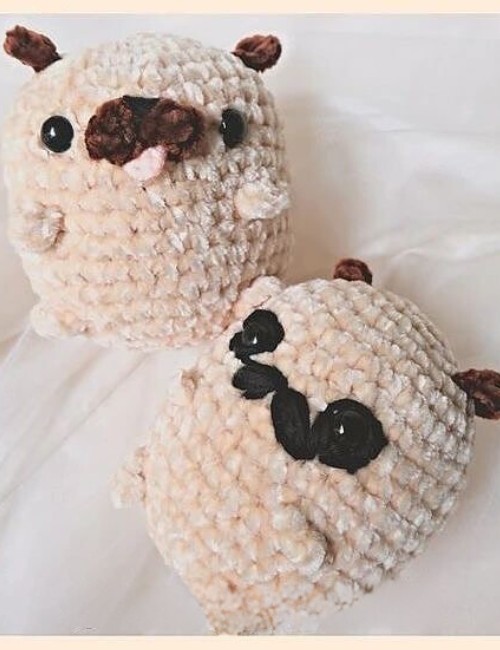
Making Your Crochet Pugmallow Plushie
Learn how to crochet a pug mallow doll stuffed toy with this step-by-step tutorial for beginners.
Materials:
Base Builder:
- Yarn A (light brown): This forms the foundation of your plush pup, covering the body, tail, and paws. Choose a light brown shade that suits your preference.
Ear-resistible Features:
- Yarn B (dark brown): This darker shade adds definition and brings personality to your pug’s ears and nose. Pick a rich brown that complements the body color.
Sweet Touches:
- Pink yarn: A pop of pink for the tongue adds playfulness and charm, making your puggo truly irresistible.
Sparkling Peepers:
- Plastic Safety Eyes (9mm)
Optional Personalization:
- Black/brown felt & yarn: Feeling creative? Use felt and yarn in these colors to add unique details like eyebrows, spots, or a collar, making your pugmallow plushie one-of-a-kind!
Abbreviations:
- MR: Magic ring – Creates a starting circle without joining ends.
- SC: Single crochet – Basic stitch for building your project.
- INC: Increase – Adds stitches to widen your work.
- CH: Chain – Creates a row of foundation stitches.
- INV DEC: Invisible decrease – Decreases stitches seamlessly.
- BLO: Back loops only – Uses only back loops of stitches for texture.
- HDC: Half double crochet – Taller stitch than SC, good for shaping.
- DC: Double crochet – Taller stitch than HDC for faster fabric.
- FLO: Front loops only – Uses only front loops of stitches for texture.
Step by step Crochet Pugmallow Pattern
BODY:
PLUSHIE
Round 1: 6SC in MR (6)
Round 2: INC around (12) Round 3: (SC, INC) around (18) Round 4: (INC, SC 2) around (24) Rounds 5: (SC 3, INC) around (30) Round 6: (INC, SC 4) around (36) Round 7-17: SC around (11 rounds, 36)
NOTE: if you plan to use safety eyes, insert at Round 9 (around 7 stitches apart), but it’s RECOMMENDED to glue them at Assembly, after inserting the nose.
BODY:
PLUSHIE
Round 18: (SC 4, INV DEC) around (30) Lightly stuff the body and continue to stuff as you go
Round 19: (SC 3, INV DEC) around (24) Round 20: (SC 2, INV DEC) around (18) Round 21: (SC 1, INV DEC) (12)
Round 22: INV DEC around (6)
Fasten off & weave in the end (sew into the
front loops of all, pull, & weave)
Pug Paw (make 4)_
Round 1: CH 3, HDC in 3rd CH from
hook, CH 1
Fasten off & leave tail for sewing
Pug Tail (make 1)
Row 1: CH 8, INC in each stitch from 2nd CH from hook (14)
Pug Ears (make 2).
Round 1: CH 3, HDC in 2nd CH from hook, DC in 3rd CH from hook, CH 1, Fasten off & leave tail for sewing
Pug Nose (make 1; optional)
Round 1: 4 CH, BLO (2 DC in 3rd CH from hook, 1 SL ST in 2nd CH from hook, 2 DC in 1st CH from hook)
Fasten off & leave tail for sewing
Pug Tongue (make 1; optional)
Round 1: 3 CH, HDC in 2nd CH from hook, HDC in next chain down, CH 1
Fasten off & leave tail for sewing
Assembly
1) If you made the nose, pin the nose, and sew it on Round 10. Then, cut a black felt triangle and stick it on top of muzzle.
If not, use your desired materials, make a nose with felt or sew with string to do whatever your heart desires!
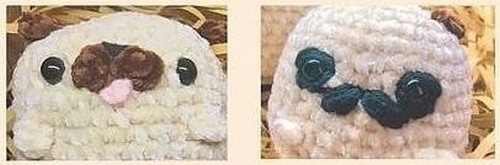
2) Glue eyes at Round 9 onto either side of the pug’s nose (used 9mm safety eyes), but you may use felt, too!
3) Pin and sew each ear (between Rounds 4 & 5) onto either side of the pug’s head.
I hope you loved this free crochet pug mallow pattern!
What’s more