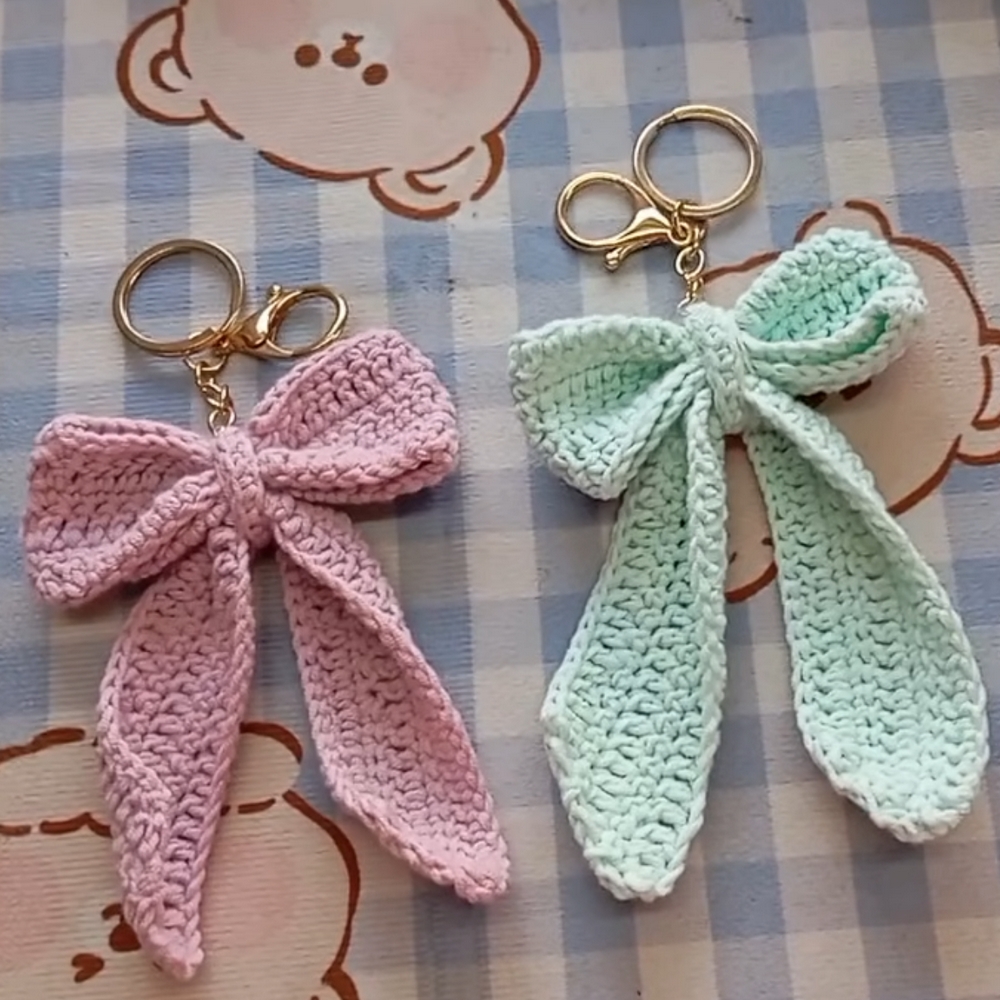
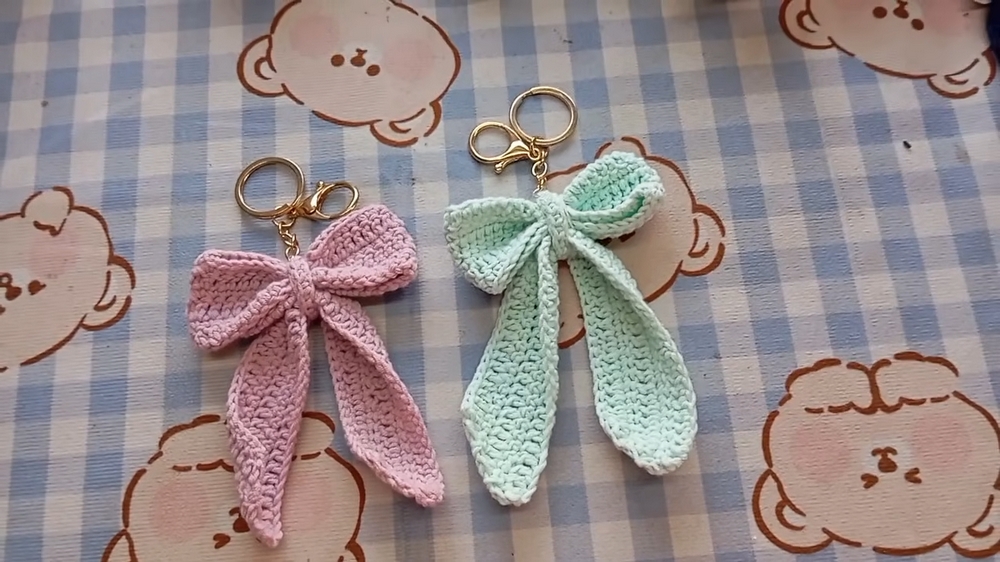
Fabulous Crochet Bow Keychain Ideal for Cute Collectibles
Elevate keys with the Crochet Bow Keychain Pattern, offering a playful, stylish, and charming accessory for everyday use.
A simple accessory can carry charm and functionality in equal measure, and a delicate bow brings both whimsy and practicality to everyday items. This crochet bow keychain adds a touch of personality to keys, handbags, or backpacks, transforming ordinary essentials into something special. Its soft texture and structured shape offer a pleasing tactile experience, making it comforting to hold while drawing the eye with subtle elegance. Lightweight yet durable, it moves effortlessly with daily life, resisting wear while maintaining its cheerful appearance.
Bright Crochet Bow Keychain Perfect for Daily Essentials

Beyond aesthetics, it helps keep keys organized and easily identifiable, offering a practical benefit that enhances everyday routines. The bow’s handmade details reflect careful attention to proportion and form, giving it a refined, timeless appeal. Perfect for gifting, personal use, or as a stylish accent, it complements a variety of styles from playful to sophisticated.
Its compact size ensures versatility, while the charm of its delicate loops and curves captures a sense of joy in the small things. Every stitch and fold conveys care and thoughtfulness, turning a functional item into a miniature statement of personality and style. This crochet bow keychain proves that even the smallest accessory can brighten daily life with charm, practicality, and subtle elegance.
Materials Needed
To complete this project, you will need:
- Yarn: 4-ply cotton yarn (or any yarn type/weight of your preference)
- Crochet Hook: 3 mm crochet hook
- Tapestry Needle: For sewing and weaving in the yarn ends
- Scissors: To cut the yarn
- Keychain Ring/Connector: To turn the bow into a keychain
- Stitch Marker (Optional): Can be used to mark your stitches if preferred
- Fabric Glue (Optional): For extra security when assembling the bow
- Polyfill or Other Stuffing: Not required for this project
Step-by-Step Instructions
1. Workflow Overview
Before starting, the tutor explains the workflow of the project:
- Crochet three separate parts – the upper bow, lower bow, and the middle piece.
- Assemble the pieces by sewing them together.
- Add the keychain ring at the end.
2. Making the Upper Bow
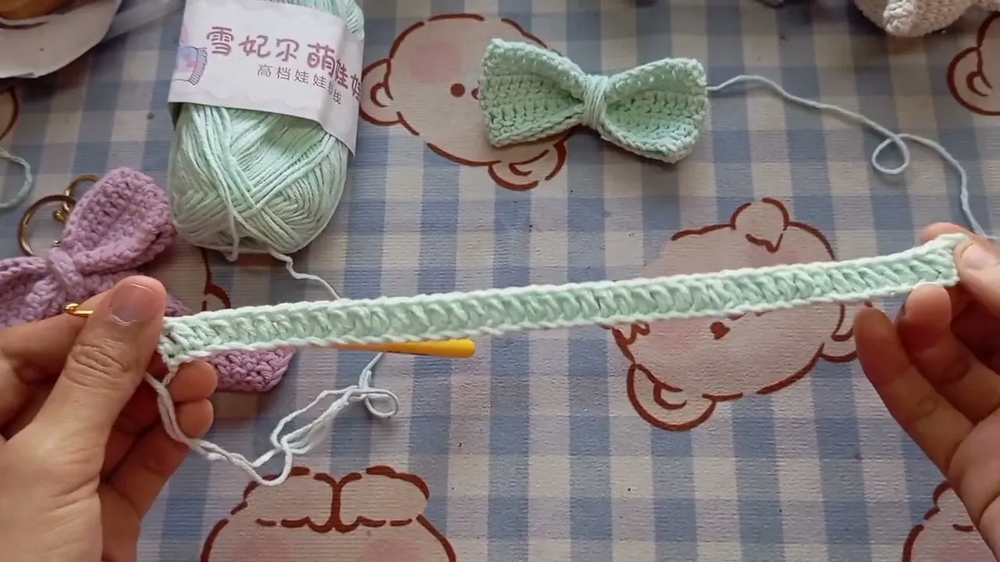
- Start with a Slip Knot: Create a slip knot and chain 42 stitches. Adjust the length (approximately 7 inches) according to your preference or yarn thickness.
- Row 1 (Double Crochet): Skip the first two stitches, yarn over, and insert the hook into the third chain. Make a double crochet across all chains.
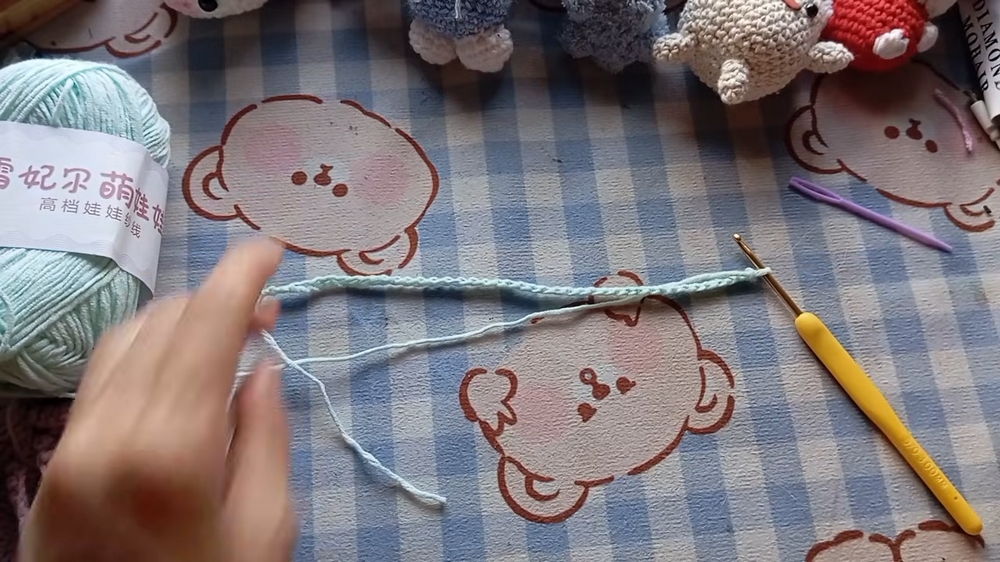
- Row 2 (Single Crochet): Chain 1, turn your work, and single crochet in each stitch across—including the chain space at the end.
- Repeat Rows 1 and 2: Alternate between double crochet and single crochet rows until you reach a total of 6 rows.
- Note: You can adjust the number of rows if you want a thicker or thinner bow.
- Finish Off: Leave a long tail for sewing and wrapping, then cut the yarn.
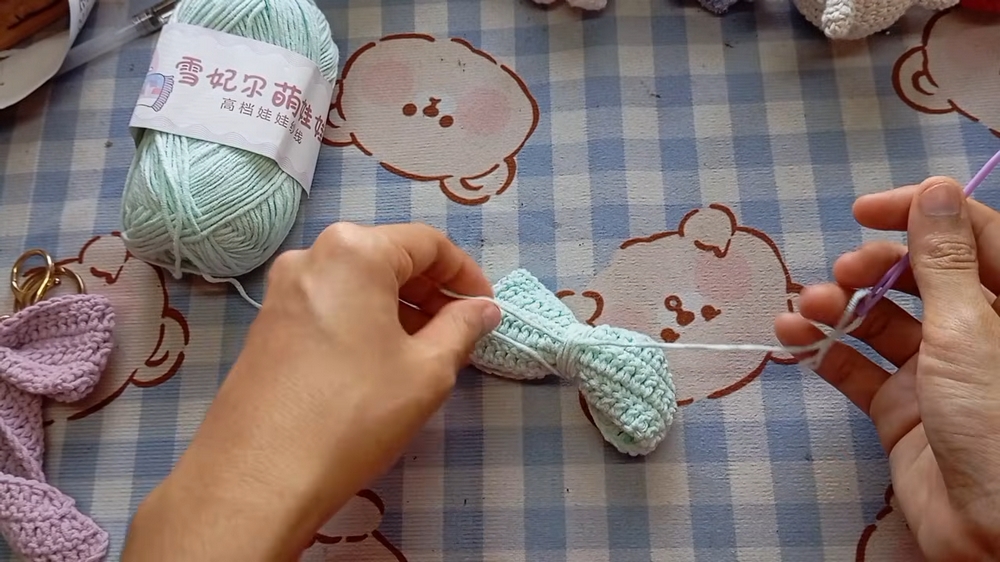
- Sew the Ends Together: Fold the finished piece in half, align the edges, and sew the ends together securely using the tapestry needle.
- Shape the Bow: Pinch the middle of the assembled piece to shape the bow and tightly wrap the long tail around its center (approximately 10 times). Once satisfied with the shape, secure and weave in the yarn tail.
3. Making the Lower Bow
- Start with a Slip Knot: Chain 48 stitches for the lower bow (approximately 9 inches in length).
- Row 1 (Double Crochet): Skip the first two stitches, yarn over, and insert the hook into the third chain. Double crochet across all chains.
- Row 2 (Single Crochet Decrease): Turn your work without chaining. Make a single crochet decrease at the beginning (by crocheting two stitches together), then single crochet across the row to the last two stitches, where you make another single crochet decrease.
- Row 3 (Double Crochet Decrease): Turn your work without chaining. Make a double crochet decrease to start, double crochet across, and end with a double crochet decrease at the last two stitches.
- Alternate Rows: Repeat Rows 2 (single crochet decrease) and Rows 3 (double crochet decrease) until the lower bow curves into the desired shape.
- Finish Off: Leave a long tail, cut the yarn, and weave in any loose ends using the tapestry needle.
4. Creating the Middle Band
- Start Small: Make a slip knot and chain 13 stitches. Wrap it around the bow to ensure the length fits snugly; adjust the chain length if necessary.
- Single Crochet Row: From the second chain, single crochet across the row.
- Finish Off: Leave a long tail, cut the yarn, and secure the loose ends.
5. Assembling the Bow
- Attach the Upper and Lower Bow: Stack the lower bow beneath the upper bow. Use the remaining tail from the upper bow to secure the two pieces by wrapping the tail tightly around both.
- Wrap the Center Band: Place the center band over the middle of the bow. Use fabric glue or sew the ends of the center band together securely.
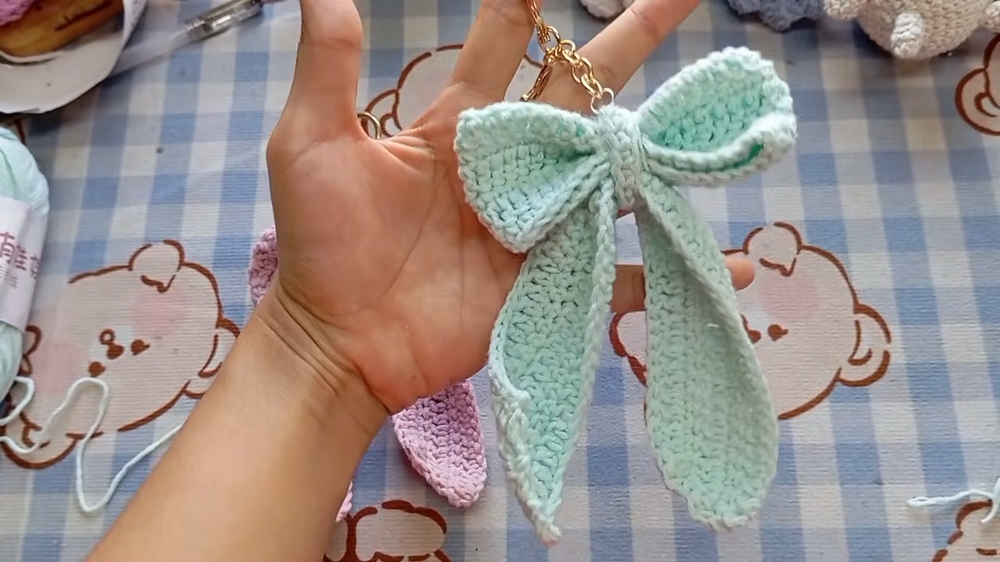
6. Adding the Keychain
- Attach a keychain ring or connector to the middle band of the bow to turn it into a keychain.
- Use pliers or a small tool to open and close the jump ring or keyring securely.
Special Features
- Customizable: You can adjust the size, color, and design of the bow according to your need.
- Multipurpose Accessory: Use it as a keychain, bag charm, or even as a decorative accent for other projects.
- Beginner-Friendly: While it involves a few stitches, the steps are explained in a simple manner and are easy to follow.
Level of Difficulty
The project is beginner-friendly. The stitches involved—such as chains, single crochet, double crochet, and decreases—are basic crochet techniques.
Tutor’s Suggestions
- Adjust Length to Match Yarn Thickness: Measure the starting chain and rows against the suggested dimensions. Thicker yarns require fewer chains and rows, while thinner yarns need more.
- Shape Carefully: Ensure the bows are pinched properly and wrap the yarn tightly around the center for a polished look.
- Be Creative: Choose unique colors or mix-and-match yarns to personalize your bow.
Uses
- Keychains: Add it to a keyring for a unique and pretty accessory.
- Decorations: Bow embellishments for gift wrapping, clothing, or home decor.
- Gifts: Handmade crochet bows make thoughtful and adorable gifts for family and friends.
Pro Tip
For extra durability, especially if the bow will be used as a keychain, apply a small amount of fabric glue to the wrapped center of the bow and to the connection points of the middle band. This will prevent the pieces from loosening over time.
Conclusion
This Crochet Bow Keychain Tutorial is an exciting and fun project that allows you to create something both beautiful and practical. With its beginner-friendly approach, you can complete the project quickly while learning some foundational crochet techniques. Whether for personal use or as a thoughtful handmade gift, this bow is guaranteed to add a touch of charm to anyone’s day.