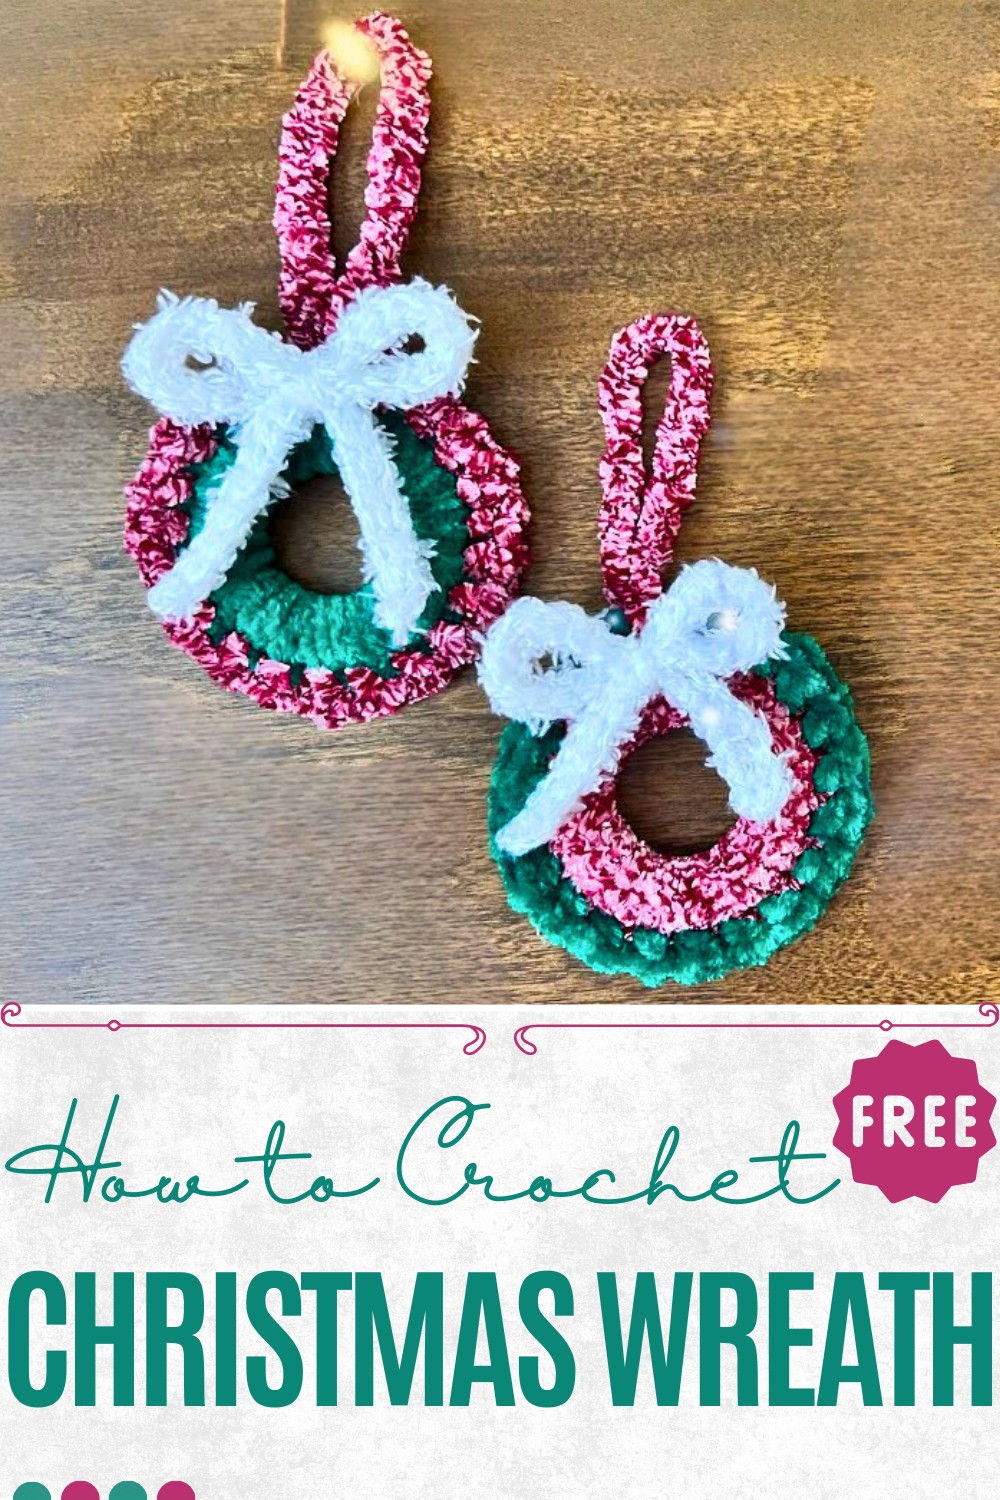
Easy crochet Christmas wreath for beginners
Ring in holiday spirit with this Crochet Christmas Wreath Pattern for a festive, charming accessory that enhances seasonal décor.
Stories of festive gatherings often begin at the doorway, where a wreath greets guests with warmth and charm before a word is spoken. A crochet Christmas wreath adds a unique touch to this tradition, bringing softness, color, and character into a familiar symbol of the season. The circular form, often rich with greens, reds, and gentle embellishments, conveys a timeless sense of joy while highlighting the beauty of handmade detail. Beyond its role on the door, it can be hung on walls, windows, or even used as a centerpiece to brighten tables with festive flair.
Colorful Crochet Christmas Wreath Perfect in Family Homes
The texture feels both inviting and sturdy, ensuring durability that lasts year after year. Lightweight yet striking, it captures attention without overwhelming a space, making it a versatile decoration for both large celebrations and intimate gatherings. It also carries the thoughtful charm of a gift, offering loved ones something that feels personal and heartfelt.
More than just decoration, it symbolizes hospitality, love, and cheer, turning simple corners of a home into meaningful spaces. With its balance of beauty and function, a crochet Christmas wreath enriches seasonal traditions while adding a refined and joyful presence wherever it is placed.
Materials Needed
Shell recommends using easily accessible and budget-friendly materials for this project:
- Yarn:
- Green chenille yarn (for the base layer).
- Red and white mixed chenille yarn (for decorative accents).
- Primer Just Yarn (for crafting the bow).
- Hooks:
- Size G or 4.25 mm crochet hook (preferred).
- You can alternatively use a 5 mm hook.
- Other Tools:
- Yarn needle.
- Scissors.
- 2-inch diameter ring (3-inch ring can also be used).
Special Features
- Perfect for Beginners: With straightforward single crochet stitches and decorative details, this tutorial is beginner-friendly yet engaging.
- Flexible Materials: Shell experiments with chenille yarn, showing how different yarn textures work for this project, and suggests alternative yarns like cotton or acrylic for convenience.
- Compact Design: The project is designed to fit small spaces or hang on Christmas trees, doors, or walls.
- Affordable and Creative: Most materials can be sourced inexpensively from stores like Dollar Tree, making it budget-conscious and accessible.
Level of Difficulty
Beginner-Friendly
The steps involve simple stitches like single crochet and slip stitches, making it a great project for those just starting their crochet journey. The most challenging parts may be using textured chenille yarn (as it can obscure stitches) and crocheting the bow, but Shell provides clear instructions to guide you through.
Step-by-Step Instructions
Part 1: Wrapping the Foundation Ring
- Prepare the Ring and Yarn:
- Start by grabbing your 2-inch ring and your green chenille yarn.
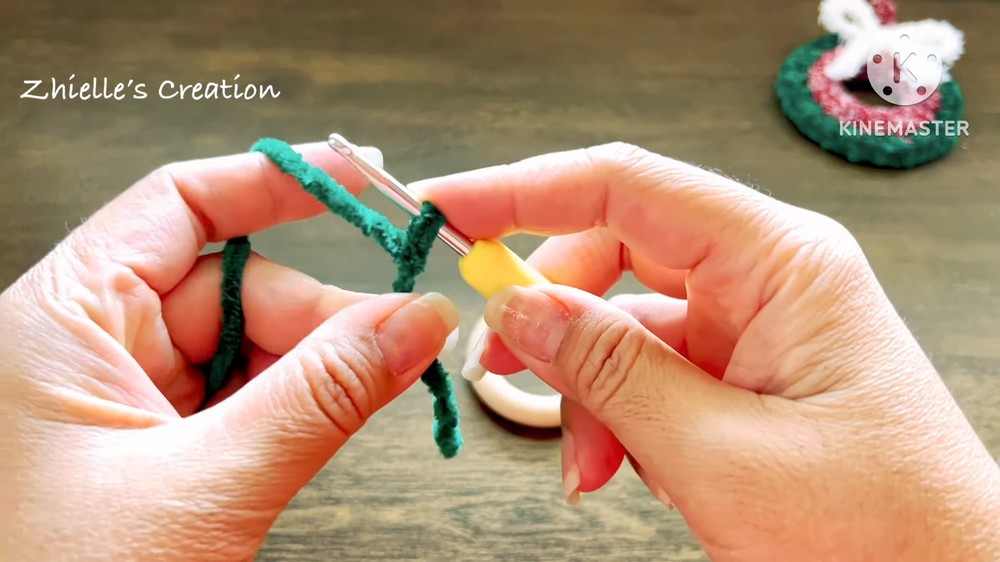
- Create a slip knot using the green yarn.
- Start by grabbing your 2-inch ring and your green chenille yarn.
- Single Crochet Around the Ring:
- Insert your hook into the ring and begin making single crochets (SC) around the ring.
- Continue crocheting until the ring is fully covered with the green yarn.
- Shell emphasizes there’s no need to count stitches; simply ensure the ring is completely covered.
- Join the Ends:
- Once the ring is wrapped, insert your hook into the first stitch you made.
- Secure with a slip stitch and trim the green yarn.
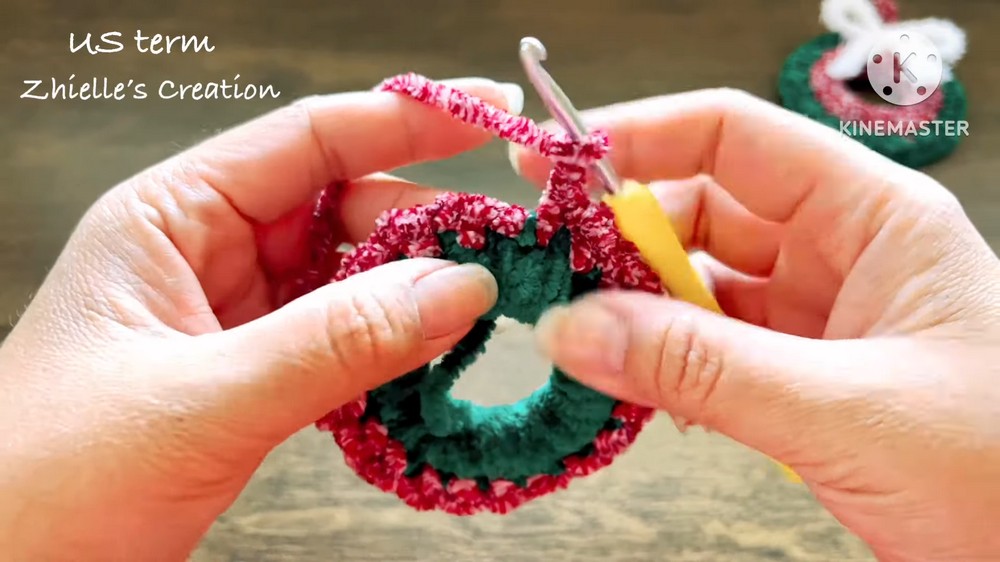
2: Adding the Red and White Accent
- Introduce the Second Color:
- Take the red and white yarn and attach it to the starting stitch of the green. Secure the transition yarn in place.
- Second Row of Single Crochets:
- Chain 1 to begin.
- Work 1 single crochet (SC) into the first stitch, chain 1, then move to the next stitch.
- Repeat the pattern: single crochet, chain 1, until you complete the row.
- Join the Row and Finish Off:
- When you reach the end of the row, join with a slip stitch in the first chain.
- Fasten off the red and white yarn, trim, and weave in loose ends.
- Hanging Loop:
- Chain 20 to 25 stitches (depending on the hanging length you prefer).
- Slip stitch into the first chain to form a loop, cut the yarn, secure the ends, and weave in.
3: Crocheting the Bow
- Chain for Bow Base:
- Using Primer Just Yarn, create a slip knot and chain 40 stitches.
- Slip Stitch the Bow Base:
- Start with a slip stitch on the first chain to form a loop. Continue making slip stitches in every chain until the row is complete.
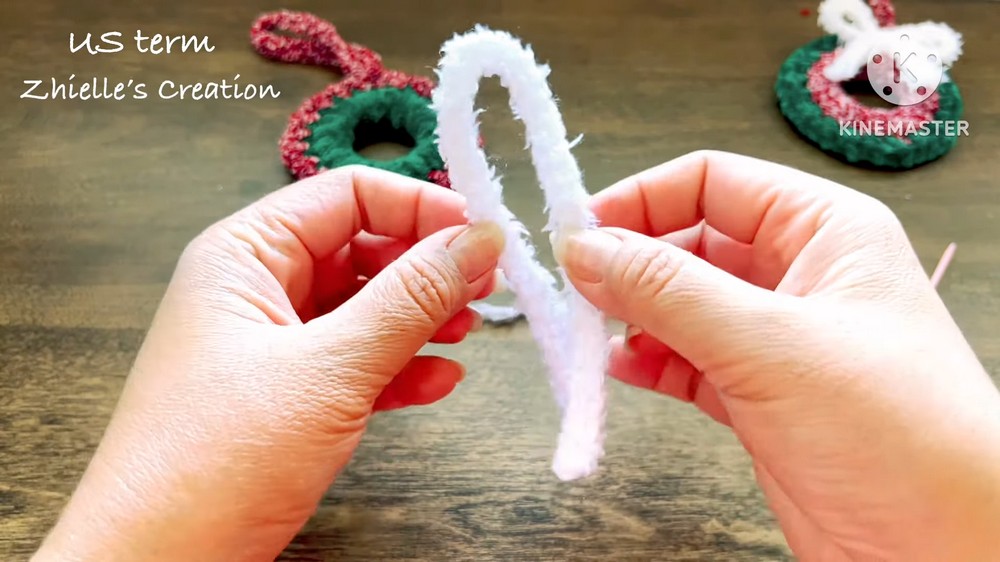
- Fasten off the yarn, leaving a long tail for assembly.
- Start with a slip stitch on the first chain to form a loop. Continue making slip stitches in every chain until the row is complete.
- Shape the Bow:
- Fold the chain in half and locate the center to form the basic bow shape.
- Use a yarn needle and a piece of 8 to 10-inch-long yarn to tightly secure the center, wrapping the yarn around the middle of the bow a few times.
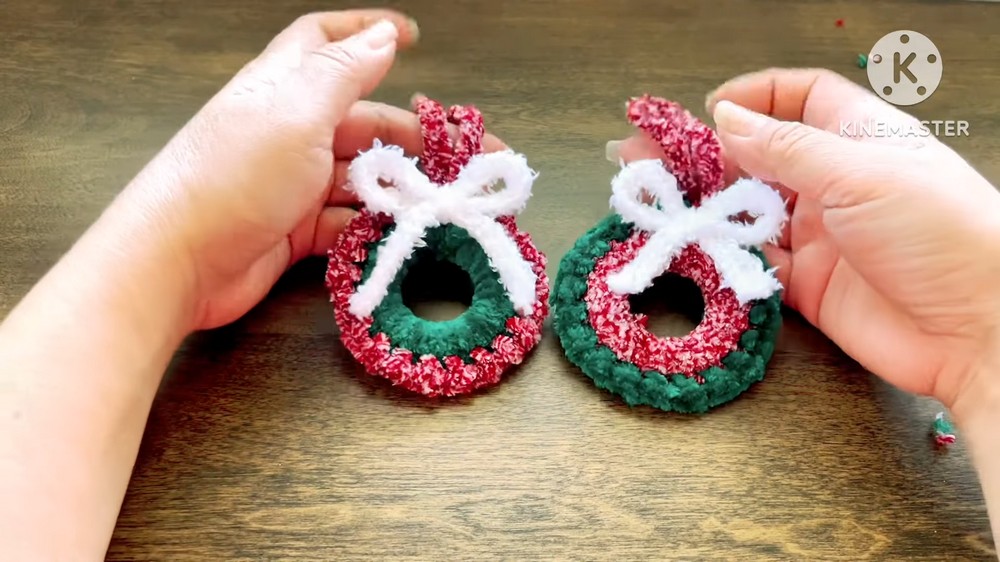
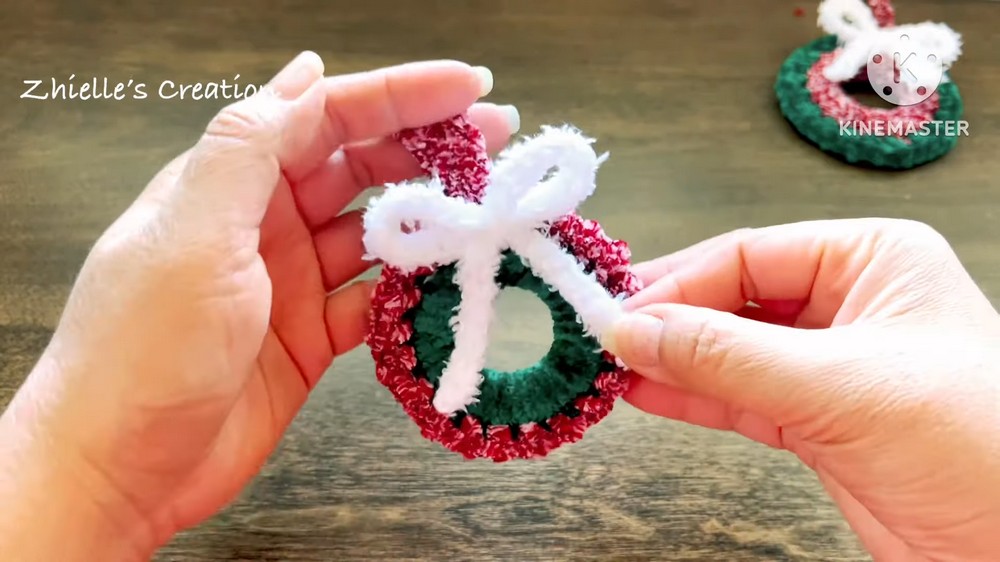
- Attach the Bow:
- Sew the bow onto the lower center of the green wreath, ensuring it is securely attached.
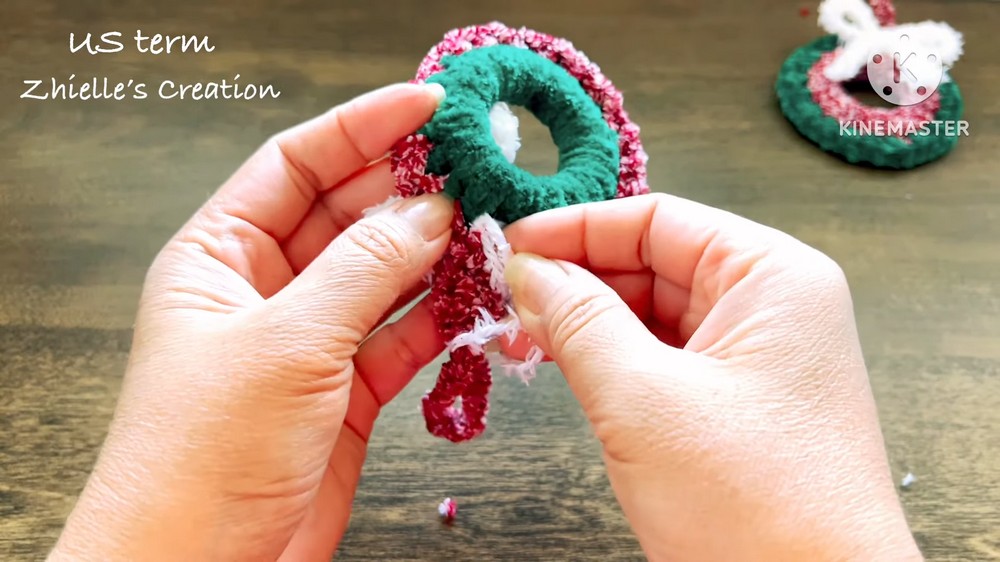
- Sew the bow onto the lower center of the green wreath, ensuring it is securely attached.
4: Final Touches
- Assemble the Wreath:
- Attach the hanging loop to the top of the wreath.
- Place the bow below the hanging loop and sew it securely at the center.
- Ensure all loose ends are sewn and trimmed for a clean finish.
- Inspect and Adjust:
- Check the symmetry of the design and make any necessary adjustments before completing the project.
- Check the symmetry of the design and make any necessary adjustments before completing the project.
Tutor’s Suggestions
- Experiment with Texture: While chenille yarn adds a soft, luxurious look, Shell suggests acrylic or cotton yarn if you find it hard to work with. Use what feels most comfortable for you.
- Take Your Time with the Bow: Folding and shaping the bow neatly is key to giving your wreath a polished look.
- Securely Weave Ends: Be meticulous about weaving in yarn ends at the back to keep the wreath neat and professional.
- Adjust Sizes: Use different-sized rings (e.g., 3-inch) and adjust the number of stitches or chain lengths to get a custom size.
Uses of the Crochet Christmas Wreath
- Tree Ornament: Perfect as a decorative piece for your Christmas tree.
- Door Decoration: Display it on doors, windows, or walls as part of your holiday decor.
- Handmade Gifts: Ideal as a small, thoughtful, handmade gift for friends and family during the festive season.
- Custom Themes: Change the yarn colors for different holiday themes, such as pastel for Easter, red/blue for patriotic events, etc.
Tip
Work with Bright Lighting: Chenille yarn can make stitches hard to see. Ensure you’re crocheting in a well-lit area to avoid mistakes and to make the process smoother.
Conclusion
This crochet Christmas wreath pattern offers a quick and fun way to create festive decorations while enhancing your crochet skills. With its lush chenille yarn and decorative bow, this wreath is both charming and versatile. Whether you’re a crochet beginner looking for a holiday project or a seasoned crocheter in search of inspiration, this pattern has something to offer.