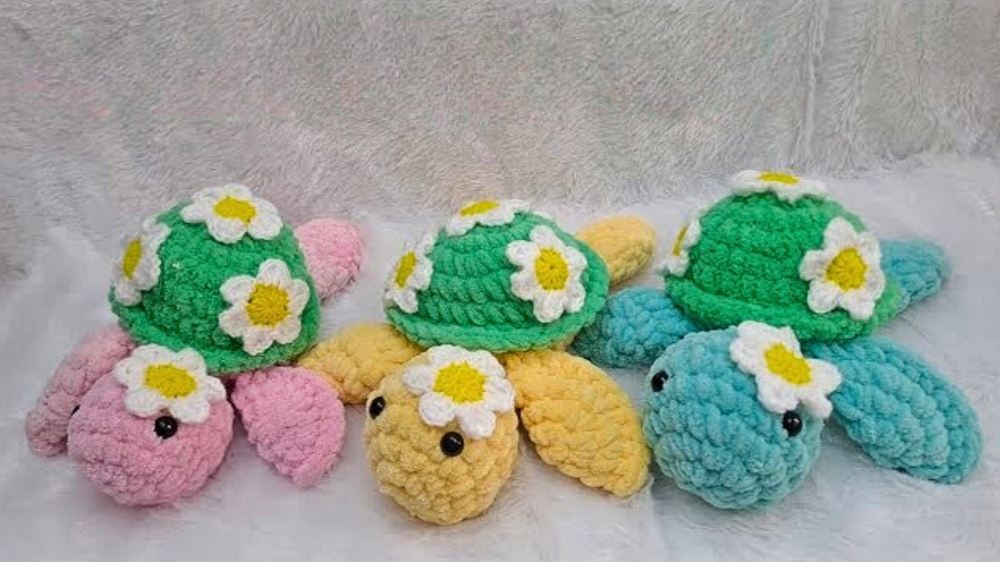
Dreamy Crochet Turtle Soft Toy for Chic Nurseries
Adorable fun awaits with this Crochet Turtle Soft Toy Pattern that turns cuddly charm into a playful companion for all ages.
Gentle waves and sandy shores often remind us of the calm presence of turtles, symbols of patience, wisdom, and comfort. Bringing this soothing imagery into everyday life, the Crochet Turtle Soft Toy Pattern offers a delightful way to capture that charm in a huggable form. With its rounded shell, tiny flippers, and sweet expression, it becomes more than a toy—it transforms into a companion that radiates warmth and joy.
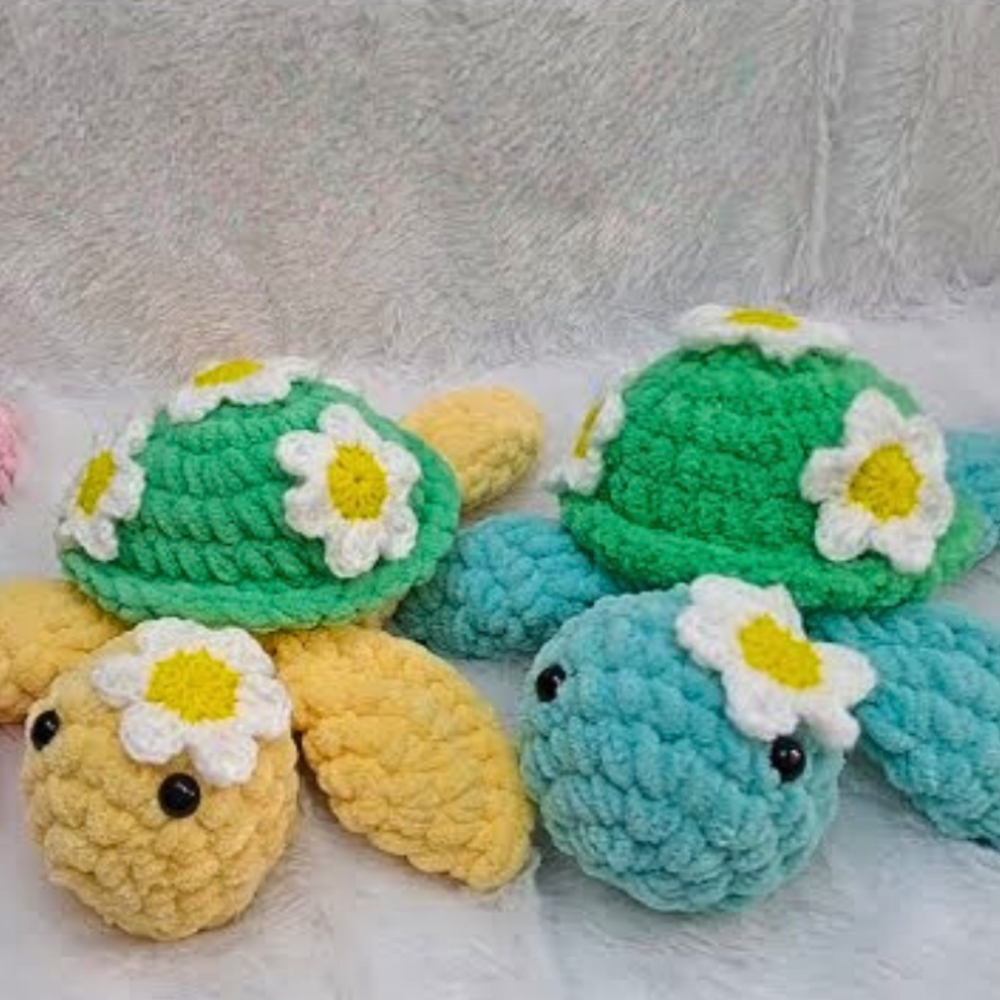
Sweet Crochet Turtle Soft Toy in Radiant Hues

Perfect for children, it serves as a cuddly friend during bedtime or play, while for adults, it can be a nostalgic keepsake or a thoughtful handmade gift. Its softness and durability make it safe for little ones, while its detailed structure ensures that it holds shape beautifully over time. The ability to customize colors allows each turtle to feel unique, whether made in natural earthy tones or in bright, playful shades.
Beyond being a toy, it works wonderfully as nursery décor, lending a whimsical charm to shelves, cribs, or themed spaces. Lightweight yet comforting, it easily becomes a cherished heirloom that carries both beauty and sentiment. The Crochet Turtle Soft Toy Pattern reflects the harmony of artistry and affection, turning stitches into something timeless and heartwarming.
Materials Needed
- Yarn:
- Plush yarn (~100 grams) for the body.
- Acrylic yarn in yellow and white for the decorative flowers.
- Crochet Hooks:
- 5.5mm for the plush yarn.
- 3mm for the acrylic flowers.
- Safety Eyes: For the turtle’s face.
- Stuffing Material: Full fiber filling to shape the turtle.
- Scissors: For cutting the yarn.
- Needle: For sewing the parts together.
- Optional: Glue for attaching the flowers.
Special Features
- Two-Toned Textures: Combines soft plush yarn for the turtle’s body and vibrant acrylic yarn for decorative flowers.
- Customizable: You can choose different color combinations to personalize your turtle.
- Realistic Design: The tutorial emphasizes balanced proportions, from creating a proper head shape to evenly spaced legs.
- Decorative Touches: Adds crochet flowers to embellish the shell, giving it a unique and adorable look.
Level of Difficulty
Beginner to Intermediate. While the crochet techniques, such as single crochet, increases, decreases, and slip stitches, are basic, the assembly and shaping steps require focus and repetition, making it suitable for crocheters with some prior experience.
Step-by-Step Instructions
Step 1: Crochet the Turtle’s Legs
- Start with a slip knot and chain 2.
- In the first chain, make 8 single crochets to form a circle.
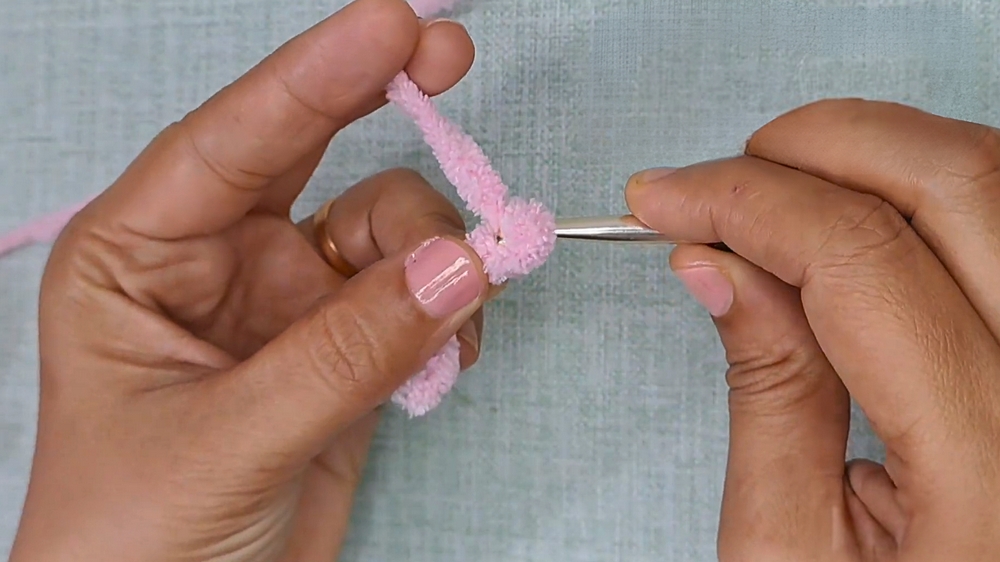
- For the second round, work 1 single crochet, followed by an increase (2 single crochets in the same stitch). Repeat this 8 times—you will end up with 16 single crochets in total.
- Use a stitch marker to mark the end of each round.
- In the third round, alternate 2 single crochets and 1 increase for a total of 24 single crochets.
- Fold the work in half and single crochet through both sides to close the leg.
- Cut the yarn and repeat the pattern to make 4 legs.
2: Crochet the Turtle’s Head
- Follow the same process as the legs for the first three rounds (total of 24 single crochets).
- For rounds 4–6, crochet 1 single crochet in each stitch without increases.
- In round 7, begin decreasing (single crochet 2 stitches together) to create the rounded head. Continue until 16 single crochets remain.
- Insert safety eyes between rounds 4 and 5, and stuff the head firmly with fiber filling.
- For the final round, single crochet stitches together until the head is fully closed. Secure with a slip stitch and cut the yarn.
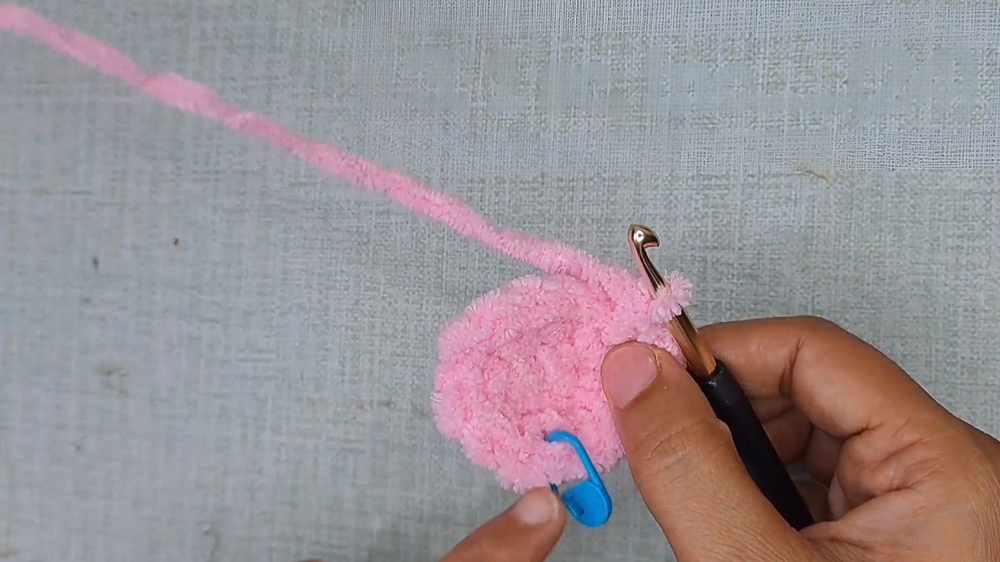
3: Crochet the Turtle’s Body (Shell)
- Start with a slip knot and chain 2. Create a base of 8 single crochets in the first chain.
- Round 2: Increase in every stitch (2 single crochets per stitch) for a total of 16 stitches.
- Round 3: Alternate 1 single crochet, 1 increase across the round to get 24 stitches.
- Round 4: Alternate 2 single crochets, 1 increase to get 32 stitches.
- Rounds 5–7: Crochet 1 single crochet in each stitch (no increases).
- Round 8: Work only into the front loops to create a ridge where the shell will later attach.
- Assemble the shell: Use back loops from previous rounds and start attaching with single crochets to form a 3D structure.
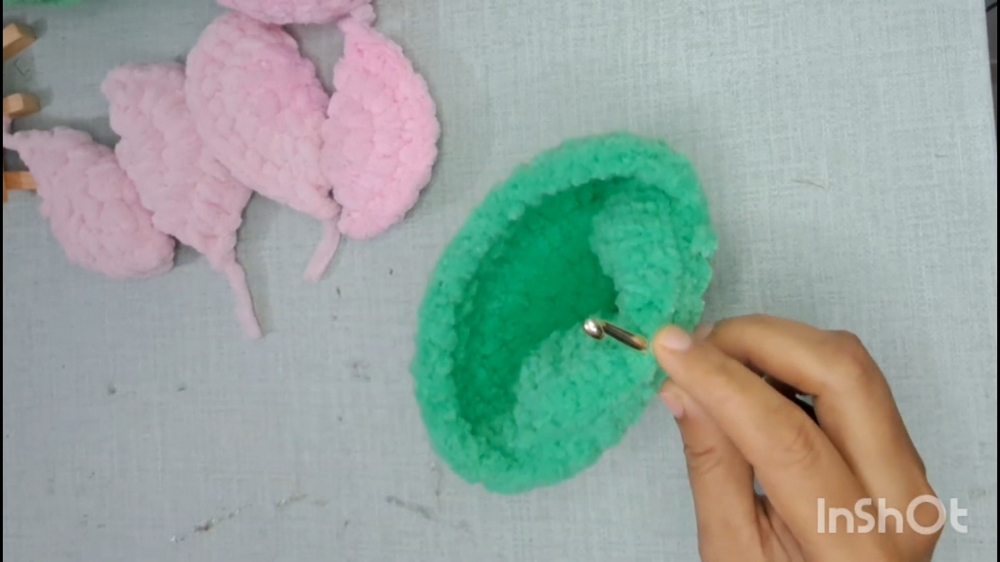
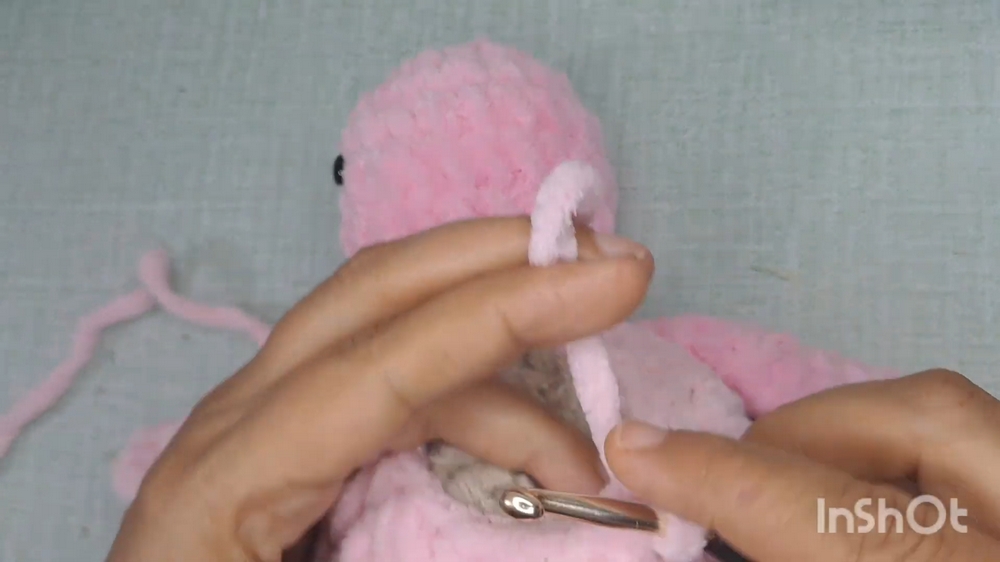
4: Assemble the Turtle
- Attach each leg at the appropriate position on the body. Use single crochets to secure them.
- Attach the head to the front of the turtle’s body, ensuring proper alignment of the eyes. Use slip stitches for a firm hold.
- Stuff the body with fiber filling as you go, making it tight and rounded.
- Continue decreasing stitches to close the body fully. Once complete, secure with a slip stitch, cut the yarn, and weave in the ends with a needle.
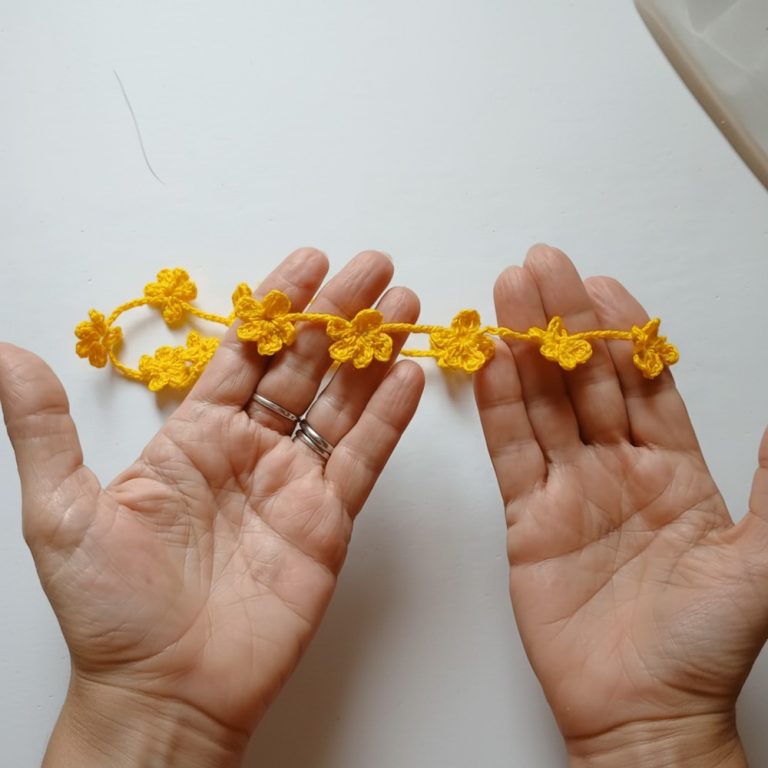
5: Crochet Decorative Flowers
- Crochet a magic ring and chain 1. Inside the ring, make 12 half-double crochets. Close with a slip stitch.
- Change to the white yarn and begin forming petals:
- In each stitch, work 1 single crochet, 1 half-double crochet, 1 double crochet, 1 treble crochet. Repeat this pattern to form 6 petals.
- Repeat the process to create 5 flowers in total.
6: Decorate the Turtle’s Shell
- Arrange the 5 flowers evenly on the top of the shell.
- Use glue to secure the flowers, or stitch them on with yarn and a needle.
Tutor’s Suggestions
- Use a Stitch Marker: This helps you keep track of rounds and ensures even results.
- Stuff Firmly: Proper fiber filling ensures the turtle holds its shape.
- Experiment with Colors: You can use other color combinations for the shell and flowers to personalize your turtle.
- Secure Attachments: Tighten all stitches when sewing parts together to avoid loose pieces.
Uses of the Crochet Turtle
- Home Décor: Place it on shelves, desks, or as part of a themed decoration.
- Children’s Toy: A safe, plush toy perfect for children to play with.
- Gift: A handmade present for loved ones on special occasions.
Conclusion
This plush crochet turtle tutorial is a delightful project that combines basic crochet techniques with creative assembly. By following the step-by-step guide, you can craft your own adorable turtle with unique decorative touches like crochet flowers. Whether as a gift, toy, or décor item, this handmade plush turtle adds a personal and heartwarming touch to any space.
Tip
When making the flowers, ensure the magic circle is tightly secured to maintain the flower’s shape over time. Also, weave in all loose ends at the end to give your turtle a clean and professional finish.