14 DIY Shoes Projects For Sneaker Lovers
Let us express your style and add a touch of stylization to your footwear following this amazing list of DIY shoe projects. This guide is all about letting your creativity shine by transforming plain shoes into unique, stylish footwear right at home. It’s easier than you might think! With simple tools, some free time, and your imagination, you can personalize your shoes to match your individuality.
DIY Shoes Projects

The happiness of wearing shoes designed by yourself is unparalleled and the most unique feeling one has ever experienced. If you wanna feel that following this impressive series of DIY shoes projects is gathered here will surely be the best option.
Let’s inject a dash of your unique flair into those ordinary shoes and turn them into a fashion statement. No need for any professional training or complex tools. With a spoonful of creativity, a pinch of effort, and a sprinkle of time, we’ll create something extraordinary together. Let’s buckle up and infuse some fun into footwear by following the easier ideas given below.
DIY Girls Shoes:

Become part of the popular VSCO girl trend by decorating your shoes using the Cricut EasyPress Mini. Not only sunflower and chess pattern you can go with the pattern or creature you like and can personalize your simple white shoes into a piece of art!
To make DIY VSCO Girl shoes, first, choose a design file. Cut the vinyl and weed all the pieces. Pack the shoe tightly with a dish towel to create a firm area for pressing. Warm the Cricut EasyPress Mini, place vinyl on the shoe creatively, then press for 30 seconds. Work in small sections and limit the design to two layers. Use a Sharpie for additional drawing if desired.
Materials:
- Cricut EasyPress Mini
- Cricut Explore Air 2
- Cricut weeding tools
- Cricut mat
- Washi tape (optional)
- Tea towel
DIY Tie-Dye Shoes

You can add a vibrant twist to your summer wardrobe with the DIY Tie-Dye Shoes project. The project uses the Tulip Tie-Dye Party Kit and various techniques, from ombre to dotting. There’s a design for everyone, be it patriotic, rainbow-themed, or even inspired by a watermelon! This DIY project isn’t limited to lace shoes; you can also give a colorful makeover to strap shoes and slip-ons.
You can follow these simple steps to make tie-dyed shoes. Firstly, grab a Tulip Tie-Dye Party Kit. Then, using the ombre technique, apply the dye colors by wetting the shoes and lightly blending the different dye colors together. For a different design, you can try the ice dye technique or the night sky pattern. Get creative by including rainbow or watermelon designs for a summer vibe.
Materials:
- White shoes (canvas material preferably)
- Tie-dye colors
- Rubber bands
- Protective gloves
DIY Pencil Shoes

These fun and colorful shoes are designed to resemble a classic school pencil, with all the familiar shades of black, tan, school bus yellow, silver, and pink. Whether it’s back-to-school season or not, these DIY pencil shoes are a fun, creative, and conversation-starting addition to your wardrobe!
Get this vibrant look by removing the shoelaces and taping off sections as you paint. Begin with the toe, taping it off and painting it black. Next, tape off an inch from the black section and paint it tan. The shoe’s middle, including the tongue, should be painted yellow. The back is divided into two parts: painted silver and pink. After drying, re-lace the shoes. Optionally, apply a sealant like a scotch guard or an acrylic paint sealer for color longevity.
Materials:
- White Canvas Shoes
- Acrylic Craft Paint
- Paintbrush
- Blue tape
Crazy DIY Confetti Shoes Are Fun For Parties

This DIY project transforms a pair of plain white shoes into an exciting, multi-color spectacle, perfect for preparing for a party or any other celebration. The best part is that you can easily wash them and use them like regular shoes after the occasion.
To fashion this homemade project, start by applying a decoupage medium Mod Podge layer onto the designated shoe areas. Adhere the confetti to the areas covered in the medium. After it’s dried for a few hours, add a second layer of the medium and more confetti. Allow it to dry overnight, and your confetti-dipped shoes are ready to add sparkle to your step.
Materials:
- Confetti
- Sponge brush
- Fabric Mod Podge
- A pair of plain white shoes
Floral DIY Embroidered Canvas Shoes

Ingenious and captivating, the Floral DIY Embroidered Canvas Shoes take conventional canvas shoes to new stylistic heights. One of their key features is the embroidered floral design, created using regular embroidery floss, adding a burst of color and detail, perfect for spring and summer.
For getting this look of shoes, choose a canvas shoe with a suitable area for your design. Transfer your floral design onto the side of the shoe. Use 3 strands of 6-strand embroidery floss to embroider, starting with the leaves. All stitches, except the stems of the yellow flowers, use satin stitches. Unlace the shoes before stitching and utilize a flexible thimble for comfort. Secure or cover internal floss with fusible interfacing or fabric glue.
Materials:
- Canvas shoes
- Embroidery Floss
- Heavy-Duty Embroidery Needle
- A flexible thimble
- Marking Pen
- Floral Embroidery Pattern
Supplies Needed To Make Your Own Shamrock Shoes

Brimming with the color and charm of shamrocks, these canvas shoes are an exciting DIY project, offering a unique way to personalize your St. Patrick’s Day attire. The design has versatility and can adapt to other themes and holidays with creative modifications.
Begin with uploading shamrock designs into Silhouette Studio For the St. Patrick’s Day DIY Shamrock Shoes. Proceed with cutting these shapes out of heat transfer vinyl. Take out the additional vinyl and ready the designs for application. Utilize a mini iron to attach the vinyl shamrocks onto the canvas shoes. Continue these steps until entire shoes are filled with shamrocks.
Materials:
- Silhouette CAMEO
- Heat Transfer Vinyl
- Teflon sheet or thin cloth for pressing
- Mini Iron
- Weeding hook
- Plain canvas shoes
- Scissors
DIY Painted Ice Cream Sprinkles Shoes

Separate some paint into the compartments of the tray. Dip your brush into each paint color and apply small dabs to the surface of the shoes, altering the direction of your brush with each dab. While one coat is usually sufficient, you can add more if desired. Allow the shoes to dry for a few hours. Although the DecoArt Americana paint should adhere solidly to the canvas, consider using a waterproofing spray to ensure the longevity of your design.
Materials:
- Plain white sneakers
- DecoArt Americana Multi-Surface Satin paint
- Angled paint brush
- Plastic paint tray
How To Make Glitter Shoes

Have a penchant for sparkly shoes? With The Crafted Life’s DIY glitter shoe tutorial, you can transform any pair of canvas shoes into a dazzling, one-of-a-kind creation. This is also the best way to give your old shoes a new life.
To make glitter shoes, mix together decoupage and glitter in a ratio that suits the solidness of the coat you desire. Apply the mixture to the shoes in small sections, stuffing them with paper to keep them firm and prevent glitter from falling inside. After the first coat, allow the shoes to dry. Repeat the process for the second coat, let them dry completely, then seal with a layer of decoupage. Let it dry overnight and your glitter shoes are ready.
Materials:
- Shoes
- Glitter
- Decoupage
- A brush for applying the decoupage and glitter
- Masking tape
DIY Abstract Paint Splatter Shoes

If you love a bit of chaos and color, then the DIY Abstract Paint Splatter Shoes from Dream Green DIY will tickle your artistic heart. These shoes are perfect to add a lot of fun and colors to your simple outfit. So, Try it yourself and experience the cathartic effect of flinging paint!
For creating this DIY project, remove shoe laces and cover the soles and shoe inside with painter’s tape. Then, dip a brush into the paint and then in water, and splatter it onto the shoes. Repeat with different colors, allowing shoes to dry between each to prevent blending. Once done, discard the tape and let the shoes dry for 2-3 hours. Finally, re-lace your shoes, and they’re ready to wear.
Materials:
- Canvas shoes
- Plastic paint tray
- Painter’s tape
- A glass of tap water
- Thick bristle paint brush the author used a stencil brush)
- Scrap poster board or cardboard
- Paints
The Cutest Birthday Cake Shoes

Who says you can’t wear cake on your feet? Turn a drab pair of shoes into a fun, birthday-cake inspired pair with this DIY guide from A Subtle Revelry. Glammed up with multi-surface acrylic paints, these shoes are the perfect birthday accessory!
Create Birthday Cake Shoes by removing the laces from your shoes and taping off the area you plan on painting. Paint the toes of the shoe and let it dry. Do the same with different parts of the shoe using various colors. Using a fine-tip brush, paint small lines randomly for the ‘sprinkles.’ Lastly, re-lace your shoes with some ribbon, and voila, your Birthday Cake Shoes are now party-ready!
Materials:
- Pair of shoes in need of a makeover
- Multi-surface acrylic paint
- Paint palette
- Paint Brushes, including a fine-tip brush
- Blue painter’s tape
- Ribbon
DIY Saddle Shoes

If traditional black and white saddle shoes are not your style, you can create your colored version with this DIY tutorial. By painting a part of your white canvas shoes with a color that matches your personality or outfit, you will give a pop of color to it without going overboard.
Start by removing any tags and the laces. Paint the center portion of the shoe, avoiding the soles, eyelets, and edges by pulling back the piping and running your brush beneath it. To maintain clean lines around the eyelet and soles, swipe your brush in a straight line. If any paint gets on the metal grommets, slightly dampen a cotton swab and wipe it clean. Once done, let them dry before lacing them up.
Materials:
- White canvas sneakers
- Paint
- Stiff paintbrush, fabric paintbrush
- Fabric medium or water
- Cotton swabs
DIY Shoe Transformation
Give new life to forgotten footwear right from your closet! In this video, the creator guides you through out-of-the-box techniques to revamp your old shoes into stunning, head-turning pieces. Rustle up your shoes and craft supplies, and hop on board with us for this shoe makeover adventure. Get set to stride with style in your unique, refreshed shoes!
You can also see:
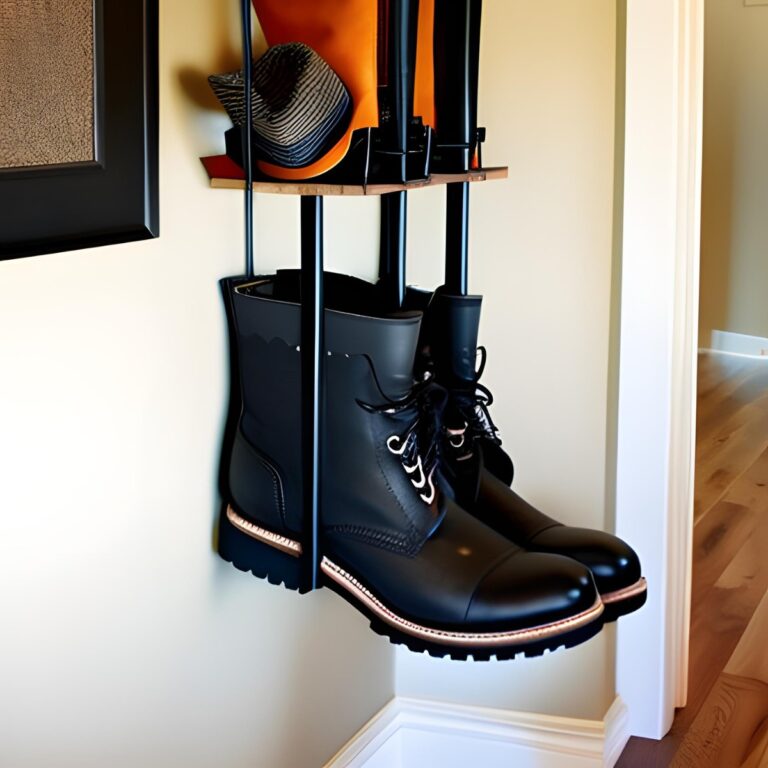
- DIY Boot Dryer Ideas: Our amazing DIY Boot Dryer Ideas can be fun and useful options, offering creative approaches to the common problem of dealing with wet shoes or used shoes all day.