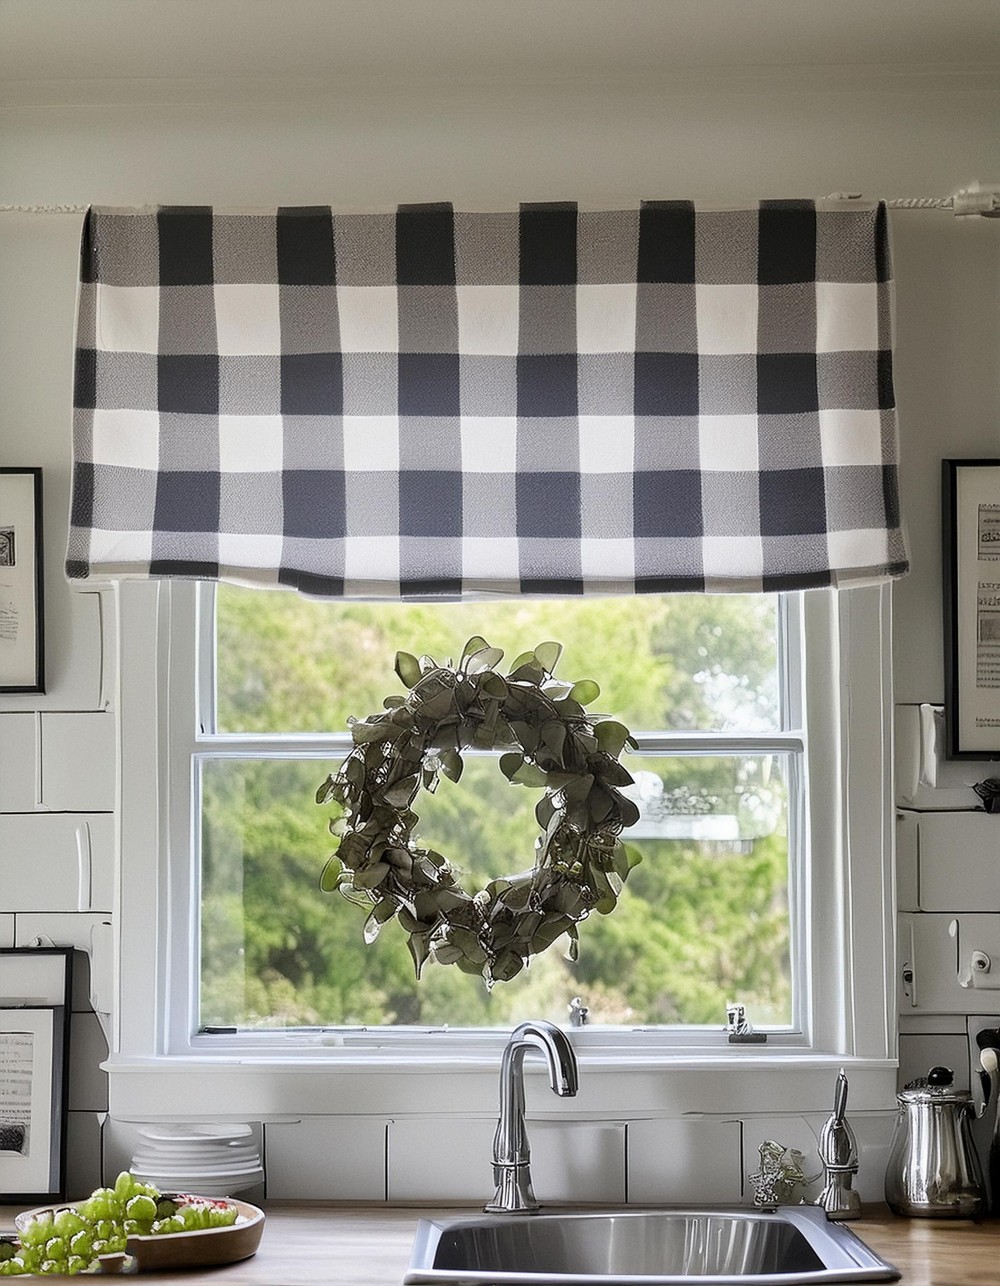
DIY Roman Shade Project For Vintage-Inspired Home Look
No more dull curtains or generic blinds! Transform your window into a masterpiece of light and shade with a charming DIY Roman Shade. With just a swoosh of fabric and simple folds, you can add a personal touch to your home. This creative DIY project lets you choose a pattern that sings to your style, ensuring each time the sun dances into your room, it plays a symphony of colour and warmth. So, engage in this simplest DIY project where each stitch brings your vision closer to reality a delightful harmony of function and fashion, all at the tips of your fingers.
making Your DIY Roman Shade
Materials:
- 2 yards of your selected fabric (choose something lightweight and easy to handle)
- 4 wooden dowels, each with a 1/4″ diameter and the desired width of your shade
- A wooden plank sized 1 x 2″ with the same width as your intended shade (paint it beforehand if desired)
- 2 mounting brackets (if you’re not planning to mount the shade inside your window frame)
- Screws for mounting purposes
- 2 eye screws (or eye hooks)
- Thin nylon string (macrame cord is a suitable alternative)
Tools:
- Wood staple gun
- Sewing machine
- Needle and thread
- Screwdriver (for bracket installation if applicable)

Step-by-step Guide
1. Measuring for Success
To kick things off, take a tape measure to your window to determine the exact height and width. Your choice of an outside or inside mount will impact the width of the shade you’re planning to create.
2. Tailoring Your Fabric
Cut your chosen fabric, leaving an allowance of 2 inches more than the final width and 7 inches longer than the desired length of your shade. This ensures that your shade will fully cover your window when extended.
3. Stitching the Edges
Press the sides and the bottom edge of the fabric twice by 1/2″ towards the back, and firmly sew these hems using your machine, keeping the bottom ends open for the dowels.
4. Dowel Pockets Creation
Calculate the distance between dowel casings by subtracting 3″ from the remaining fabric height (for the 1 x 2″ wood mount), then divide by 4. Measure from the bottom up, and mark for equal dowel spacing to ensure a neat finish.
5. Forming Horizontal Dowel Casings
Fold and pin at each marked line for accuracy, then sew across to create casings. A 1/2″ seam should suffice, and remember to slide the dowels in afterwards.
6. Placement of Blind Rings
Add the small blind rings by hand sewing them onto each dowel casing. Position one ring about 3″ from each end to create the lifting mechanism.
7. Assembling the Wooden Hanger
Screw the mounting brackets or the eye screws, depending on your mount preference, onto the 1 x 2″ wood. The brackets should be about 1″ from each end, and eye screws should be placed 3″ from each end.
8. Attaching the Fabric to the Wood
Roll the fabric blind over the wood so it snugly wraps from the broader side to the narrower side, and secure it with staples.

9. Stringing It Together
Attach the nylon string to the bottom right ring, thread it through each ring up to the top right eye screw, across to the left eye screw, and down through the rings on the left, leaving a 6″ tail.
10. Finishing the String Loop
Repeat the stringing process for the left side, ensuring square knots at each bottom ring for security.
11. Installing Your Creation
Mount your Roman shade to your window via the outside brackets or directly screw it into the window frame for an inside mount.
12. Stationary Hook Installation
Mount a stationary hook or screw at the base of your window frame to wrap the excess string around it, allowing you to easily adjust and secure the shade’s position.
Conclusion
Congratulations, your custom DIY Roman shade is now complete! Take pride in your newly minted handiwork, which adds elegance and a personal touch to your space.