Decorative Crochet Christmas Wreath for Playful Holiday Interiors
Elevate holiday décor with this Crochet Christmas Wreath Pattern for a festive, delightful accessory that brightens every room.
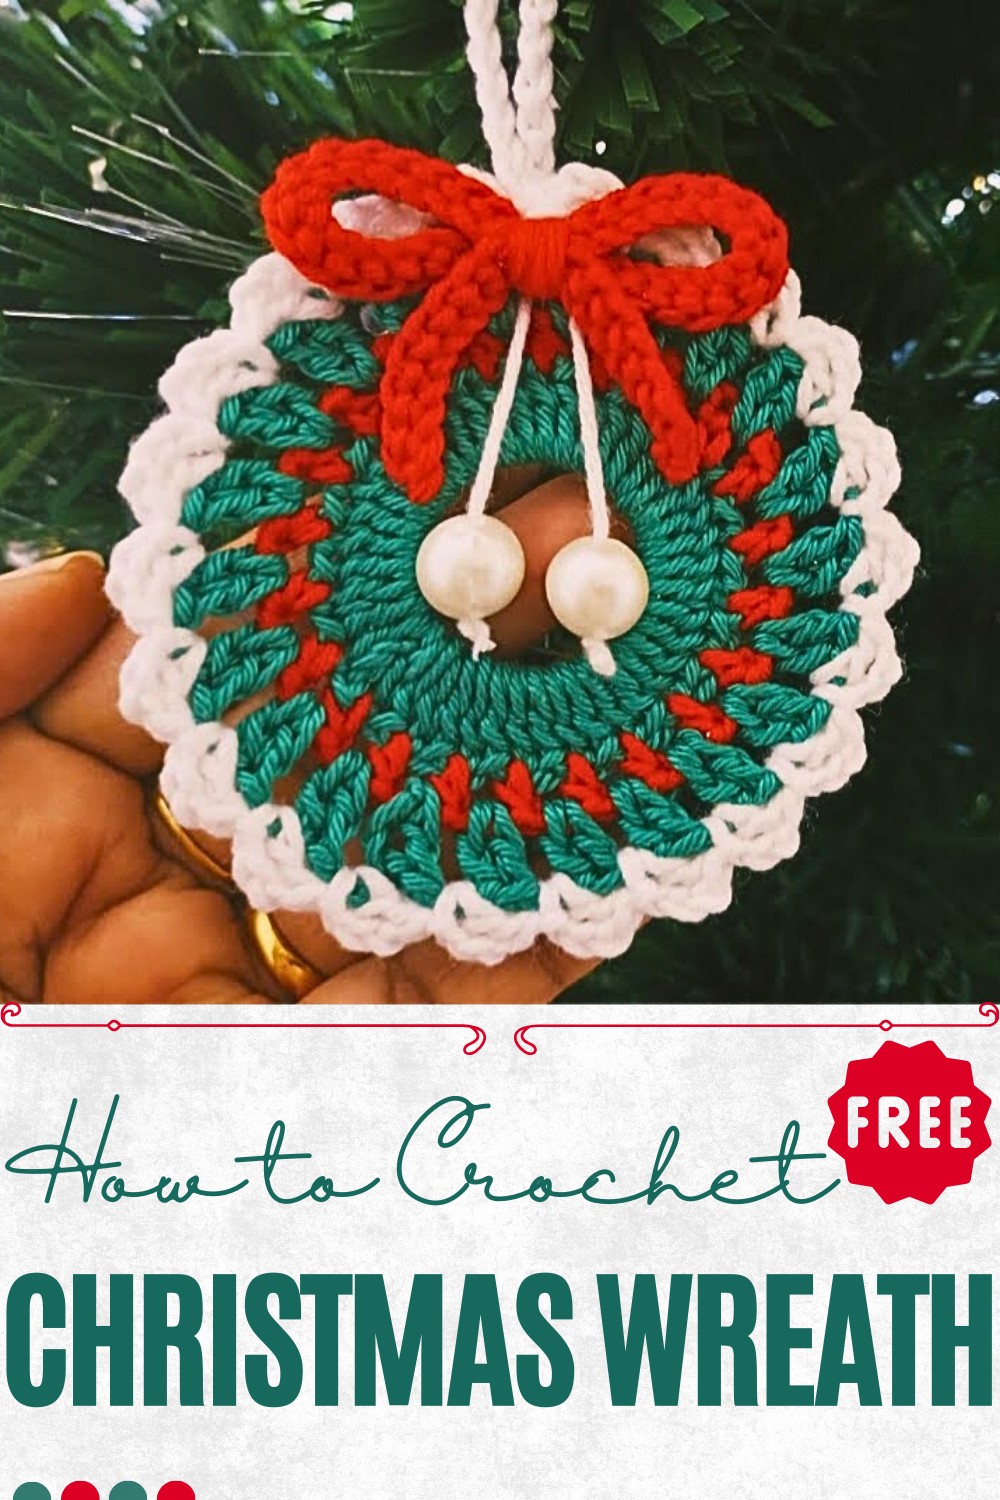
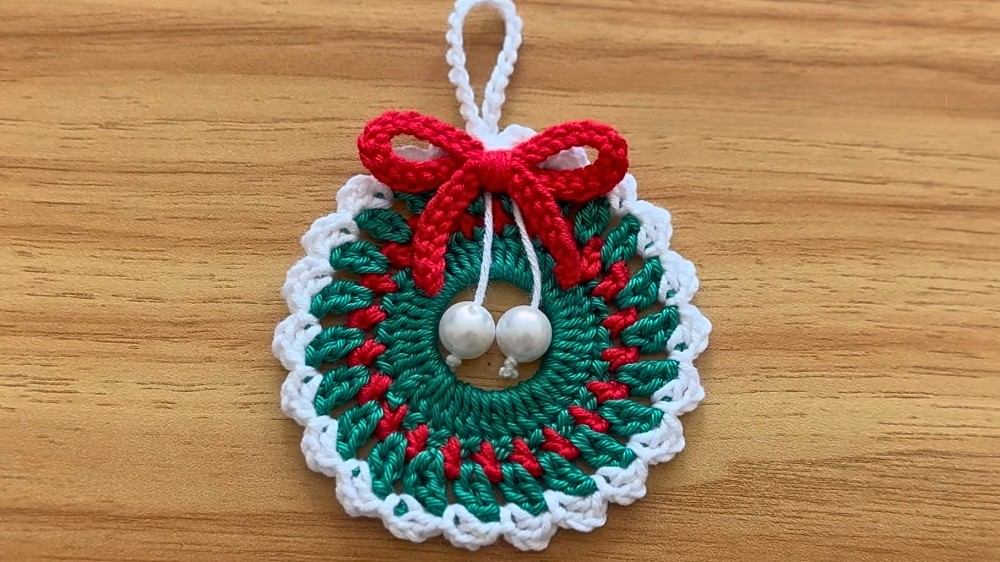
Brightening any home with a festive charm, this crochet Christmas wreath pattern transforms simple yarn into a captivating holiday decoration. Inspired by the timeless appeal of seasonal décor, the pattern weaves together layers of texture and color, creating a full, inviting wreath that captures the spirit of celebration. Each stitch contributes to a balanced structure, giving the piece a pleasing symmetry while maintaining a soft, handmade feel. Its uses are versatile: it can grace doors, walls, or mantels, or serve as a centerpiece, instantly elevating the holiday ambiance.
Bright Crochet Christmas Wreath for Cheerful Home Accents
The pattern encourages personalization, allowing makers to experiment with various color schemes, add tiny embellishments, or combine multiple wreaths for a striking display. The finished piece exudes beauty and charm, drawing attention without overwhelming other décor elements. Beyond aesthetics, the wreath brings joy through its process, offering a mindful, creative experience that rewards with a tangible, decorative outcome.
Lightweight yet sturdy, it can be easily stored and reused, ensuring it remains a cherished holiday accent for years to come. Perfect as a thoughtful handmade gift or a personal decorative statement, this crochet Christmas wreath balances functionality and visual appeal, enhancing any festive setting with warmth, elegance, and a touch of handmade magic.
Materials Needed
To create this crochet Christmas wreath, you’ll need:
- Yarn: Three colors of your choice (commonly green, red, and white).
- Crochet Hook: 3.5 mm.
- Ring Base: A keychain ring or any round base for the wreath.
- Scissors: For cutting yarn.
- Yarn Needle: For weaving in ends and securing parts of the wreath.
- Beads (Optional): Two small beads for decoration.
- Hot Glue (Optional): For attaching beads and accessories like bows.
Step-by-Step Instructions
1. Begin the Base Layer of the Wreath
- Create a slip knot and attach the yarn to the ring.
- Chain 3 stitches: This will serve as your starting point.
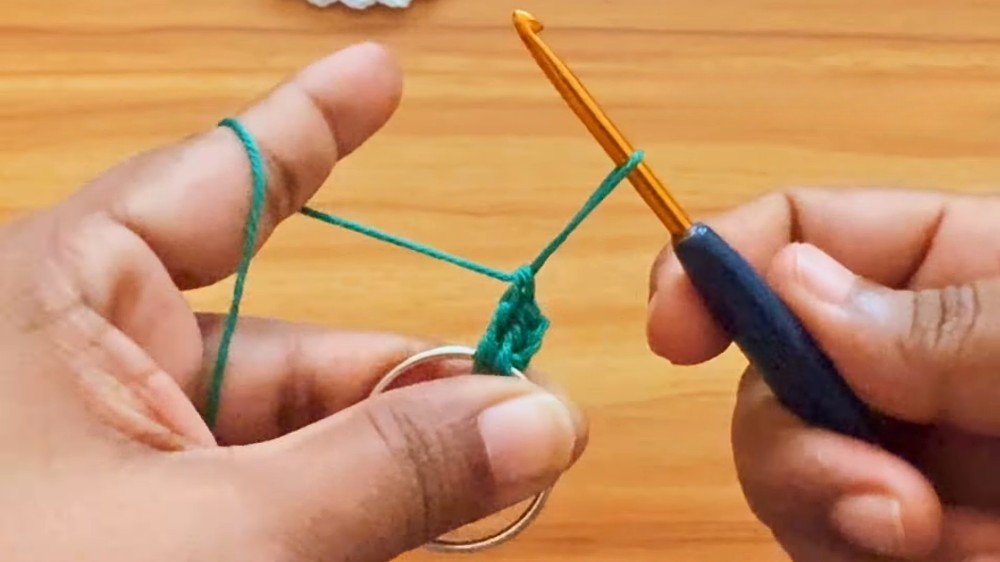
- Work double crochets (DC) around the ring:
- Yarn over, insert the hook into the ring, pull through, yarn over, pull through the first two loops, then yarn over again and pull through the next two loops to form a double crochet.
- Repeat this process until you have 42 double crochets covering the ring (you can adjust to 40, 44, or 46, depending on your ring size, but stick to multiples of two).
- Join the round: Slip stitch on top of the third chain.
- Finish the round: Chain 1 and cut the yarn.
2. Create the Red Accent Layer
- Attach the red yarn with a slip knot anywhere on the ring.
- Chain 3 stitches and begin with half double crochets (HDC):
- Skip one stitch, then work one HDC in the next stitch by yarning over, inserting the hook, pulling the yarn through, and pulling through all three loops at once.
- Chain 1 after each HDC.
- Repeat the sequence of skipping a stitch, making one HDC, and chaining one across the round.
- When you’ve completed the round, slip stitch to join, then chain 1 again, pull tight, and cut the yarn.
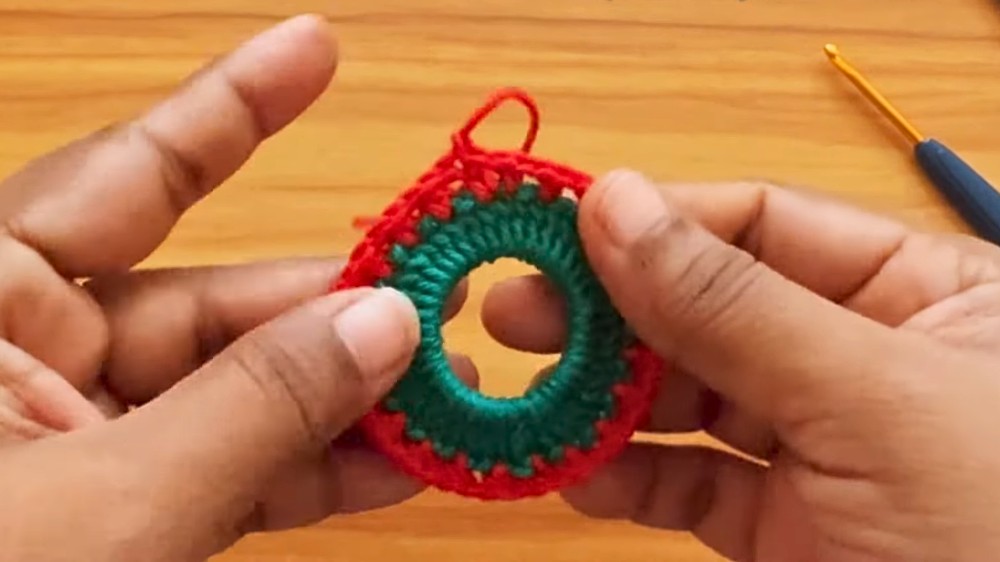
3. Create the Green Decorative Layer
- Attach the green yarn with a slip knot in a chain space from the red layer.
- Chain 4 stitches and then work double crochets in the same chain space:
- Yarn over, insert your hook, pull through, yarn over again, pull through the first two loops, then the next two loops.
- In the next chain space, work:
- 2 double crochets followed by chain 1.
- Continue the sequence of 2 double crochets with a chain in between for each chain space across the round.
- Slip stitch to join the round.
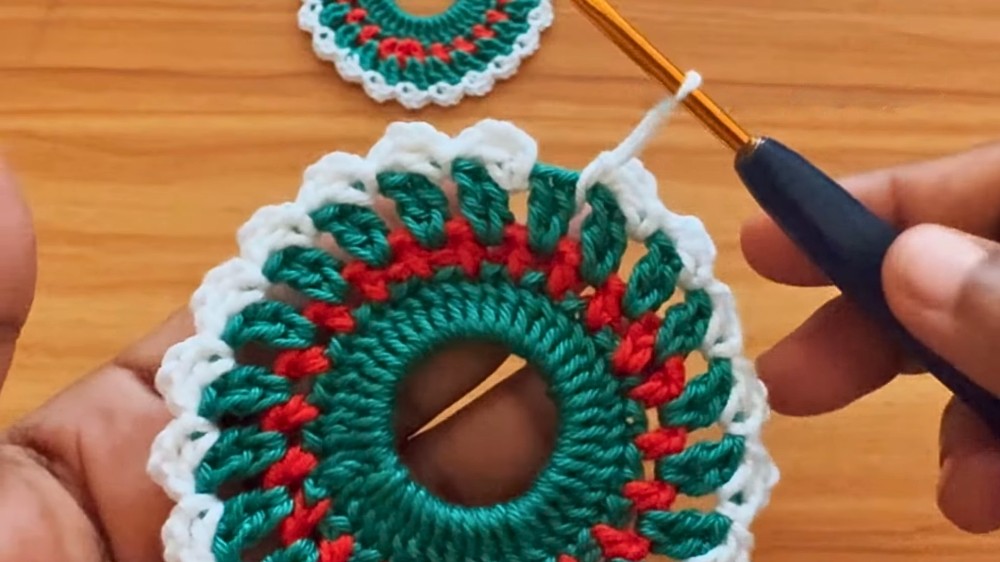
4. Add the White Decorative Edges
- Attach the white yarn with a slip knot in any chain space.
- Chain 3, and work 1 double crochet in the same chain space.
- Go to the next available chain space and work a slip stitch.
- Continue the pattern:
- Chain 3, make 1 double crochet in the same space, and slip stitch into the next chain space.
- Repeat the process until the end of the round.
- After the final stitch, slip stitch into the next chain space, secure the yarn with one chain, pull tight, and cut the yarn.
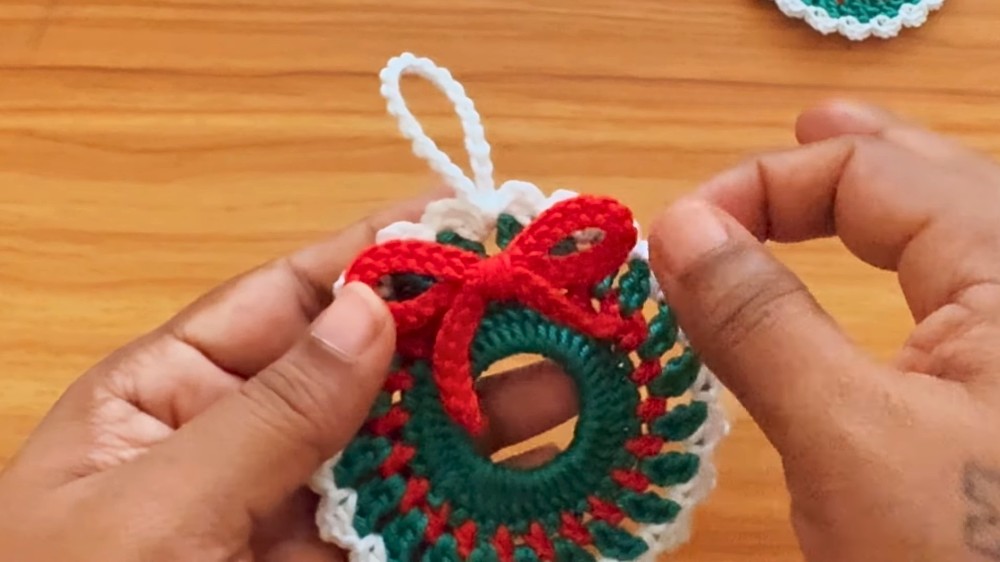
5. Create the Hanging Loop
- Insert your crochet hook into a chain space and chain 20 stitches.
- Slip stitch to the same chain space to form a loop.
- Secure the loop with one chain, pull the yarn tight, and cut the yarn.
- Use your yarn needle to weave in loose ends from all yarns.
6. Add Optional Decorations
- Beads: Thread a piece of yarn through any bead and tie knots to secure them. You can use hot glue or hand-sew the beads to the wreath. Attach them symmetrically for balance.
- Bows: Create or attach a crochet bow following the tutorial linked in the description of the video, or attach a premade bow using hot glue for additional decoration.
Special Features
- Versatile Design: Works as a Christmas ornament, a gift topper, or part of a garland string.
- Customizable Look: Personalize your wreaths with various yarn colors, bows, beads, or other creative embellishments.
- Quick to Make: The simple stitchwork and small size make this a fast project that can be completed in less than an hour.
- Great for Beginners: This pattern uses basic crochet techniques like DC, HDC, slip stitches, and chains, making it accessible to newer crocheters.
Tutor’s Suggestions
- Adjust Stitch Count for Ring Size: If using a larger or smaller ring, adjust the number of double crochets accordingly, but ensure they remain multiples of two for optimal results.
- Consistent Tension: Maintain even tension throughout to ensure the wreath lays flat and looks uniform.
- Try Alternative Bases: If you don’t have a keychain ring, experiment with other circular bases, like wooden or metal hoops.
- Experiment with Decorations: Be creative and use other embellishments such as buttons or glittery yarn for added festivity.
Level of Difficulty
- Beginner to Intermediate:
- The project is beginner-friendly but includes slightly more advanced techniques like attaching yarn to new spaces and maintaining consistency in the decorative edging.
Uses
- Christmas Tree Decoration: Hang these ornaments to add a handmade touch to your tree.
- Holiday Gift Toppers: Use them as embellishments for wrapped presents.
- Seasonal Home Decor: Create multiple wreaths to make garlands, table toppers, or mantle decorations.
- Crochet Gifts: Perfect for gifting to friends and family.
Tip
When working with multiple yarn colors, weave in your ends after completing each layer to avoid tangles and ensure a polished look at the end of the project.
Conclusion
This crochet Christmas wreath pattern is a lovely and fast project that blends festive charm with simplicity. With minimal materials and easy-to-follow steps, it’s a great way to add a personal touch to your holiday season through ornaments or decorations.