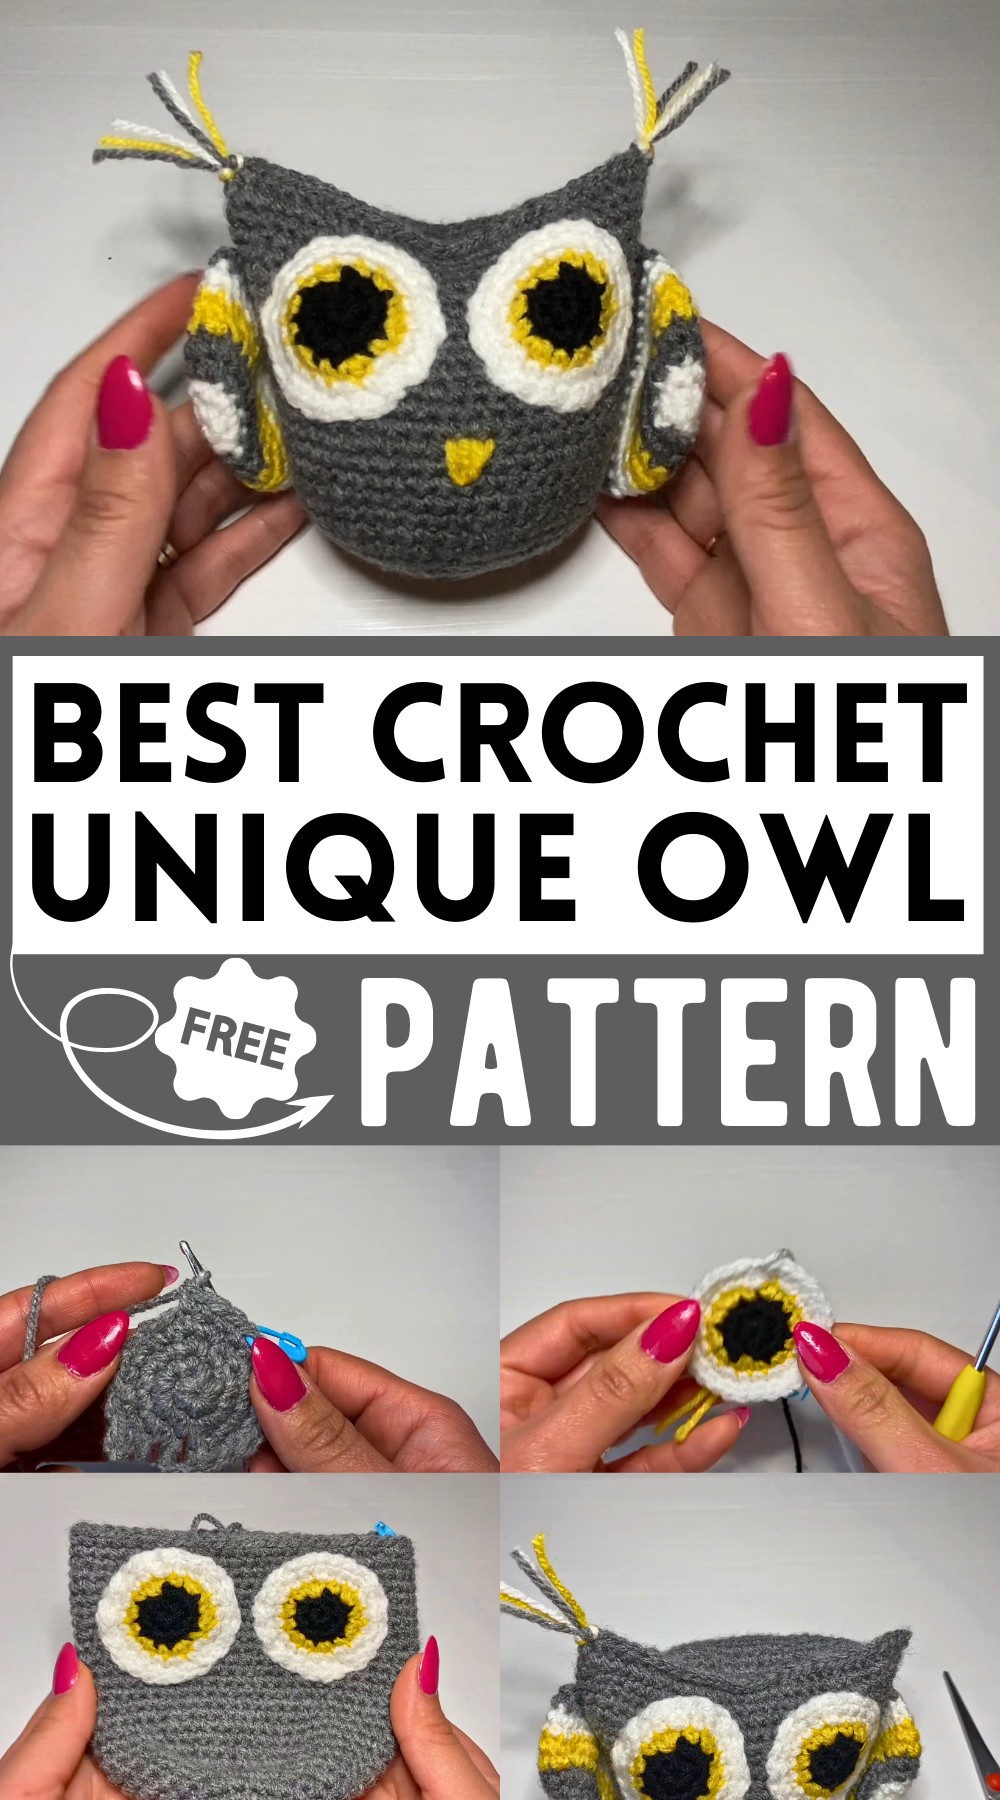
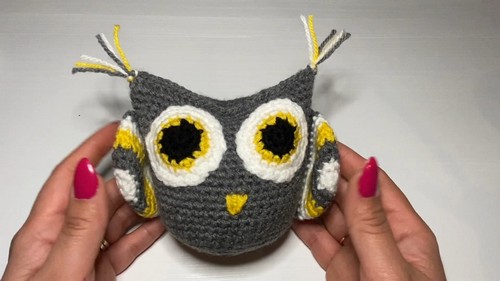
Crochet Unique Owl Pattern For Nursery Decorations
Why Love This Pattern?
- Visual and Written Instructions: The combination of visual demonstration and the option of a written pattern (available via the link in the description) caters to different learning preferences, ensuring that viewers can follow along in the manner that suits them best.
- Creative Personalization: The pattern leaves room for creativity, allowing crocheters to choose their colors for the owl’s body, eyes, and wings. This adds a personal touch to each creation.
- Engaging and Enjoyable: Rashmi’s clear, calm, and engaging teaching style makes the process enjoyable. It’s easy to keep calm and crochet along, making the project a relaxing and rewarding experience.
- Practical Tips: Throughout the tutorial, practical tips for securing stitches, changing colors, and assembling the owl add value, helping ensure a polished final product.
How To Crochet Amigurumi Owl
Materials Needed:
- Yarn in various colors (main color, black, yellow, white, gray)
- Crochet hook appropriate for the yarn
- Stitch markers
- Darning needle
- Fiberfill for stuffing
Abbreviations:
- ch: chain
- sc: single crochet
- inc: increase (2 sc in one stitch)
- sl st: slip stitch
- MR: magic ring
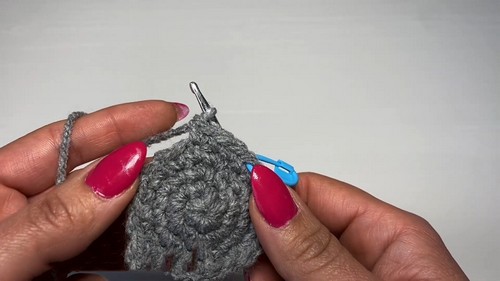
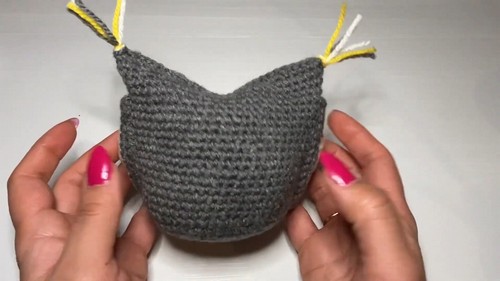
Owl Body:
- Round 1: Create a magic ring with the main color yarn. Work 6 sc into the MR. Alternatively, you can start with a slip knot and chain 2, then work 6 sc into the second chain from the hook.
- Round 2: Inc in each stitch (12 sc).
- Round 3: (1 sc, inc) repeat around (18 sc).
- Round 4: (2 sc, inc) repeat around (24 sc).
- Round 5: (3 sc, inc) repeat around (30 sc).
- Round 6: (4 sc, inc) repeat around (36 sc).
- Round 7: (5 sc, inc) repeat around (42 sc).
- Round 8: (6 sc, inc) repeat around (48 sc).
- Round 9: (7 sc, inc) repeat around (54 sc).
- Rounds 10-29: sc in each stitch around (54 sc per round). [20 rounds of sc]
After completing the body, pull the loop to secure the stitch, and set it aside.
Owl Eyes:
- Round 1: Using black yarn, create a magic ring or slip knot chain method. Work 6 sc into the MR or the second chain from the hook.
- Round 2: Inc in each stitch around (12 sc).
- Round 3: Attach yellow yarn. (1 sc, inc) repeat around (18 sc).
- Round 4: Attach white yarn. (2 sc, inc) repeat around (24 sc).
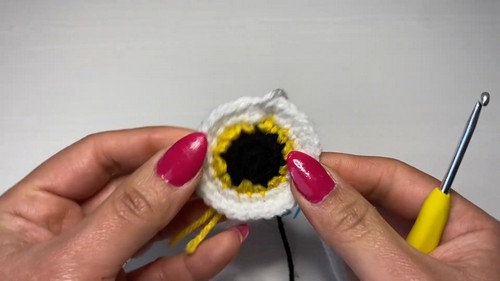
- Round 5: Continue with white yarn. (3 sc, inc) repeat around (30 sc).
Finish by securing the stitch and leaving a long tail for sewing.
Repeat these steps to create the second eye.
Owl Wings:
- Round 1: Using white yarn, create a slip knot and chain 2. Work 6 sc into the second chain from the hook (6 sc).
- Round 2: (2 sc in each stitch) repeat around (12 sc).
- Round 3: Attach gray yarn. (1 sc, inc) repeat around (18 sc).
- Round 4: (2 sc, inc, 1 sc) repeat around (24 sc).
- Round 5: Attach yellow yarn. (3 sc, inc) repeat around (30 sc).
- Rounds 6-7: Switch to white yarn and work sc in each stitch around (30 sc).
- Round 8: Switch to gray yarn, work sc in each stitch around (30 sc).
Finish by securing the stitch and leaving a long tail for sewing.
Repeat these steps to create the second wing.
Owl Assembly:
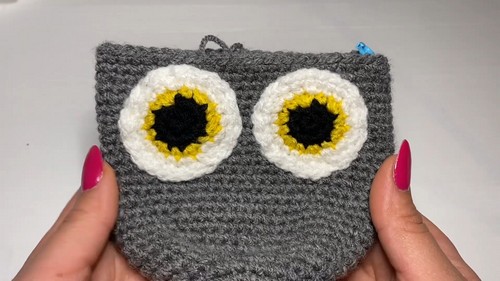
- Sewing the Eyes:
- Pinch the top of the owl’s body to flatten it and decide the front side.
- Attach and sew the eyes with approximately half an inch (1 cm) between them, leaving one round from the top round visible.
- Creating the Owl’s Beak:
- Use yellow yarn and a darning needle to create a triangular nose between the eyes.
- Embroider the triangle shape and fill it with the yellow yarn.
- Attaching the Wings:
- Pinch the body again to align the top and bottom part and mark the positions.
- Align the wings to the side of the body, making sure the top point of the wing aligns with the body’s edge.
- Sew the wings securely onto the body.
- Stuffing the Body:
- Fill the owl with fiberfill to the desired firmness.
- Close the top with sc, making sure to connect stitches from both the front and back side.
- Secure the stitches and weave in the ends.
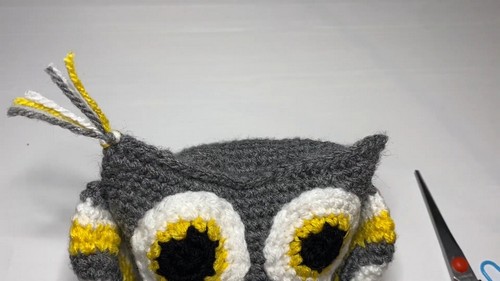
- Adding Tassels:
- Cut pieces of yellow, gray, and white yarn (about 3-4 inches).
- Fold them in half to create a loop.
- Insert the hook into the corner stitch, pull the loop through, yarn over, and pull the yarn ends through the loop, then tighten.
- Trim the ends to even them out.
Your crochet owl is now complete!
Final Touches:
- Make sure all ends are weaved in and the fiberfill is evenly distributed.
- Adjust any details as needed to ensure everything is secure.
Congratulations! You’ve made a cute little crochet owl.