13 Free Crochet Turtle Patterns For Amigurumi
Turtles are very unique animals. So, following these crochet turtle patterns to recreate them as amigurumi, loveys, and earrings will give you a new experience compared to the same kind of animals. These will also be educational gifts to teach kids about turtles and their anatomy. Let’s get started!

Which Techniques are needed for crocheting the Turtle amigurumi?
Since most patterns will not revise the basic crochet techniques needed for crochet turtle amigurumi, below I have written the guides:
- Chain: Yarn over the hook and pull it through the loop on your hook.
- Single Crochet: Insert your hook into the stitch, yarn over your hook, and pull the yarn back through the stitch (now you should have two loops on your hook). Yarn over your hook again and pull through both loops on the hook.
- Half Double Crochet: Yarn over, then insert your hook into the stitch. Yarn over your hook again and pull back through the stitch (leaving three loops on your hook). Now, yarn over the hook and pull it through all three loops.
- Slip Stitch: Insert your hook into a stitch, yarn over and draw the yarn through the stitch and through the loop on your hook in one motion.
- Increase: Increasing essentially means making two or more stitches in the same stitch. This is most commonly done with a single crochet stitch. You would do two single crochet stitches into the same stitch.
- Decrease: This is done by starting a stitch (like single crochet or double crochet), but instead of completing it, you start another stitch into the next stitch. You then complete all of them together.
- Magic Circle
- Basic Sewing with yarn needle
What is the best yarn for the crochet turtle patterns?
Both cotton and acrylic yarns can be used for crocheting turtle amigurumi. Cotton is durable, holds shape well and is washable, too. Acrylic, on the other hand, is cheap, comes in many colors and is easy to work with.
No-Sew Amigurumi Turtle

Create a cute little turtle friend without having to juggle needles and thread! With a Crochet No-Sew Amigurumi Turtle pattern, you can do just that. All you need is your crochet hook, some yarn, and a bit of stuffing. It’s like magic—loop by loop, your yarn turns into a charming turtle with a cozy shell.
There’s no fuss with sewing pieces together; this crafty adventure lets you crochet everything as one piece. Get ready to make a new buddy who’s perfect for cuddles and brings a smile to your face with its handmade charm!
Materials
- Chunky Yarn
- 5mm hook
- Yarn needles
- Scissors
- 12mm Safety Eyes
- Stuffing
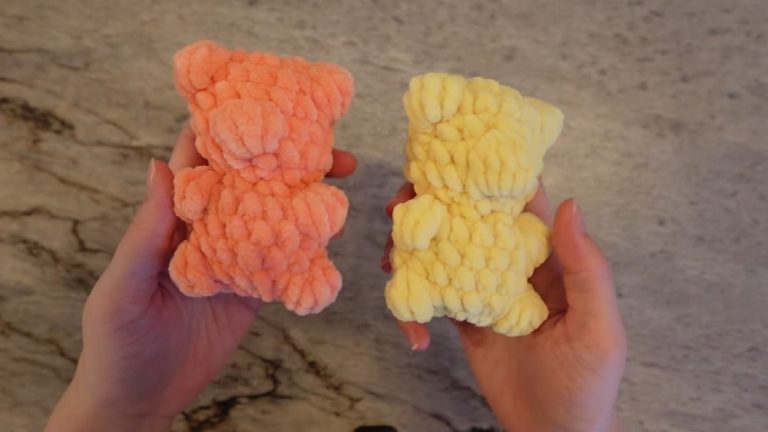
Easy Turtle

This Easy Crochet Turtle pattern is your ticket to make an adorable new friend, one simple stitch at a time. Whether you’re a beginner or a seasoned crocheter, this pattern is a breeze, leading you to create a cute turtle that’s perfect for gifting, playing, or simply making you smile. Get ready to turn yarn into your very own snuggly turtle pal, ready for adventures or cozy times on the shelf!
Materials
- Yarn Chenille
- Hook 5mm
- eyes 6.0mm
Crochet Turtle Keychain

Make a tiny turtle that can follow you wherever you go, hanging on your keys or bag! With the Crochet Turtle Keychain pattern, this little dream can come true. It’s a fun, easy project that turns yarn into a mini turtle buddy. You’ll hook and loop, adding a bit of charm to your keys, making them impossible to ignore.
Whether you’re looking for a sweet gift or a cheerful addition to your day, this pint-sized turtle keychain is perfect. It’s not just a craft; it’s a little joy you can create and carry with you!
Materials
- Yarn
- 2.5mm Hook
Tully The Turtle
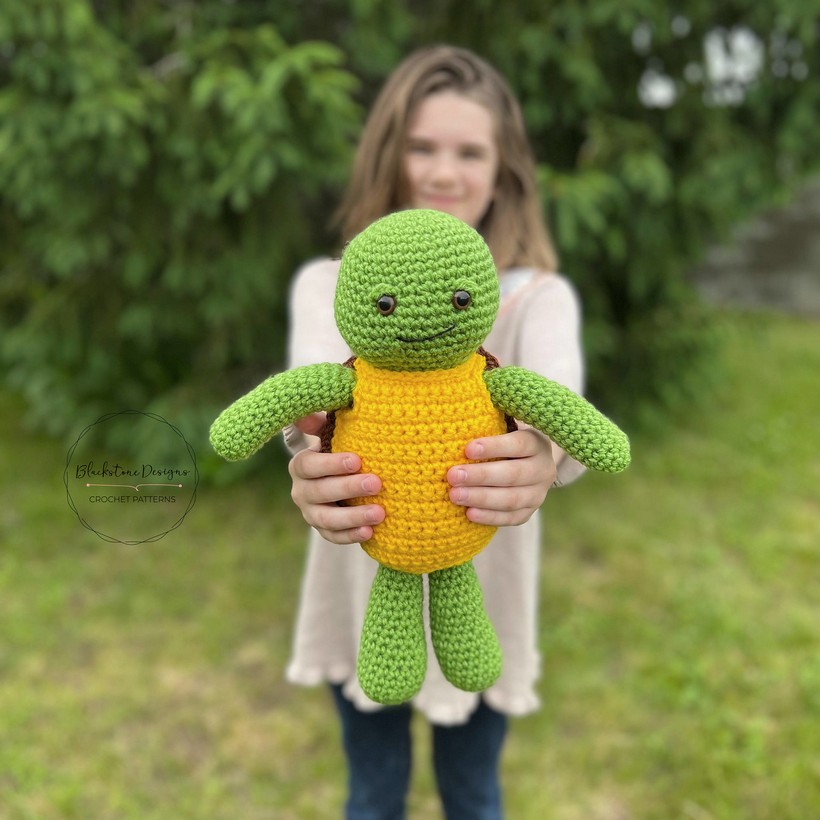
Uses: “Tully The Turtle” is the perfect companion for kids as a colorful, touch-friendly toy! This lovely turtle is also an excellent heartwarming gift for a baby shower or a birthday.
Materials:
- Worsted Weight Yarn
- 5mm crochet hook
Making:
The head is crocheted in rounds, gradually increasing the stitches to create an oval shape, then decreasing to close the head. Insert safety eyes before stuffing and finishing the head. The body is crocheted in a similar manner as the head, starting with a magic ring and increasing stitches in rounds, then decreasing until the desired body shape is achieved. Stuff the body before attaching it to the head.
The turtle’s shell is crocheted separately, starting from the center and working outwards, increasing the stitches to create an oval shape. After completing the shell, attach it to the turtle’s back.
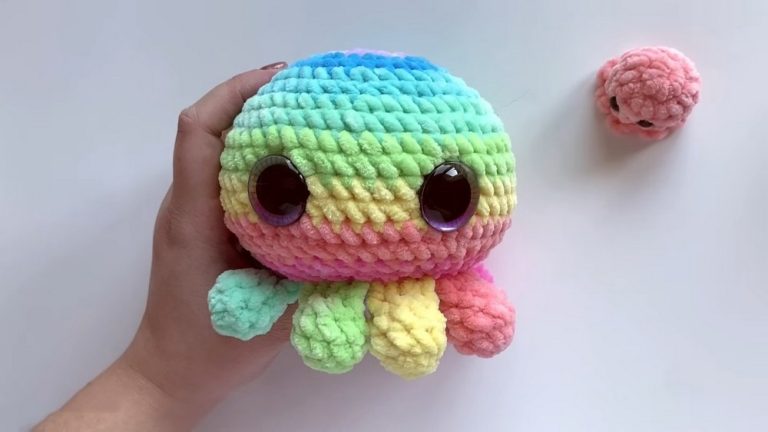
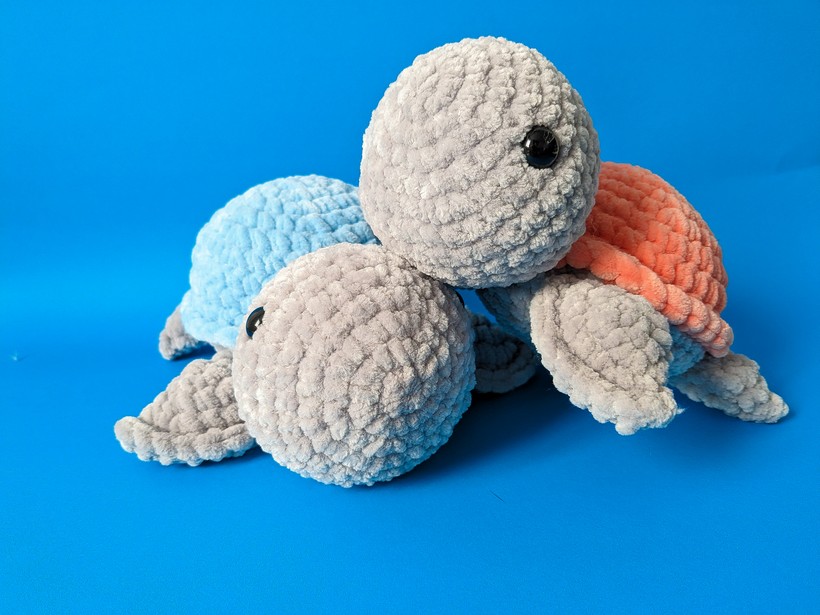
Amigurumi Sea Turtle

Uses: Bringing a splash of colors and joy, the “Amigurumi Sea Turtle” is the perfect companion for kids and adults alike! Perfect as a cuddly sidekick at night, this amigurumi turtle also doubles as a joyful home decor item, adding a seaside charm wherever it ventures.
Materials:
- Bernat Blanket yarn
- Size N crochet hook
Making:
The head begins with 6 single crochets in magic ring, and the number of stitches expands in subsequent rows to create round shape. Attach safety eyes between rows 3 and 4, and The head is stuffed before fastening off. Construct the tail using 3 single crochets in a magic ring, and increase the stitches in subsequent rows to get the shape! Fasten off the tail for attaching later.
The shell starts with 6 single crochets in a magic ring and expands the stitches in the next rows. It’s stuffed after subsequent rows and before fastening off and hiding ends inside. The scallops are sewn above the head to help it stay level.
Turtle Amigurumi
Uses: Playtime, bedtime stories, or just as a playmate, your “Turtle Amigurumi” is always ready for action! Share the love and warmth by gifting these charming turtles on birthdays or special occasions.
Materials:
- Light worsted yarn
- 3mm crochet hook
Making:
It involves creating several components: the head, four legs, top shell, and bottom shell, all stitched separately and later assembled together. The head was formed by magic circle of 6 single crochets and increased incrementally in subsequent rows to take shape.
Safety eyes are inserted between the 10th and 11th rows. The head and neck are stuffed appropriately and then slip stitch seals the neck. The top shell begins with magic circle of 6 single crochets and increases gradually in the following rounds to form the shape. The shell doesn’t require overstuffing, just enough to give it firm yet flat shape. The head, legs, and shell are all secured and assembled together.
Baby Turtle lovey
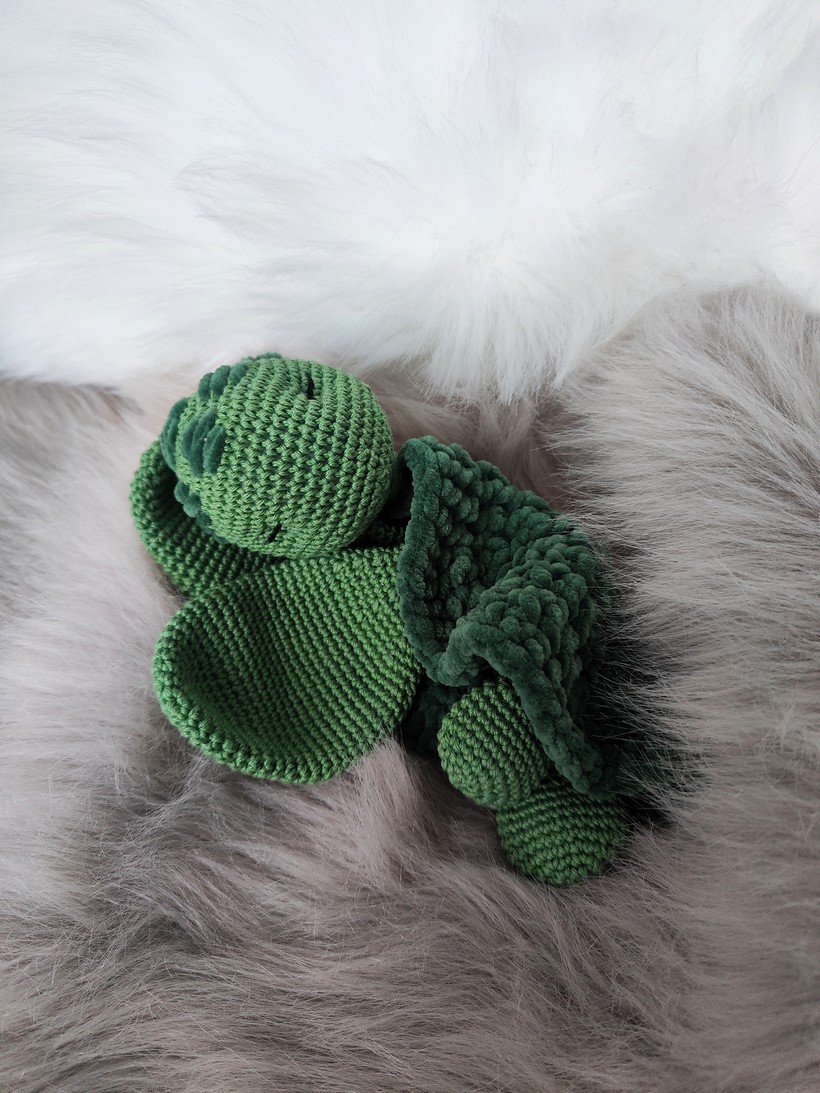
Uses: Sure to be the new best friend for a growing child, the “Baby Turtle Lovey” offers comfort and security. Its size makes it easy to carry and snuggle with, not to mention its power to turn everyday moments into memorable, picture-perfect occasions.
Materials:
- Cotton and Chenille yarn
- 2.5mm and 5mm crochet hook
Making:
The head and fins are made with cotton yarn, while the shell designed with extra soft chenille yarn, ensuring comfort at all times. The head Starts with magic ring, and you continue increasing the stitch count in each round until the 9th round.
The next rounds involve one single crochet in each stitch, up to the 16th round! Decrease the stitches afterward, stuffing the turtle’s head before closing. The shell contains magic ring, chain stitches, double crochets (dc), and half double crochets (hdc). The stitch count in each round modifies up to the 5th round! The yarn is then cut, and the ends are secured.
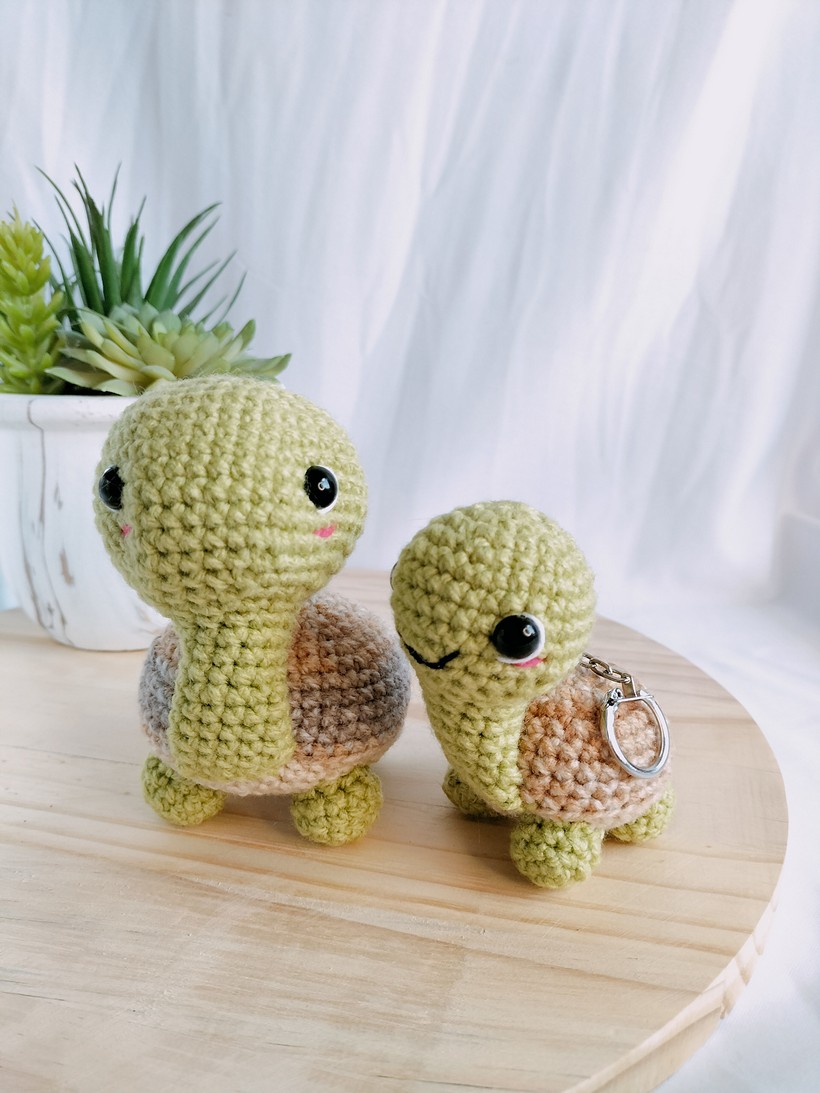
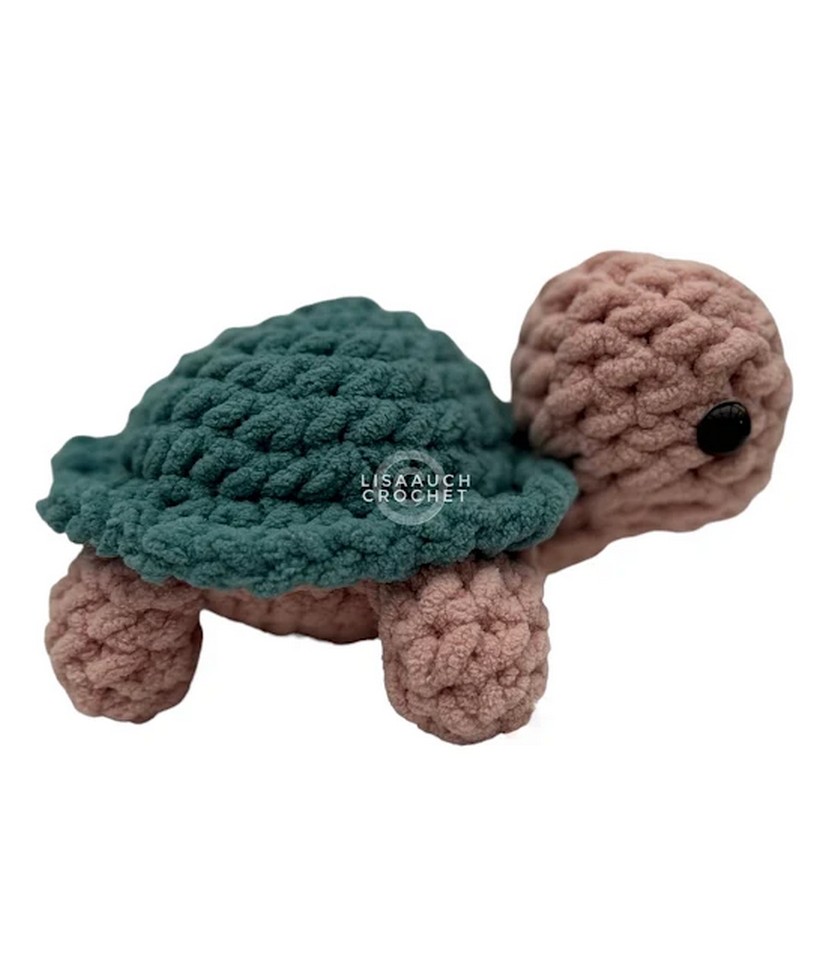
Small Amigurumi Turtle
Uses: With adorable proportions and a cute demeanor, our tiny friend cherishes the title of a ‘show-stopper.’ Due to its compact size, the “Small Amigurumi Turtle” is a perfect companion for your desk or as a thoughtful gift.
Materials:
- 6 weight yarn
- 5mm and 5mm crochet hook
Making:
Start building the Front and Back Legs by creating a magic ring of 7 single crochets (sc), and then gradually increase the stitch count in the following rounds. Note that the number of rounds and stitches will differ between the front and back legs.
After that, sew the legs onto the body. To start the shell, make a magic ring with 6 single crochets (sc) and increase the stitch count with each round until the 6th. For rounds 9 through 11, use front-loop-only and back-loop-only stitches specifically. To prepare for attaching the legs, add and skip some chains at selected spots on the body. This creates openings that make the sewing of the legs onto the body neat and easy.
Chenille Sea Turtle
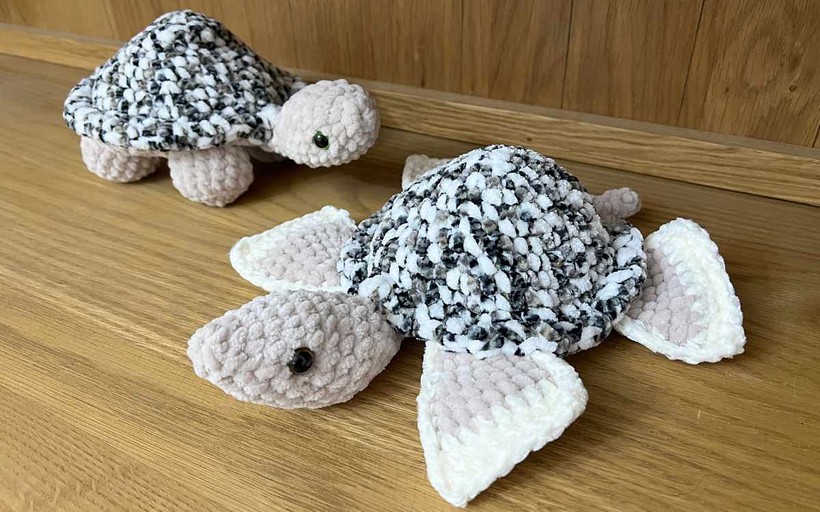
Uses: Ideal as a cozy companion or a unique gift item, It sits comfortably on a desk, car dashboard, or in the arms of young ones. Its smooth texture promises snug comfort, and its cute appearance invokes a playful ambiance.
Materials:
- Chenille yarn
- 5.5mm crochet hook
Making:
The creation of this sea turtle involves crocheting the shell, head, tail, flippers, and plastron separately. The shell is the unique feature; made with carefully stitched rounds, topped with intricate puff stitches. Each piece follows specific stitch patterns and counts, sewn together seamlessly. The pattern employs the user-friendly technique of attaching components as they are made, making the process streamlined and satisfying.
Sea Turtle Earring

Uses: Sea turtle earrings uniquely blend nature-inspired beauty and appeal. These enchanting ornaments amplify the allure of any attire, making a grand statement about a love for marine life and a sense of elegant fashion. Universally loved, these earrings never fail to leave an endearing impression, whether at a casual gathering or an outing to the beach.
Materials:
- Crochet thread
- 1.25mm crochet hook
Making:
The creation starts with the fundamental piece, the Turtle Body, made with dark green crochet thread. Initially, the magic ring technique is used, followed by several rounds of single crochets (SC), increases (INC), and decreases (DEC) to achieve the desired shape and size of the miniature sea turtle.
Mi-Shell Turtle
Uses: With its ability to be transformed into an adorable keyring or a plush toy, it serves as a versatile gem. Ideal as a last-minute gift or a delightful addition to your collection, this easy project fascinates both beginners and experienced crochet enthusiasts.
Materials:
- Chunky Yarn or Double Knit Yarn
- 6.00mm or 3.00 mm Crochet Hook
Making:
The process of creating the Mi-Shell Turtle begins with sculpting the Turtle Body, shaping it up through repeated bead stitches and rows. The Legs are then crocheted along, filled with stuffing, and attached to the body. A similar procedure followed for the Head studded with safety eyes and given a firm shape through the stuffing.
The Belly then follows suit, using the single crochet method to bring the design to life, and the legs and head are expertly attached. A Tail and the Top of the Shell are the essential final touches that bring the overall charm of the turtle to the fore.
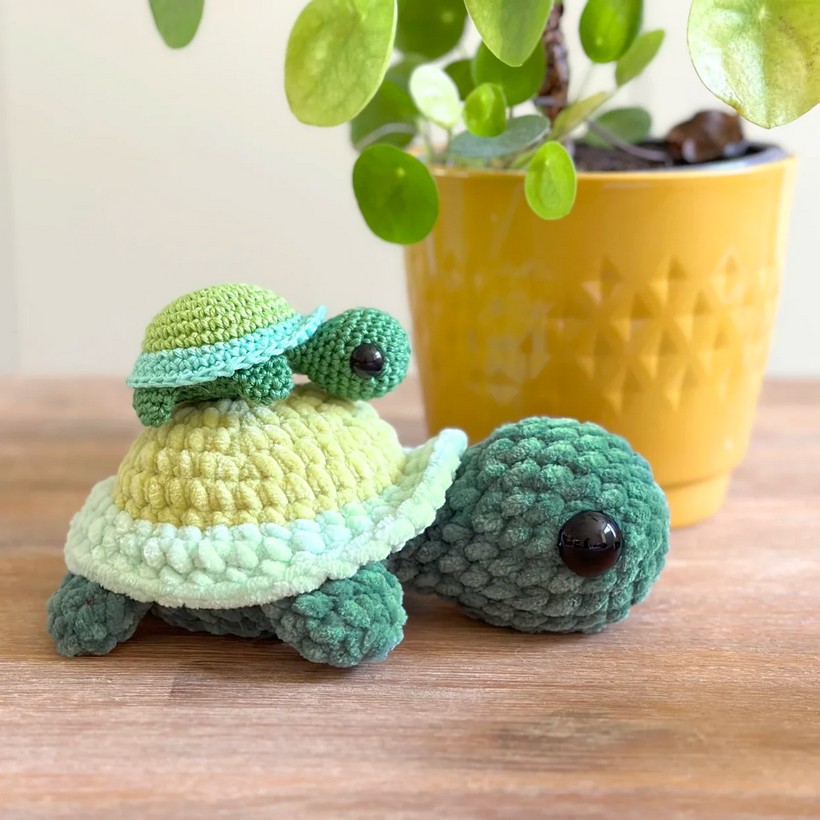
Turtle With Removable Shell

Uses: The removable shell feature adds an interactive element, making it a popular choice for playtime for the young or as a teaching tool about nature. The Turtle with a unique Removable Shell is a charming gift, a cheerful desk accessory, or a lovely addition to any collection.
Materials:
- Chunky Yarn
- 6.00mm Crochet Hook
Making:
Create the Head and Body together, starting with a magic ring and continuing with multiple rounds of single crochet (sc) to define the turtle’s size and shape. Next, craft the Legs and which are developed through repeated rounds and then stuffed to achieve an accurate turtle form.
Finally, focus on the main highlight – the Removable Shell, made in three parts: two for the top and one for the bottom. Stitch each piece carefully, including openings for the legs, head, and tail, to give the turtle a lifelike appearance.
Mini Turtle Amigurumi
Uses: A cute, easy, and quick addition to any amigurumi lover’s collection! Adorn your desk, bag, or car with this little turtle, attracting appreciative applause.
Materials:
- Cotton Yarn
- 2.5mm Crochet Hook
Making:
The turtle’s body is covered in green and dark green! After the initial establishment of magic ring, each round involves an increase in stitches until it reaches a size of 36 stitches, after which the color is changed to dark green, and the legs are attached.
The head, made with dark green yarn, starts with magic ring similar to the body and gradually increases to form the size. It’s crucial to mark the 5th and 15th stitch of the fourth round – as it’s the placement for safety eyes. The head is then attached between the 8th and 12th rounds of the body.