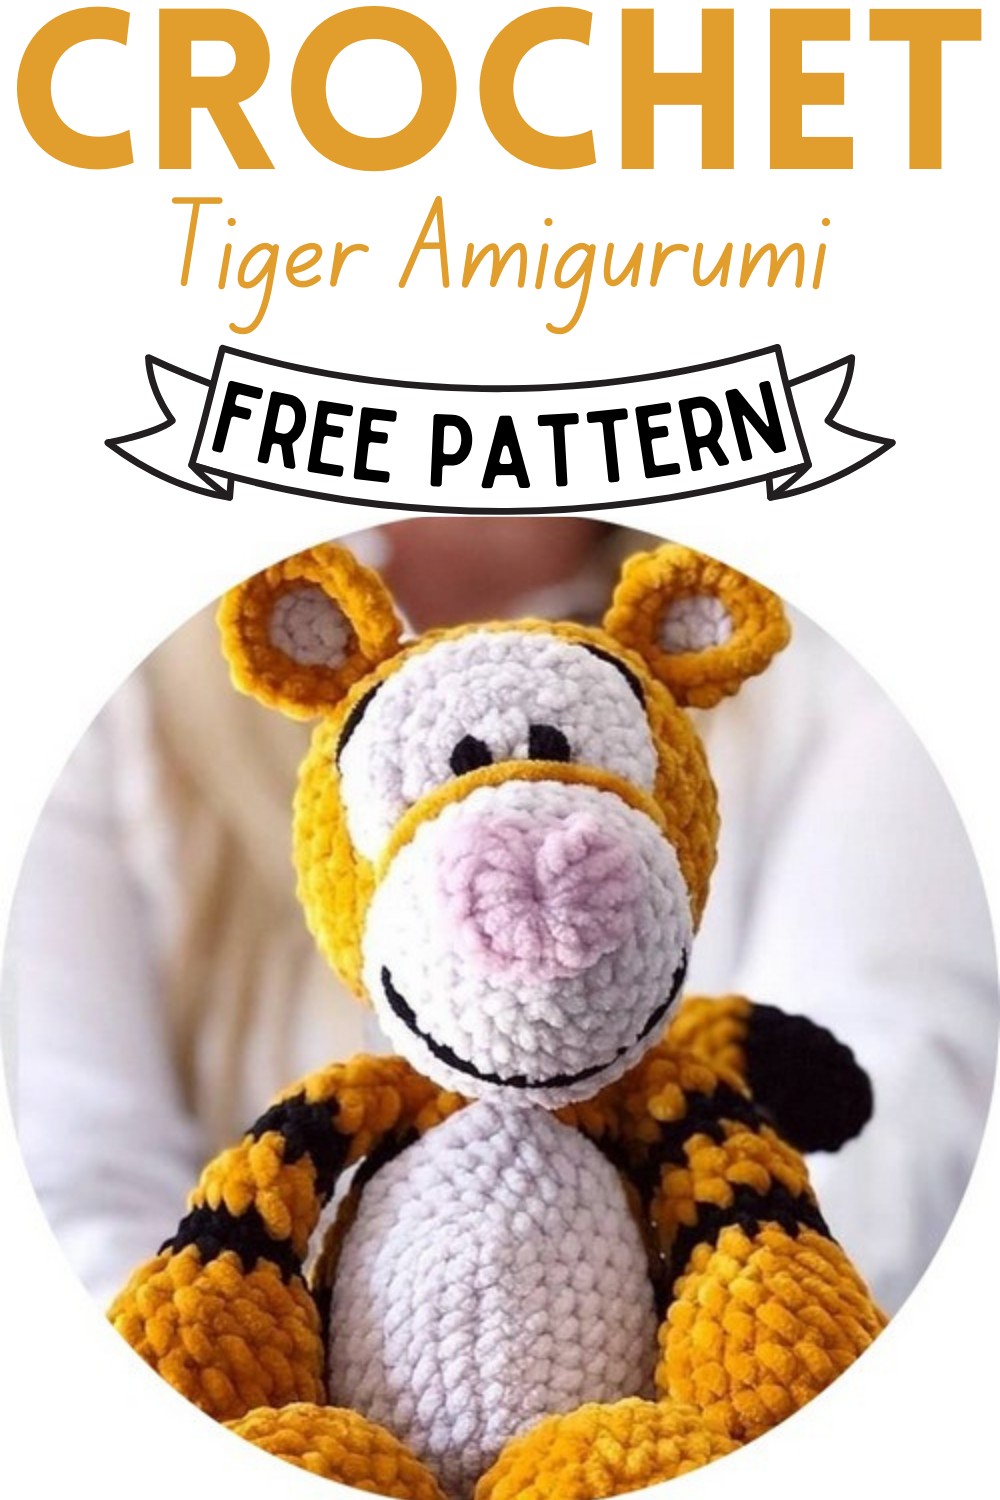
Crochet Tiger Amigurumi Pattern Free For Kids
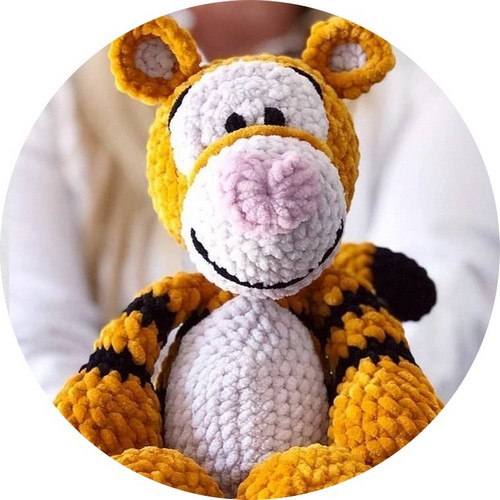
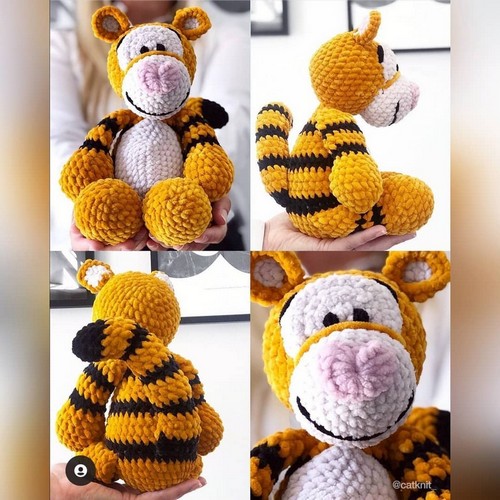
Today, we’re going to make the cutest little crochet tiger that’s almost every kid’s favorite! This adorable tiger has a super soft and cuddly look that you’re going to love. Its body is made in a pretty mustard yellow color, while its head, belly, and other parts are a cozy oatmeal and white color. It’s sure to be a favorite for any kid or anyone who loves cute animals.
Crochet Tiger Amigurumi Pattern
Making this tiger is also lots of fun. The pattern we’ve got for you is really easy to follow. You don’t need to be a crochet pro to make it look amazing. This tiger is going to look so elegant when you’re finished. You can make this adorable, sweet tiger sitting on a shelf and going to make everyone say, “Wow!” So, grab your crochet hook, and let’s make this charming little tiger together following the easiest pattern we’re providing.
MATERIALS USED:
- (You’ll need 2 balls of the Mustard yarn)
- Color A: Cygnet Yarns Chenille Chunky, Mustard
- Color B: James C Brett Flutterby Chunky, Oatmeal
- Color C: James C Brett Flutterby Chunky, Black
- Color D: James C Brett Flutterby Chunky, Rose
Crochet Hook: 4mm
- Toy stuffing
- Stitch marker
HEAD PART 1:
- 1. Using color A, work 6 sc in magic ring (6)
- 2. Inc in each st (12)
- 3. *1 sc, 1 inc** repeat * to ** 6 times (18)
- 4. *2 sc, 1 inc** repeat * to ** 6 times (24)
- 5. *3 sc, 1 inc** repeat * to ** 6 times (30)
- 6. *4 sc, 1 inc** repeat * to ** 6 times (36)
- 7-11. Sc in each st
- 12. *4 sc, 1 inv.dec** repeat * to ** 6 times (30)
- 13. *3 sc, 1 inv.dec** repeat *to** 6 times (24)
- 14. *2 sc, 1 inv.dec** repeat * to ** 6 times (18)
- 15. *1 sc, 1 inv.dec** repeat * to ** 6 times (12)
Stop crocheting and stuff the head firmly.
- 16. Inv.dec in each st (6)
Fasten off, leaving a long tail for sewing the last stitches together.
HEAD PART 2:
- 1. Using color B, work 6 sc in magic ring (6)
- 2. Inc in each st (12)
- 3. *1 sc, 1 inc** repeat *to** 6 times (18)
- 4. *2 sc, 1 inc** repeat *to** 6 times (24)
- 5-10. Sc in each st
Fasten off, leaving a long tail for sewing the muzzle to the head.
ASSEMBLY:
The muzzle will be sewn on to the decreasing side of the head to keep the neater looking stitches at the back of the head. Sew the muzzle to the head around round 14, stuff as you go along.
HEAD PART 3:
Now you’ll work as you would in a magic ring but instead of joining after round 1, you’ll chain 1 at the end of each round and turn your work to get a half circle.
- 1. Using color B work 6 sc in magic ring (6) ch1, turn.
- 2. Inc in each st (12) ch1, turn.
- 3. Sc in each st, ch1, turn.
- 4. *1 sc, 1 inc** repeat * to ** 6 times (18) ch1, turn.
- 5. Sc in each st
Fasten off, leaving a long tail for sewing the eye area to the head.
ASSEMBLY:
Sew in place just above the muzzle, it should stretch to between round 9 and 10 of the head. Make sure you stretch the sides so the width is approximately the same as the muzzle.
Using a long tail of color A, make 2 long stitches across the muzzle to cover up where the two parts join.
For the eyes, these will sit on bottom of the half circle, just above the muzzle. Using color C, make a stitch on the outside of round 1, across the height of one stitch. Go over the same stitch 4 times.
For the eyebrows, these will sit just above where the half-circle ends. Using color C, count 4 stitches in between, make a stitch across 3 stitches down the side of the half circle, go over once more.
NOSE:
Using color D, make a magic ring, chain 3.
In the magic ring, make the following stitches: 2 tr, 2 dc, 2 hdc, 1 sc, 2hdc, 2dc, 2 tr, chain 3, sl st in to the magic ring.
Now tighten the magic ring, and you should have a heart-shaped nose.
ASSEMBLY:
Stitch in place just above round 1 to between round 6 and 7 of the muzzle.
MOUTH:
The mouth is sewn on between rounds 6 and 7. Make a stitch across the full length with color C; don’t secure it in place yet. The middle of the mouth will sit between round 4 and 5 so make sure you’re happy with the position before securing in place. You can do this by using a bit of glue or making 3 stitches in color C by doing a loop around the mouth in the same stitch.
EARS:
- 1. Using color B, work 6 sc in the magic ring (6)
- 2. Inc in each st (12)
- 3. Change to color A, *1 sc, 1 inc** repeat * to ** 6 times (18)
Fasten off, leaving a long tail for sewing the ears to the head.
ASSEMBLY:
Attach the ears to round 8 of the head, leaving 7 stitches in between.
BODY:
- 1. Using color A, work 6 sc in the magic ring (6)
- 2. Inc in each st (12)
- 3. *1 sc, 1 inc** repeat *to** 6 times (18)
- 4. *2 sc, 1 inc** repeat * to ** 6 times (24)
- 5. *3 sc, 1 inc** repeat * to ** 6 times (30)
- 6. *4 sc, 1 inc** repeat * to ** 6 times (36)
- 7. Sc in each st
- 8-9. Change to Color C, sc in each st
- 10-12. Change to Color A, sc in each st
- 13. Change to Color C, sc in each st
- 14. *4 sc, 1 inv.dec** repeat * to ** 6 times (30)
- 15. Change to Color A, sc in each st
- 16. *3 sc, 1 inv.dec** repeat * to ** 6 times (24)
- 17. Sc in each st
- 18. Change to Color C, sc in each st
- 19. *2 sc, 1 inv.dec** repeat * to ** 6 times (18)
- 20. Change to Color A, sc in each st
- 21. *1 sc, 1 inv.dec** repeat * to ** 6 times (12)
- 22. Sc in each st
Fasten off, leaving a long tail for sewing the body to the head. Stuff the body firmly.
The body is attached across rows 9-12 of the head.
BELLY:
- 1. Chain 11.
- 2. From second chain from the hook, sc 10.
- 3. Continue on the other side of the side and sc 10.
- 4-5. Sc around the full piece again, adding 1 extra sc on each end.
- 6-7. Sc around the full piece again, adding 2 extra sc on each end with one st in between.
- 8. Sc around the full piece again, on each end count 7 sts, now: 1 inc, 1 sc, 1 inc, 1 sc, 1 inc.
- 9. Sc around the full piece again; on each end, count 9 sts, now: 1 inc, 3 sc, 1 inc, 3 sc, 1 inc.
Fasten off leaving a long tail for sewing the belly to the body. Attach the belly across rows 5-20 of the body.
LEGS (MAKE 2):
- 1. Using color A, work 6 sc in the magic ring (6)
- 2. Inc in each st (12)
- 3. *1 sc, 1 inc** repeat * to ** 6 times (18)
- 4. *2 sc, 1 inc** repeat * to ** 6 times (24)
- 5-7. Sc in each st
- 8. *2 sc, 1 inv.dec** repeat * to ** 6 times (18)
- 9. *1 sc, 1 inv.dec** repeat * to ** 6 times (12)
- 10. Sc in each st
- 11-12. Change to Color C, sc in each st
- 13-14. Change to Color A, sc in each st
- 15-16. Change to Color C, sc in each st
- 17-21. Change to Color A, sc in each st
Fasten off, leaving a long tail for sewing the legs to the body. Stuff the bottom part of the legs but not the thinner part to allow for movement. Attach the legs on each side of the body, just below where the first
black stripe starts on the body.
ARMS (MAKE 2):
- 1. Using color A, work 6 sc in the magic ring (6)
- 2. Inc in each st (12)
- 3. *1 sc, 1 inc** repeat * to ** 6 times (18)
- 4-6. Sc in each st
- 7. *1 sc, 1 inv.dec** repeat * to ** 6 times (12)
- 8. Sc in each st
- 9-10. Change to Color C, sc in each st
- 11-12. Change to Color A, sc in each st
- 13. Change to Color C, sc in each st
- 14-15. Change to Color A, sc in each st
- 16. *1 sc, 1 inv.dec** repeat *to** 4 times (8)
Fasten off, leaving a long tail for sewing the arms to the body. Stuff the bottom part of the arms but not the thinner part to allow for movement. Attach the arms 1 row down from where you attached the head to the body.
TAIL:
- 1. Using color C, work 6 sc in the magic ring (6)
- 2. Inc in each st (12)
- 3-5. Sc in each st
- 6-8. Change to Color A, sc in each st
- 9-10. Change to Color C, sc in each st
- 11-13. Change to Color A, sc in each st
- 14-15. Change to Color C, sc in each st
- 16-18. Change to Color A, sc in each st
- 19-20. Change to Color C, sc in each st
- 21-23. Change to Color A, sc in each st
- 24-25. Change to Color C, sc in each st
Fasten off leaving a long tail for sewing the tail to the body.
Stuff the tail firmly.
- Attach the tail at the back of the body in the middle of the first black stripe.