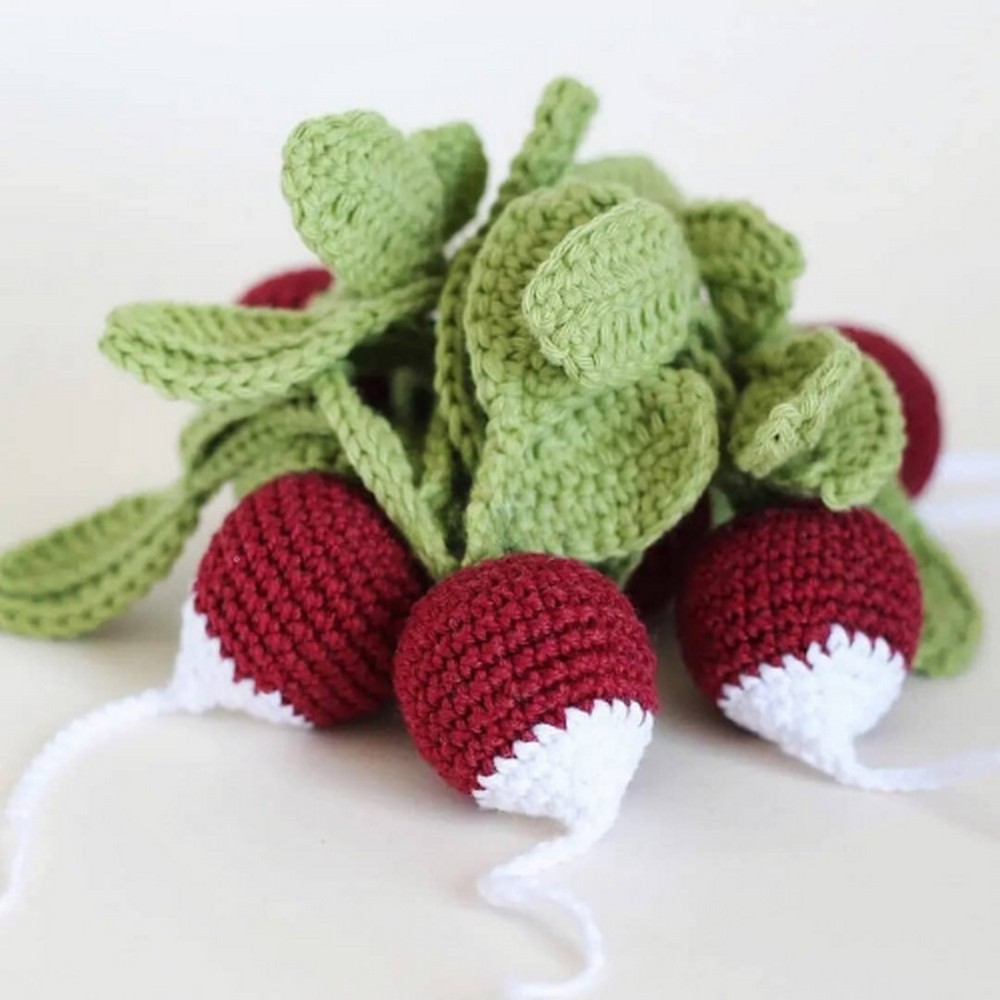
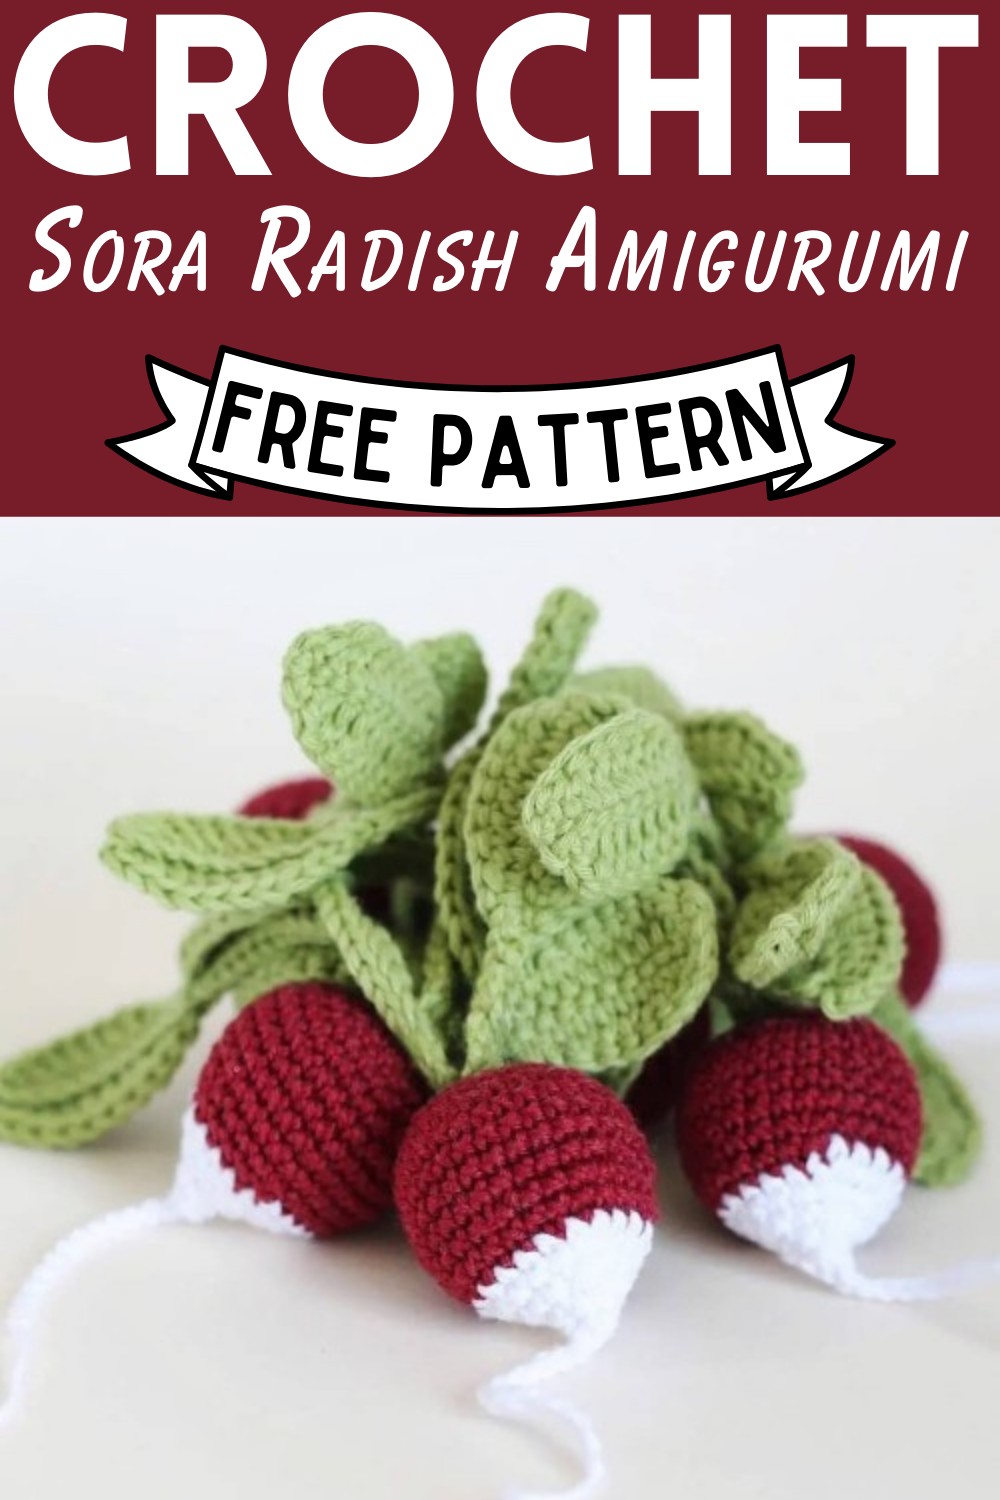
Crochet Sora Radish Amigurumi Pattern Free
The Crochet Sora Radish Amigurumi pattern brings to life a charming little radish with a distinct appearance. This tiny crochet creation features a round, red body, mimicking the vibrant hue of a fresh radish. Extending from this colourful sphere is a long, white root, adding authenticity to its vegetable inspiration. Crowning the top, a generous cluster of big, green leaves completes the look, giving this amigurumi radish a lifelike and adorable appeal. This delightful crochet radish can serve as a lovely decoration, a unique gift, or even a playful addition to a child’s toy collection, infusing a touch of nature’s beauty into everyday life. So, follow the easy steps given below and complete your child’s amigurumi vegetable collection!

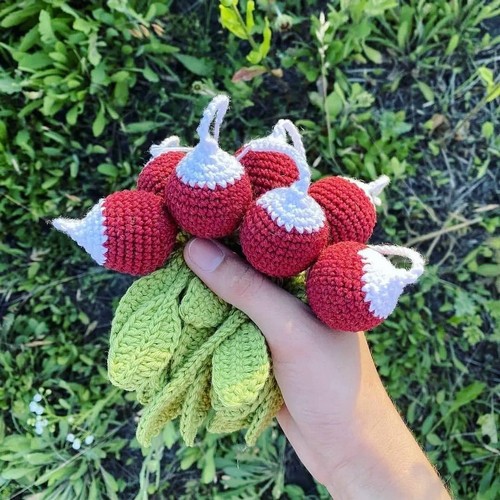 Designer: Knittedstorybears On Instagram
Supplies
- DK weight cotton yarn in 3 colours – dark pink (or red), white and green
- (The creator used Yarn and Colors “Must-Have” for radish and Rico Design “Ricorumi” yarns for leaves);
- Crochet hook 2,5 mm;
- Stuffing;
- Yarn needle and scissors.
Size
- The size of the toy is approx. 5.5 inches tall (radish+leaves) if made with indicated materials. The size may vary if you choose another weight of yarn and crochet hook number.
Abbreviations
- The pattern is written in English, using US terminology.
- ch – chain
- Sc – single crochet
- sl st – slip stitch
- inc – increase
- dec – (invisible) decrease
- hdc – half double crochet
- dc – double crochet
Difficulty
- Skill level: easy*
- You should know how to crochet: chains, slip stitches, single crochet stitches, increases and decreases, half double crochet and double crochet stitches, how to crochet in rounds.
Step by step Pattern
Main Detail
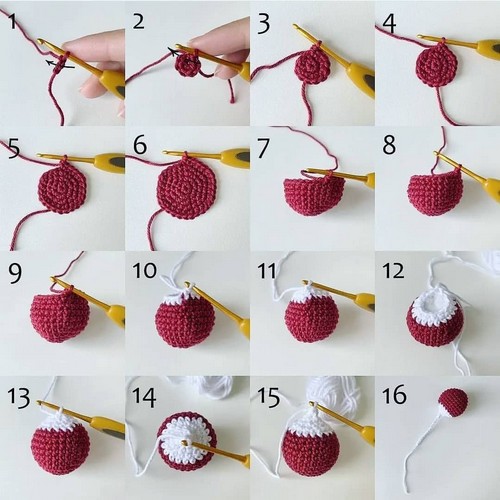
- Start crochet with red yarn.
- RND 1: Ch 2, 6 sc in second ch from a hook [6] /pic. 1-2/
- RND 2: inc in next 6 st [12]/pic.3/
- RND 3: (sc in next st, inc in next st) * repeat 6 times [18]/pic.4/
- RND 4: (sc in next 2 st, inc in next st) * repeat 6 times [24]/pic.5/
- RND 5: (sc in next 3 st, inc in next st) * repeat 6 times [30]/pic.6/
- RND 6-9: sc in next 30 st [30] – 4 rounds/pic.7/
- RND 10: (sc in next 3 st, dec) * repeat 6 times [24]/pic.8/
- RND 11: sc in next 24 st [24]/pic.9/
- Change yarn to the white.
- Starting this round don’t count the stitches in the rounds, just follow the pattern!
- RND 12: (sc in next 3 st, dec) * repeat 5 times /pic. 10/
- RND 13: (sc in next 2 st, dec) * repeat 5 times /pic. 11/
- Stuff the detail. /pic.12/
- RND 14: (sc in next 2 st, dec) * repeat 4 times /pic.13/
- RND 15: dec 6 times/pic. 14-15/
- Make 12 chains and then fasten off, leaving a tail of yarn approx. 2″ (5 cm)/pic. 16-17/
 Leaves
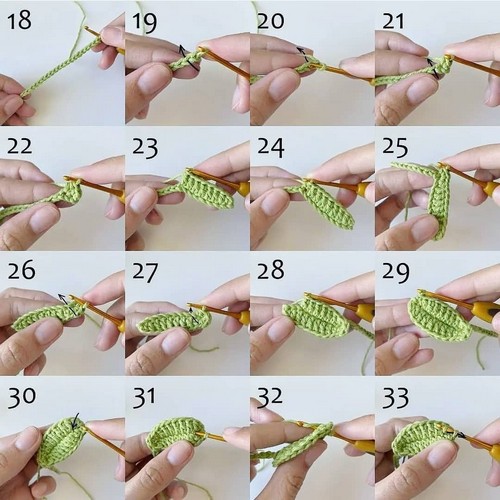
- Crochet with green yarn.
- Make 20 chains/pic. 18/
- sc in the second ch from a hook/pic. 19-21/
- hdc in next ch/pic.21-22/
- dc in next 6 ch/pic.23/
- hdc in next ch/pic.24/
- 3 sc in next ch/pic.25/
- Turn the detail and continue crochet on the other side of foundation chains (skip the next 10 chains)/pic.26/
- hdc in next ch/pic.26-27/
- dc in next 6 ch/pic.27-28/
- hdc in next ch
- sc in next ch/pic.29/
- Turn the detail and continue crochet in the middle of the leaf, where the foundation chains./pic.30/
- Crochet the slip stitches to the end of the leaf /pic.31-39/ Continue crochet the slip stitches follow the skipped chains/pic.40-43/
- Don’t fasten off and continue crochet 3 more leaves/pic.44/
- For the second leaf make 25 chains/pic.45-46/
- For the third leaf make 30 chains /pic.47-48/
- For the fourth leaf make 15 chains /pic.49-50/
- When all leaves are done, fasten off, leaving a long tail for sewing.
- And then sew the leaves to the main detail/pic.51-53/
Designer: Knittedstorybears On Instagram