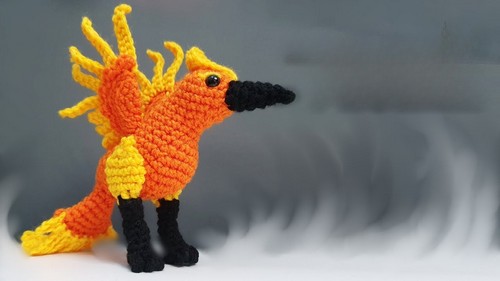
Crochet Phoenix Pattern For Magical Creation
With vibrant colors and majestic details, the Crochet Phoenix Pattern transforms yarn into a mythical masterpiece. This dazzling pattern uses 100% acrylic yarn and simple crochet techniques to create a striking creature with flowing tail feathers, detailed wings, and an expressive beak. Whether adorning your home or serving as a thoughtful handmade gift, this Phoenix captivates with its bold orange and yellow hues, crafting an unforgettable centerpiece that echoes ancient tales of rebirth and renewal.
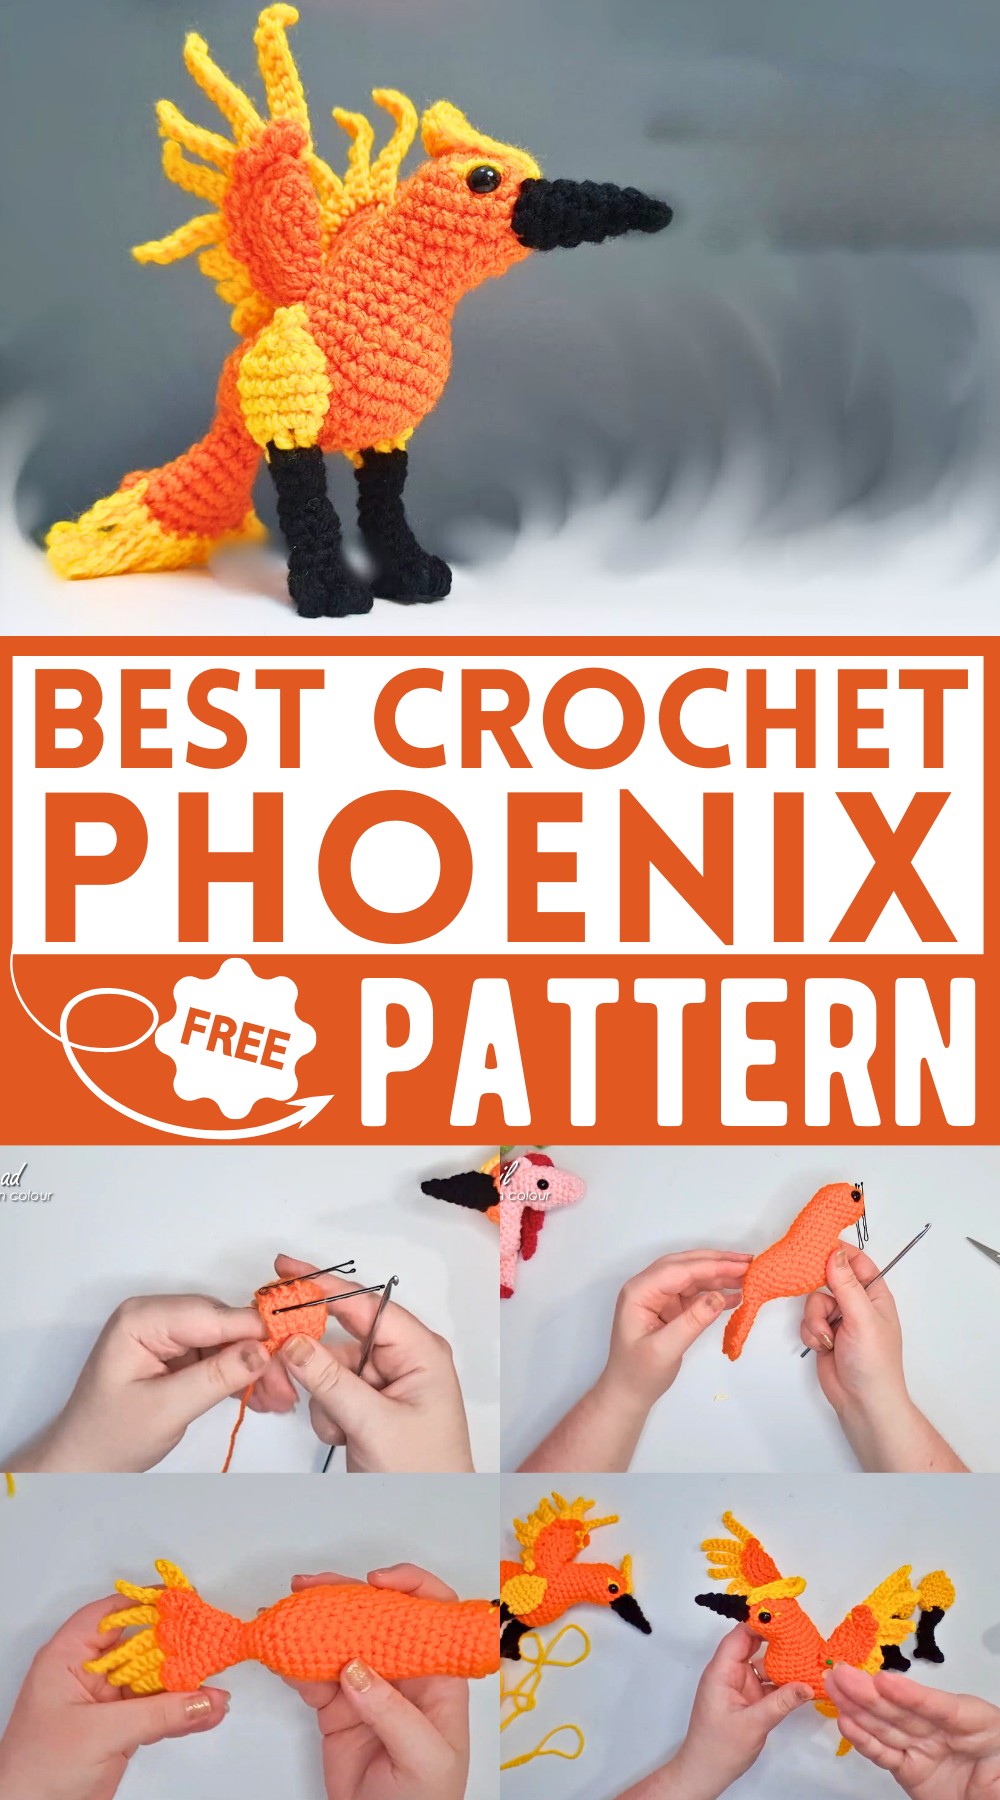
How To Crochet Amigurumi Phoenix
Tools and Materials
- 8 ply 100% acrylic yarn in three main colors:
- Orange (main base color)
- Yellow (accent color)
- Black (beak and feet)
- 9 mm safety eyes
- 3.5 mm crochet hook
- Scissors
- Pins and needles
- Bobby pins (for stitch markers)
- Stuffing
Pattern Details
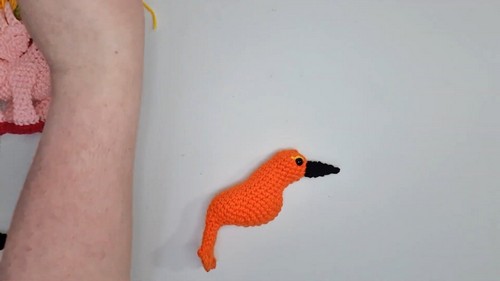
Head, Body, and Tail
- Main Base Color (Orange):
- Row 1: Magic ring of 6 stitches.
- Row 2: 6 increases to get 12 stitches in total.
- Row 3: 6 increases on one side, 6 single crochets on the other.
- Row 4: Work 12 single crochet. Work next 3 stitches in back loops only, then 3 single crochet through both loops.
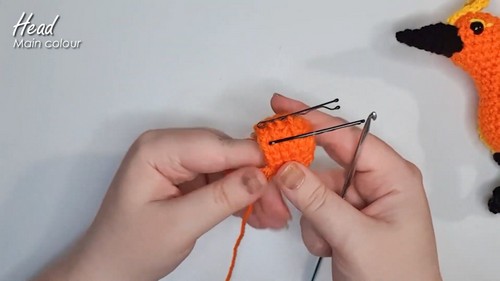
- Beak Foundation:
- Row 5: 12 single crochet, 1 single crochet (back loop only), 1 single crochet (both loops), 1 single crochet (back loop only), 3 single crochet.
- Row 6: 12 single crochet, 3 single crochet (back loops only), 3 single crochet.
- Insert Safety Eyes:
- Positioned in row 3, one stitch apart from the beak’s position.
- Body and Tail Expansion:
- Continue working for 12 more rows, placing decreases and increases strategically to shape the body.
- Finish body, starting tail:
- Lay down stitches to form a tail and work 6 more rows to narrow down.
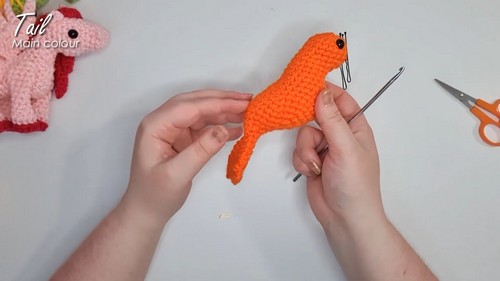
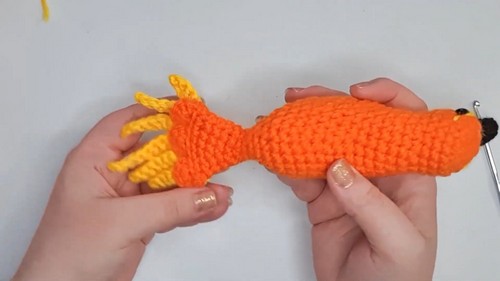
- Tail Feathers:
- Flatten opening and chain 1 to create the foundation rows.
- Create 3 feathers using the shell stitch technique.
- Use yellow yarn to make 7 similar feathers along the base.
Beak
- Construction:
- Attach yarn (black) at the bottom left-hand corner of beak foundation.
- Work 8 single crochet around in a clockwise direction.
- Next row: 8 single crochet.
- Following 4 rows: 1 decrease each row until the beak points.
- Finish off and tuck the end inside.
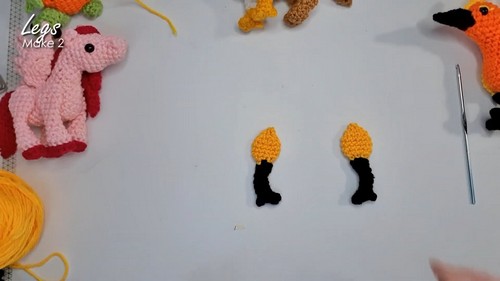
Legs
- Construction:
- Start with black yarn.
- Begin with magic ring of 6 stitches.
- Row 2: Create claws using triple crochet in front loop, followed by slip stitch in the back loop (work 3 claws in a row).
- Row 3: Work 6 single crochet around (excluding slip stitches).
- Work 4 more rows of 6 single crochet each.
- Further shaping: alternate decreases and regular stitches to make knee joint.
- (Color Change): In last stitch of Row 10, switch to yellow yarn.
- Work 6 front post single crochet.
- Finish with 6 more rows to build the drumstick.
- Finish off and weave in ends.
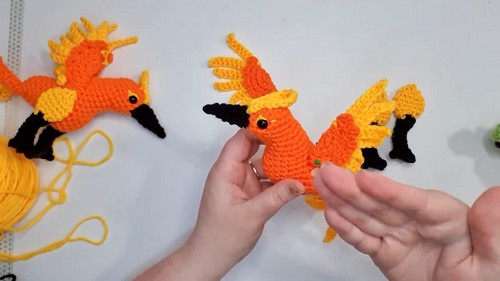
Wings
- Construction:
- Begin with orange yarn.
- Make a circle of 18 single crochets.
- Next row: 24 single crochets in the back loops.
- Fold sides to create taco-like shape.
- Chain 1 and create petals by working pairs of inner loops.
- Using yellow yarn, add feathers similar in size to the tail feathers (chain 5, 7, 9).
Head Plume
- Construction:
- Chain 7.
- Work slip stitches, single crochet, half-double crochet, and double crochet to create a plume.
- Attach this piece at the top of the beak.
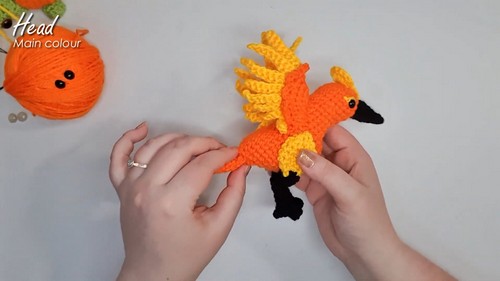
Assembly
- Attach Legs:
- Align with wings.
- Adjust and pin to position the legs.
- Sew each leg on securely.
- Attach Wings:
- Wings attach around row 13, aligned horizontally or slightly tilted.
- Sew firms around the top thighs and shoulders.
- Head Plume:
- Secure at top of the beak, stitching where slip stitches are done.
- Details:
- Add other facial details like eyelids using contrast threading.
- Final Results:
- Adjust all parts to ensure even positioning.
- Add additional details as desired.