Free Crochet Peas in pod Amigurumi Pattern
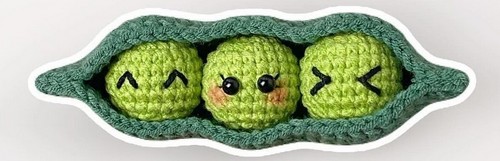
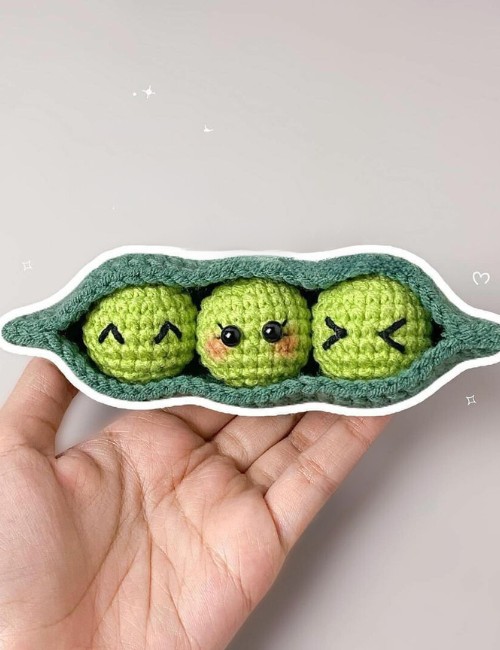
Spring has sprung, and what better way to celebrate than with a podful of adorable crochet peas in a pod? This crochet amigurumi is a trio of vibrant green peas nestled snugly in a single pod, each with their own cheeky eyebrows and rosy cheeks. Spread these around your house for a bright burst of color, use them as enjoyable decorations for the holiday, or give them to your loved ones as a sign of the joy of simple things.
We will guide you through the process of making the pea, adoring them with cute expressions and then making a peapod. So, make this fun crochet amigurumi, turn them into a playful garland for your child’s room, or even decorate your clothes or bags.
Making Your Crochet Peas in a Pod Pattern
Designer: amiwacrochet On Instagram
Tools:
- Crochet hook: 2mm
- Tapestry/yarn needle
- Scissors
Materials:
- Milk cotton yarn 4ply:
- Pea-green
- Dark green
- Fiberfill for stuffing
- Glue (optional: UHU)
- Blusher (optional)
- 6mm black half pearls for eyes
Abbreviations:
- R = round: This indicates you’re working in a circular pattern, like crocheting a cozy nest.
- CH = chain: These are the foundation loops, like jump ropes for tiny stitches. You’ll use them to start projects and move between stitches.
- ST = stitch: This is the general term for any stitch you make, like a tiny knot.
- SC = single crochet: This is the most basic stitch, like a tiny knot. It’s the building block for many crochet patterns, so get comfy with this one!
- DC = double crochet: This stitch is taller than a single crochet, creating a different texture and fabric.
- SLST = slip stitch: This sneaky stitch invisibly joins two stitches together, like a zipper for your crochet work.
Shaping:
- INC = increase (2 SC in 1 ST): This is like giving birth to a twin stitch! You’ll work two single crochets into the same space to make your project wider or rounder.
- DEC = invisible decrease (1 SC in 2 ST): This is the opposite of an increase, like gently hugging two stitches into one. It helps shape your project and make it less wide.
Counting and Finishing:
- [] = a total of ST on that R: This is like a little stitch counter at the end of the instructions, ensuring you have the right number of stitches in place.
Step by step Pattern
Pattern Note:
This pattern is written in US terminology.
Peas:
Work with pea green yarn and make 3.
AMIWA
crochet
(notes I crochet in spiral way, no need SLST in every R)
R1: 6SC in MR [6]
R2: 6INC [12]
R3: (1INC, 1SC)x6 [18]
R4: (2SC, 1INC)x6 [24]
R5-R8: SC all around [24]
Pea Pods:
Work with dark green.
R9: (2SC, 1DEC)x6 [18] -start stuffing-
R10: (1SC, 1DEC)x6 [12]
R11: 6DEC [6]
Fasten off, stuffing more, and close the hole.
Make 26CH, and start at the 3rd CH from the hook. (notes: in every R we need to make SLST to close the R and 2CH to start the R)
R1: 1DC INC, 22DC, 4DC at the same ST, turn to the other side of the CH and make 22DC, 1DC INC [52]
R2: 1DC, 1DC INC, 22DC, 1DC INC, 2DC, 1DC INC, 22DC, 1DC INC, 1DC [56] R3: 1DC, 1DC INC, 24DC, 1DC INC, 2DC, 1DC INC, 24DC, 1DC INC, 1DC [60] R4: 1DC, 1DC INC, 26DC, 1DC INC, 2DC, 1DC INC, 26DC, 1DC INC, 1DC [64] R5: 1DC, 1DC INC, 28DC, 1DC INC, 2DC, 1DC INC, 28DC, 1DC INC, 1DC [68] Cut the yarn and left a long tail for sewing.
Peas in a a pod
-ASSEMBLY-
AMIWA
crochet
1. Put the eyes between R5-R7 and you can customize the face like what you want!
2. Put the blusher around under the eyes if you want that.
3. Fold the very corners of the pea pod, line up the ST, and sew 4ST on both sides.
4. Put the trio of peas into the pod!