Crochet Mug Cozy Pattern To Personalize Your Mug
Elevate your coffee break with this delightful Crochet Mug Cozy Pattern! Crafted for both style and function, this charming cozy snugly fits around your favorite mug, keeping your beverage warm and your hands cool. Featuring a simple design with a beautiful textured stitch, it transforms an ordinary mug into a statement piece that’s both decorative and practical. Perfect for personal use or as a thoughtful handmade gift, this pattern is an easy yet rewarding project for crochet enthusiasts of all levels.
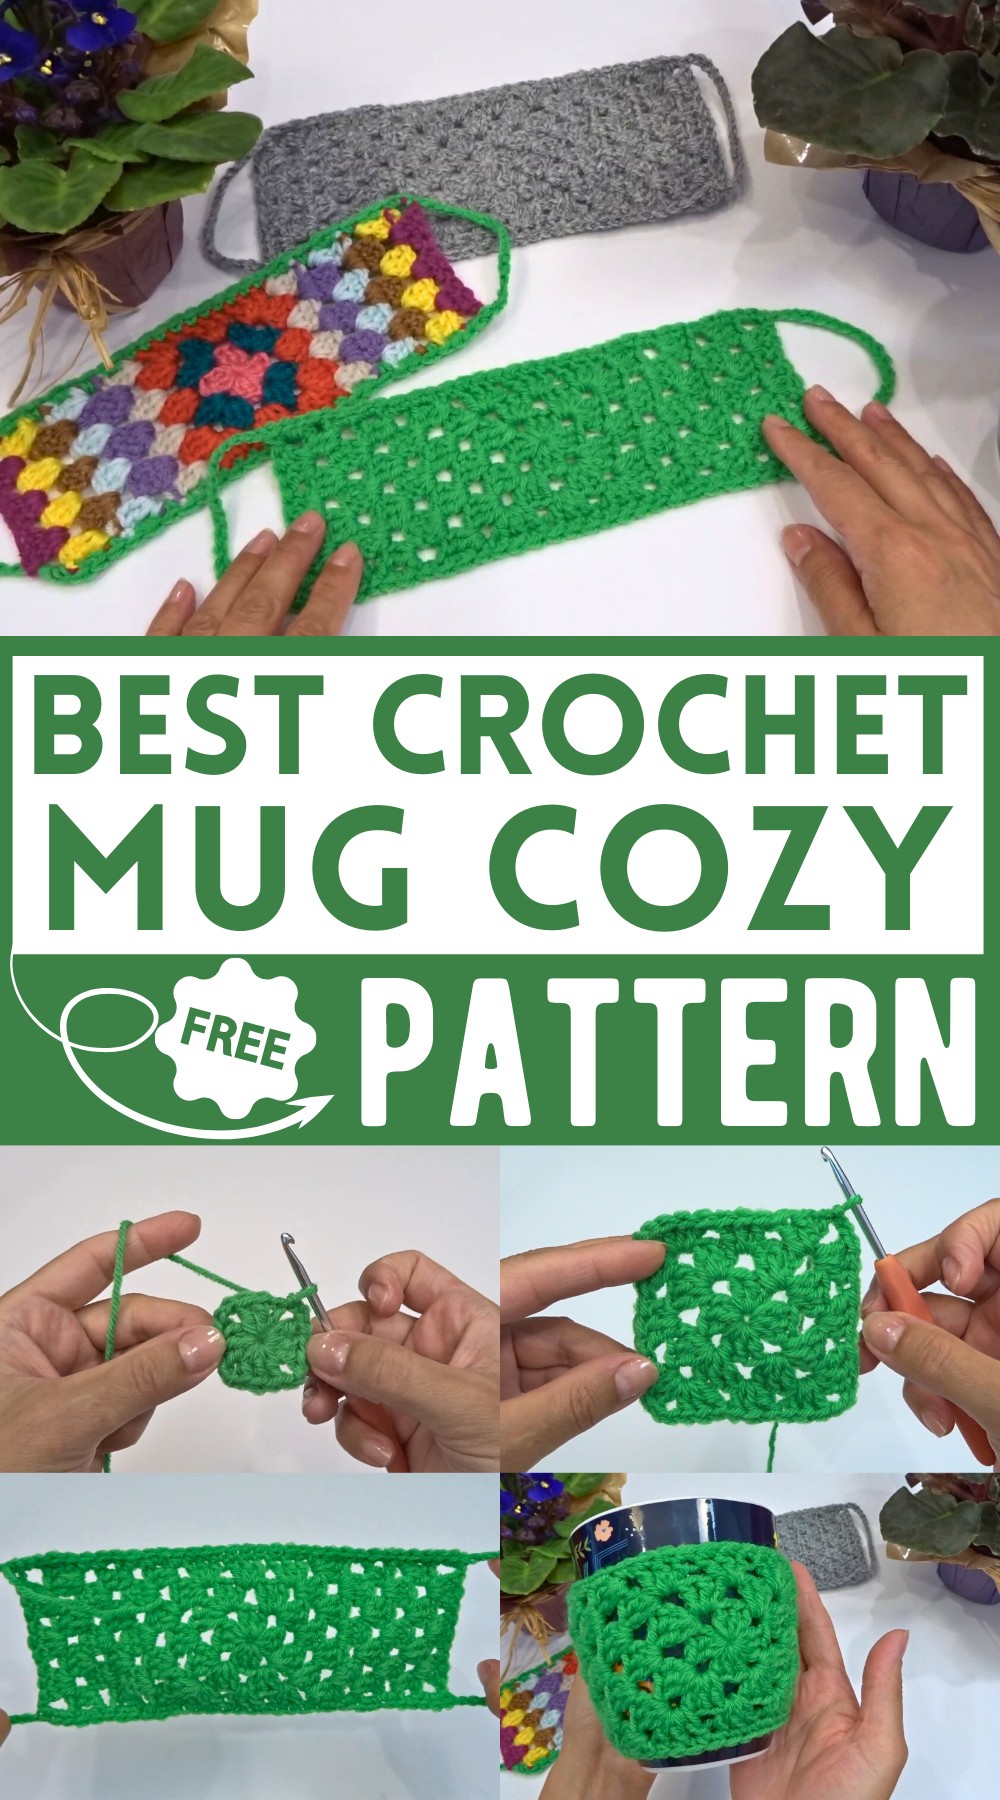
Why Love This Crochet Mug Cozy Pattern?
- Easy to Follow: The step-by-step instructions make it simple, even for beginners. The video guides you from creating a magic ring to completing the cozy with clear, concise steps.
- Versatility: You can use different types of yarn, whether acrylic or cotton, based on your preference.
- Customizable Size: The pattern allows you to add more rounds if you want your mug cozy to be larger, offering flexibility to fit various mug sizes.
How To Crochet Mug Cozy
Materials Needed:
- Acrylic or cotton yarn
- 4mm crochet hook
Abbreviations:
- ch: chain
- dc: double crochet
- sl st: slip stitch

Instructions:
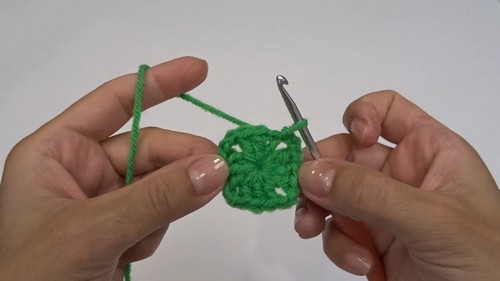
- Magic Ring or Alternative Start:
- Start with a magic ring or make a slip knot, chain 4, and join with a slip stitch to the first chain to form a ring.
- Round 1:
- Chain 3 (this counts as the first double crochet, dc).
- Into the magic ring, work 2 dc. (Total of 3 dc including the chain 3)
- Chain 2.
- Work 3 dc into the magic ring.
- Chain 2.
- Repeat the process 2 more times to make 4 sets of 3 dc with chain 2 spaces between them.
- Close the round with chain 2 and slip stitch into the third chain of the starting chain 3.
- Pull the tail to tighten the center. You should now have a small square.
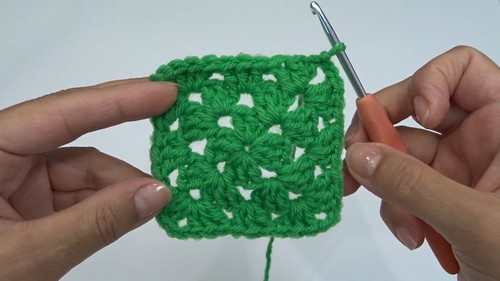
- Round 2:
- Chain 3 (counts as first dc).
- Into the chain 2 space from the previous round, work 2 dc, chain 2, and 3 dc (corner made).
- Skip the next 3 dc and work 3 dc, chain 2, 3 dc in the next chain-2 space (next corner).
- Repeat this process for the remaining corners.
- To finish the round, chain 2 and slip stitch into the third chain of the starting chain 3.
- Round 3:
- Chain 3 (counts as first dc).
- Into the chain 2 space from the previous round, work 2 dc.
- In the space between groups of 3 dc from the previous round, work 3 dc.
- In the next chain 2 space, work 3 dc, chain 2, 3 dc (corner).
- Continue this pattern around the square: work 3 dc in side spaces, and 3 dc, chain 2, 3 dc in each corner.
- Finish the round with 3 dc in the last chain 2 space, chain 2, and slip stitch into the third chain of the starting chain 3.
- Making the Square Larger (Optional):
- If you want the cozy to be larger, you can add more rounds, continuing the established pattern of working 3 dc in each side space and 3 dc, chain 2, 3 dc in each corner.
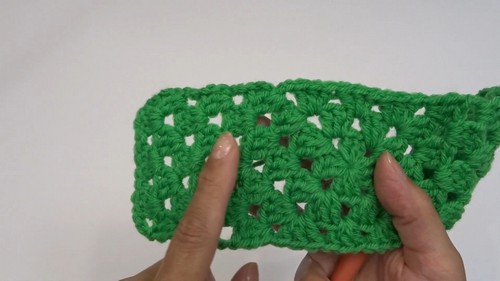
- Creating the Side Rows:
- Choose one side of the square to start creating the rows.
- Row 1: Chain 3 (counts as first dc), then work 2 dc into the same space. In the next space between groups of 3 dc, work 3 dc. Continue to the end of the row.
- Row 2: Chain 3, turn. Work 3 dc in each space between groups of 3 dc to the end. Work the last dc into the third chain of the starting chain 3.
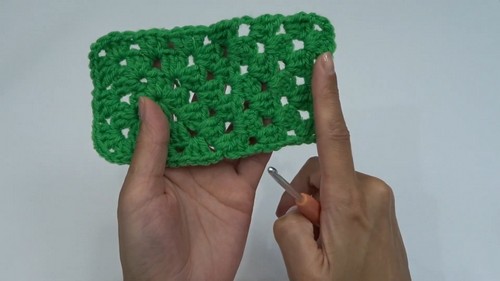
- Repeat Rows 1 and 2 to add a total of 6 rows on this side.
- Do the same on the opposite side.
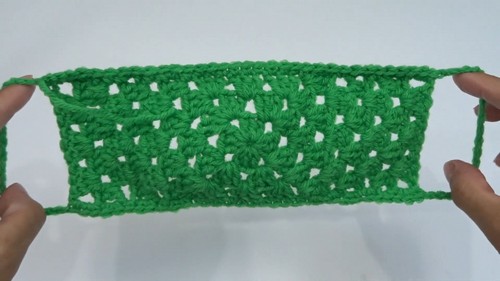
- Creating Button Loops:
- Chain 20.
- Skip 3 sets of 3 dc groups, and join with the next stitch on the opposite side with a single crochet.
- Work single crochets evenly around the edges of the cozy.
- Repeat for the opposite side, ensuring both loops are aligned.
- Finishing:
- Cut and weave in all yarn tails securely.
Final Touch:
You can add buttons on the opposite sides of the loops to secure the cozy around your mug.
Notes:
- You can change colors every round or every few rows to create a different design.
- Adjust the size by adding or reducing the number of rounds and rows.
Here’s the finished mug cozy! Enjoy your crochet project.