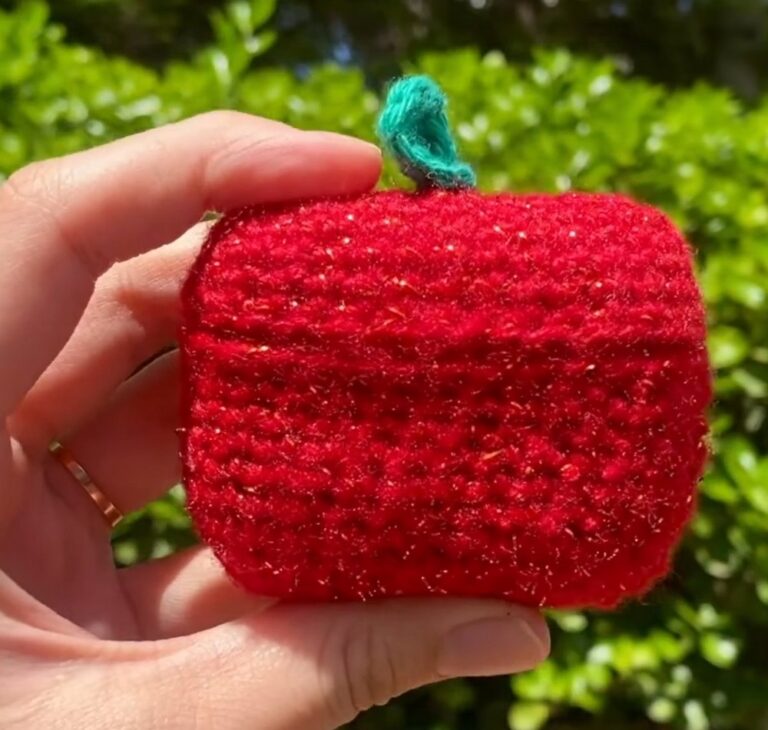
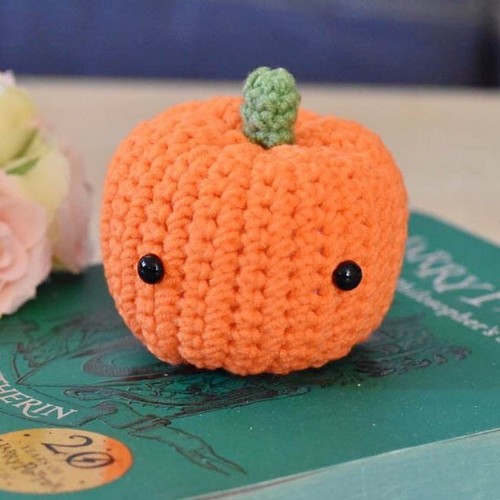
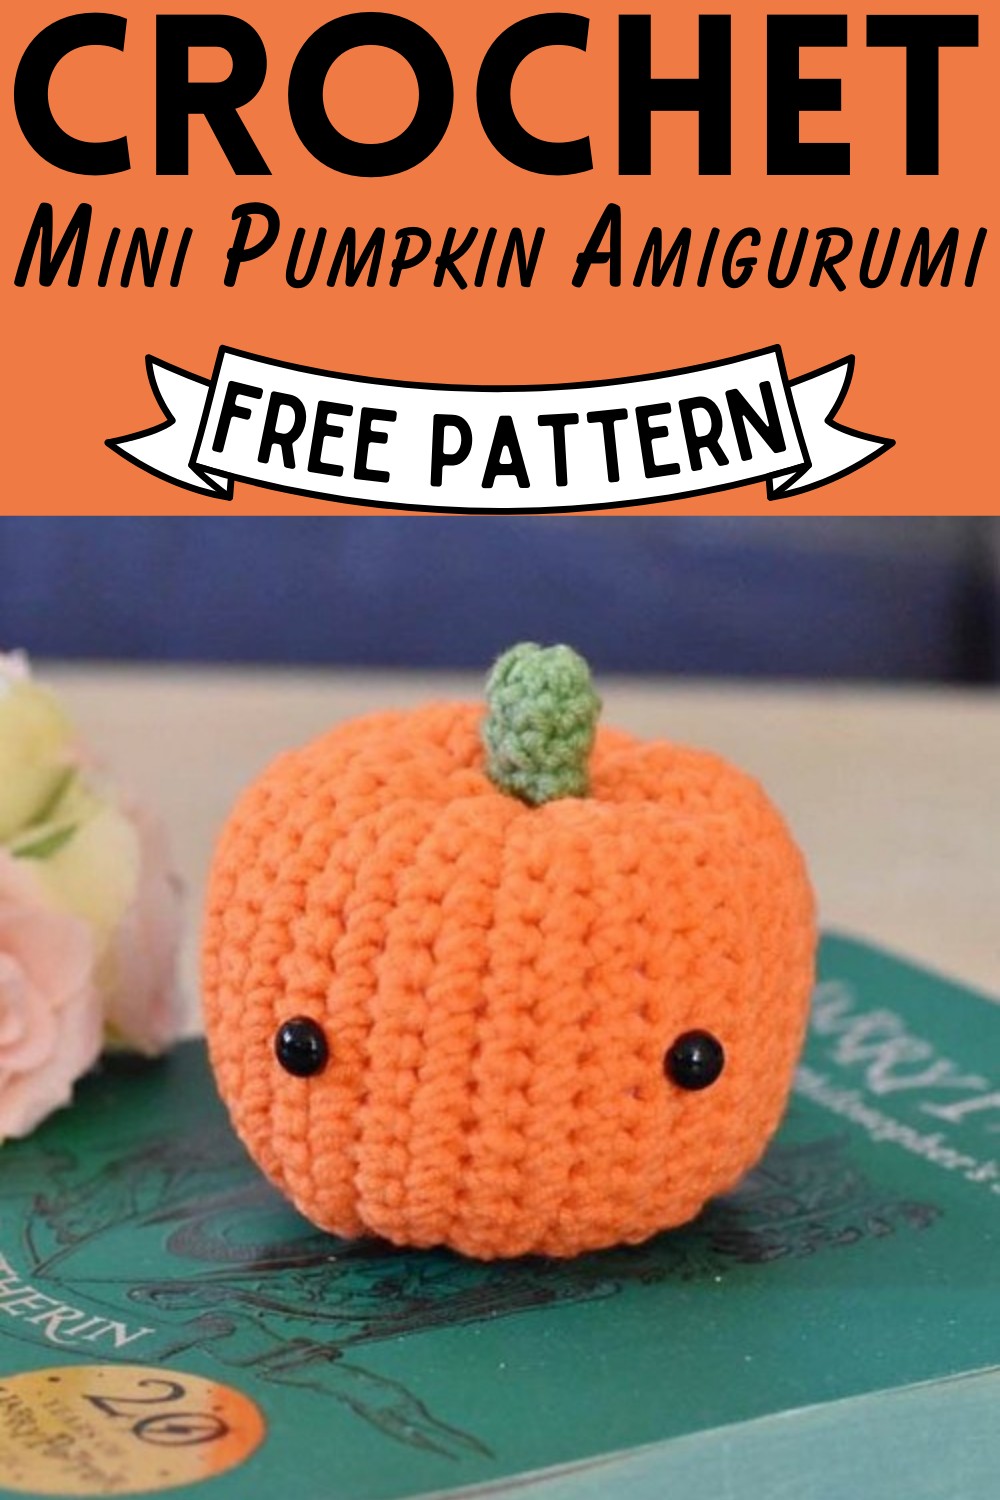
Crochet Mini Pumpkin Amigurumi Pattern For Halloween Season
Halloween is a time for spooky decorations, fun costumes, and lots of candy. Among the many ways to bring the Halloween spirit into your home, one creative and cozy idea is making a crochet mini pumpkin amigurumi. This little, cute crochet pumpkin has an embroidered face, full of character, and comes with a stem on top. It’s not just a decoration; it can also be a cuddly friend. Whether placed among other Halloween decorations, used as a festive paperweight, or given as a special handmade gift, this Halloween crochet pattern adds a touch of warmth and festivity to the spooky season. With its charming appearance, it’s bound to be a hit with both kids and adults, making it a delightful addition to any Halloween celebration.
Making Your Crochet Mini Pumpkin Amigurumi
Materials
- YarnArt Jeans orange 77
- YarnArt Jeans green 69
- 2mm crochet hook
- Toy filling
- 1 pairs of 6mm safety eyes
Step by step Pattern
PUMPKIN
- Row 1: Chain 19, turn (19)
- Row 2 Row 32: ch1, 18sc, turn (18)
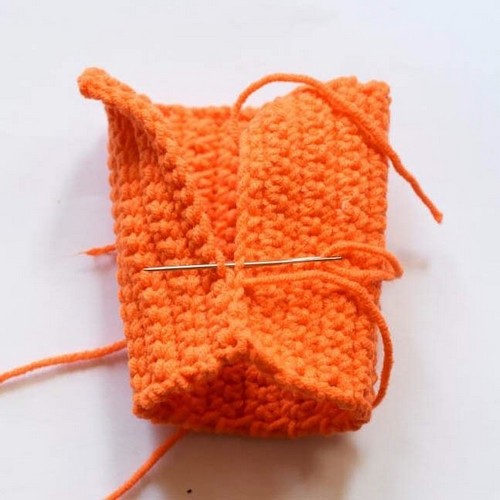
- Fasten off. Leave a long tail for sewing.
- Fold your work together, and use the needle to sew the edges together.
- Turn the piece right side out so that the slip stitched seam is on the inside.
- You should now have a tube shape.
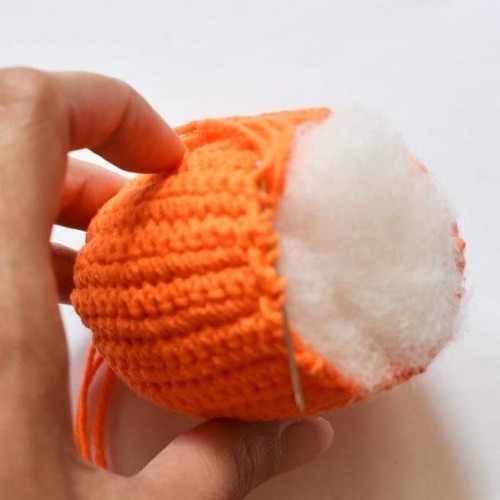
- Use the tail to weave through all the holes on the edge.
- Weave into all holes around the pumpkin, until you reach the beginning.
- Then you’ll pull your yarn tight. Then secure with a knot.
- This will be the bottom of your pumpkin.
- Stuffing well but keep the shape quite squidgy and soft.
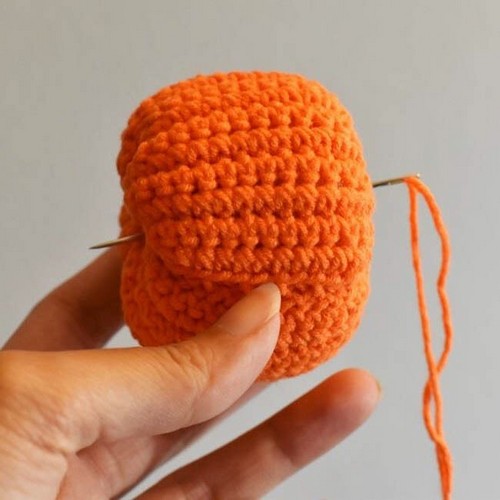
- Thread a new piece of yarn and weave through the top of the pumpkin and close the opening tight.
- Put the remaining tail through the center of the top of the pumpkin, then you push it all the way to the middle of the other side.
- Pull tight to squish the center.
- Put the needle under the closing loops again and repeat the same procedure in the other way around, from the bottom up
- and keep repeating until you are satisfied with the pumpkin’s shape.
STEM
- Use the green yarn
- Row 1: Cast on 6 sc in the magic ring (6)
- Row 2- Row 4: 6sc (6)
- Fasten off. Sew the stem to the top of the pumpkin.
- Place the safety eyes.
Designer: Meow Amigurumi On Instagram