Crochet Loomigurumi Cupcake Pattern For Colorful Creations
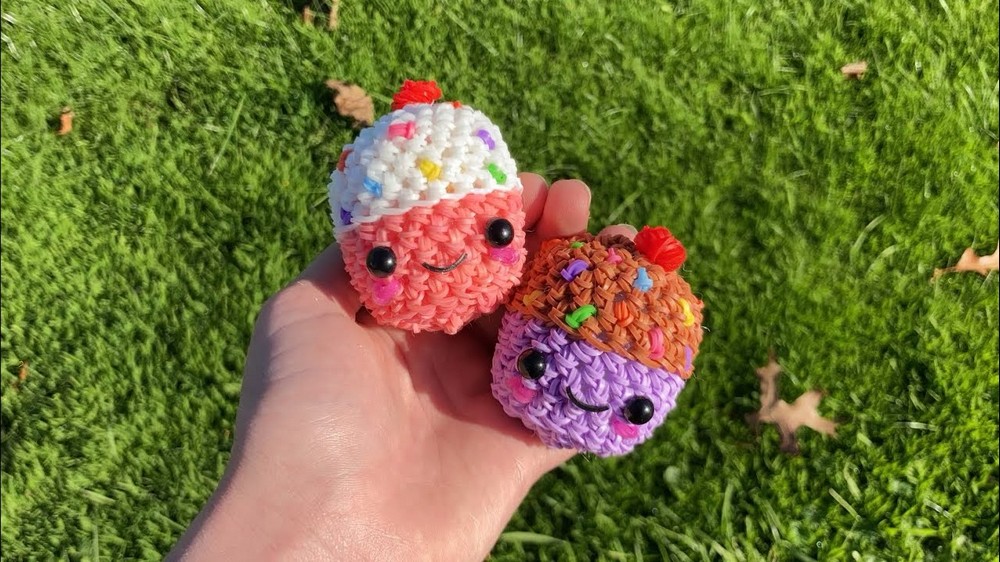
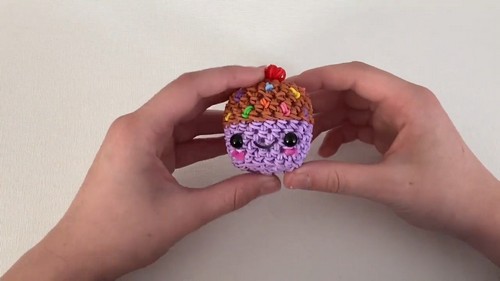
The Crochet Loomigurumi Cupcake Pattern is absolutely adorable and perfect for beginners. You will create a cute cupcake adorned with colorful sprinkles, a cherry on top, and smiling cheeks. This project uses simple stitches, starting from a magic ring for the frosting and moving on to the cupcake liner.
The finished cupcake stands out with its charming details like sparkly pink cheeks and a joyful expression. Ideal as a gift or a cheerful decoration, this small, delightful cupcake showcases the joy of crochet in a fun and engaging way. Get ready to create smiles with every stitch!
Why Love This Pattern?
- Adorable Design: The cupcake is described as “adorable” and “so, so cute,” and the creator absolutely loves how it turned out. The pattern results in a charming and delightful little cupcake, perfect for various occasions.
- Beginner-Friendly: Despite its cute and intricate appearance, the design is really easy to follow, making it a great starting point for beginners. The tutorial provides clear, step-by-step instructions, ensuring that even those new to looming can create a beautiful cupcake.
- Creative Flexibility: The pattern allows for a lot of creativity with colors and customizations. For instance, you can choose different colors for the frosting, liner, and sprinkles, and even add safety eyes, beads, or wrapped bands for eye embellishments. This flexibility lets you create a personalized cupcake that suits your style.
- Cute Finishing Touches: The addition of small details like cheeks, sprinkles, and a cherry on top makes the cupcake even more delightful. These elements are easy to add and enhance the overall look of the cupcake.

How to Crochet Loomigurumi Cupcake
Materials Needed:
- Hook (any type, the user uses Rainbow Loom hook)
- Stitch marker or a c-clip
- 8mm safety eyes (optional, can use beads or wrapped bands)
- A tool to poke in the stuffing
- Colors of bands:
- Frosting: White
- Cupcake liner: Pink
- Sprinkles: Rainbow
- Mouth band: Any color
- Cheek bands: Sparkly pink
- Cherry: Red
- Stuffing (Polyfill or similar material)
Step-by-Step Pattern:
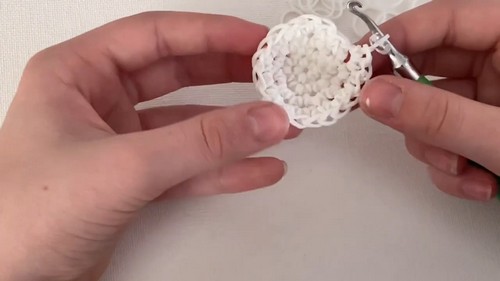
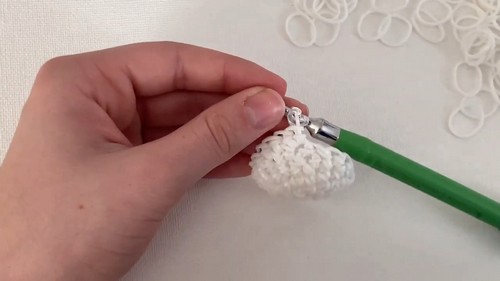
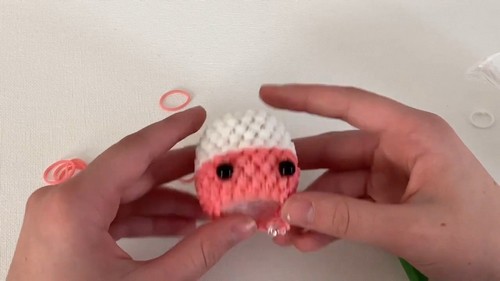
Frosting:
- Magic Ring with 5 Bands:
- Wrap a band around your hook three times, creating three loops.
- Pull another band through these loops and reclaim.
- Slide the back band over the front band without pulling tight.
- Repeat until you have a magic ring with 5 tear dropped shaped stitches.
- Place your c-clip or stitch marker on the band on your hook.
- Row 1 – Increase Round (Total 10 stitches):
- Do 2 stitches in each stitch around.
- Increase by pulling through the first stitch, go back into the same stitch and do another stitch.
- Repeat all the way around; you should have 10 stitches in total. Use the c-clip to mark the end of the row.
- Row 2 – Single Increase Round (Total 15 stitches):
- Do a single stitch in one stitch, then do an increase (two stitches in one stitch).
- Repeat the pattern all the way around.
- At the end of this row, you should have 15 stitches.
- Row 3 – 2 Single Increases Round (Total 20 stitches):
- Do 2 single stitches, then an increase.
- Repeat the pattern all the way around.
- At the end of this row, you should have 20 stitches.
- Rows 4-7 – Single Stitches (20 stitches each row):
- Do a single stitch in each stitch all the way around.
- Complete this for 4 rows; you should have 4 rows of single stitches.
Cupcake Liner:
- Row 8 – Half Row in Liner Color:
- Change to your cupcake liner color.
- Create a half row by going through only the front half of each stitch.
- Pull through a band and stitch in the liner color.
- Rows 9-12 – Single Stitches (20 stitches each row):
- Using the liner color, do 4 rows of single stitches (one in each stitch).
Tapering the Base:
- Row 13 – Half Row with Decreases (Single Single Decrease):
- Do a single stitch, another single stitch, then a decrease grabbing both front loops.
- Repeat all the way around; you should have 15 stitches at the end.
- Row 14 – Decrease Round (Single Decrease):
- Do a single stitch and then a decrease grabbing both front and back loops.
- Repeat the pattern all the way around.
- You should have 10 stitches by the end.
- Row 15 – Final Decrease Round (All Decreases):
- Decrease in every stitch.
- You should have 5 stitches by the end.
- Close off by tying a band and loop through several stitches to create a tight finish.
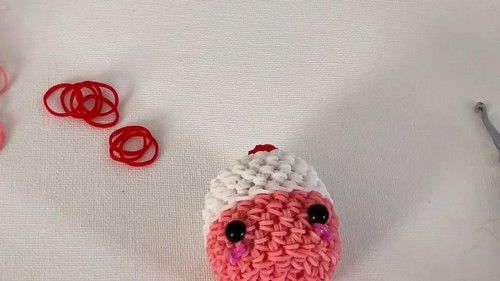
Finishing Touches:
- Cheeks:
- Use sparkly pink bands.
- Stitch under the eye, pull the band through, and tuck it back in for cheeks.
- Cherry:
- Use 4 bands, wrapped around your hook three times.
- Pull a frosting color band through all loops.
- Stitch it onto the top of the cupcake and tie securely.
- Sprinkles:
- Select random rainbow colors.
- Use the technique similar to the cheeks and sprinkle over the frosting.
- Mouth:
- Use a band of any desired color.
- Cut and shape it for a smile.
- Use a tiny speck of hot glue to secure the smile onto the cupcake, or tie a band directly.
- Stuffing:
- Use Polyfill or other stuffing material to stuff the cupcake to your desired shape.
Final Notes:
- Ensure all loose ends are tucked in to give it a clean finish.
- Always check your progress in each row to make sure you’re getting the correct number of stitches.
Your adorable crochet cupcake amigurumi is now complete!