Crochet Knee-High Leg Warmers Pattern To Beat the Chill
Stay cozy and stylish with these crochet knee-high leg warmers, perfect for chilly days and adding a touch of charm to your favorite outfits.
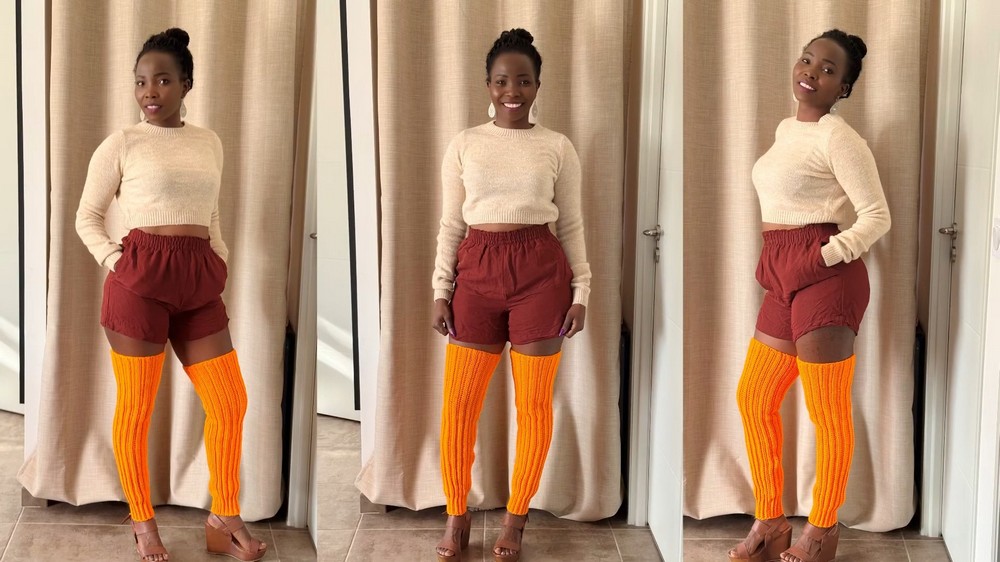
Knee-high leg warmers are great for staying warm and stylish as the weather gets colder and days shorter. The Free Crochet Knee-High Leg Warmers Pattern is perfect for making cozy, breathable leg warmers that still keep you warm. They’re made with soft yarn and have an open stitch design, so they feel snug but let your skin breathe. You can wear them over leggings, jeans, or even skirts. They’re perfect for outdoor activities, dance, or everyday outings while staying comfy and mobile.
Free Crochet Knee-High Leg Warmers Pattern That Fits All Sizes
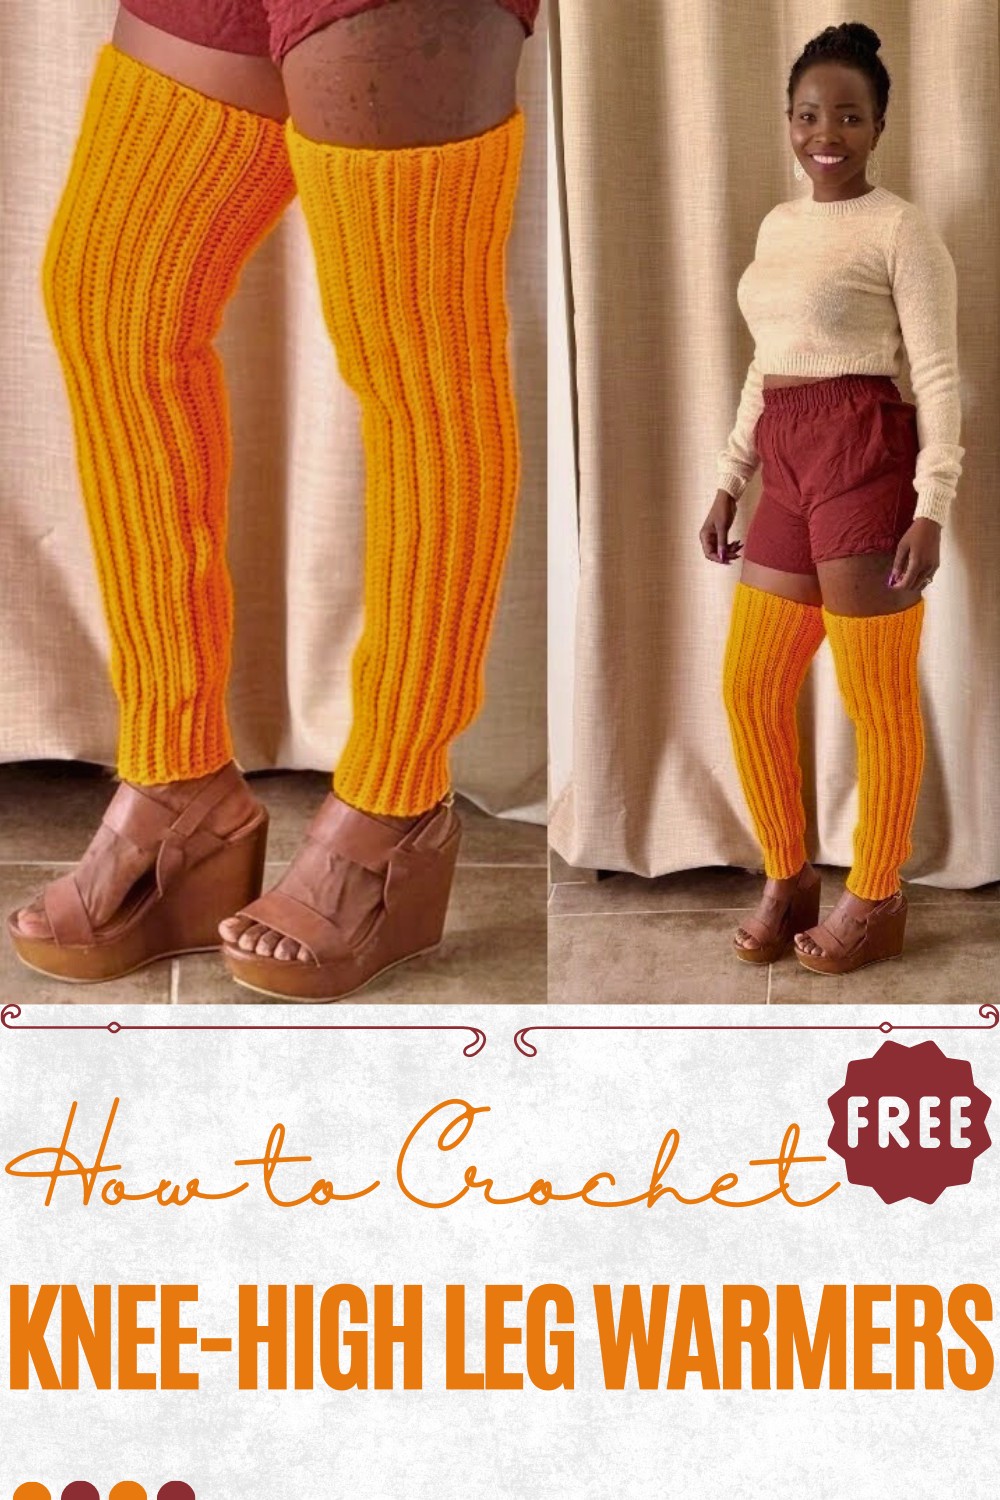
Their length ensures that cold air stays at bay, while the stretchy construction offers a comfortable fit for various leg sizes. Beyond keeping the chill out, they bring texture and color to any outfit, making them versatile accessories that adapt to multiple styles and seasons. The lightweight nature means they won’t weigh you down, allowing for effortless movement throughout the day.
Whether layered under boots or paired with sneakers, these leg warmers offer both practicality and charm. Their handmade quality also lends a personal touch, making them thoughtful gifts for friends and family who appreciate cozy, stylish warmth during cooler months.
Step-by-Step Instructions from the Video:
1. Preparation
- Gather Materials:
- Yarn: 50g (140 meters) of lightweight number 3 acrylic yarn. The instructor used a yarn labeled “color 7,” referring to it as orange.
- Crochet Hook: 5 mm (H-8 US) hook, larger than the recommended 3.5-4 mm for the yarn.
- Additional Supplies: Scissors, a darning needle, measuring tape, and a stitch marker (or alternative such as a hairpin as the tutor prefers).
2. Starting the Leg Warmers
- Form a Slip Knot: Create a slip knot to attach the yarn to the hook.
- Crochet the Foundation Chain:
- Measure from your ankle to the desired height of your leg warmers (e.g., for thigh-high warmers).
- Create a chain to match this length. For the tutorial, Angel crochets 100 chains for thigh-high length.
- Add one extra chain to act as the turning chain.
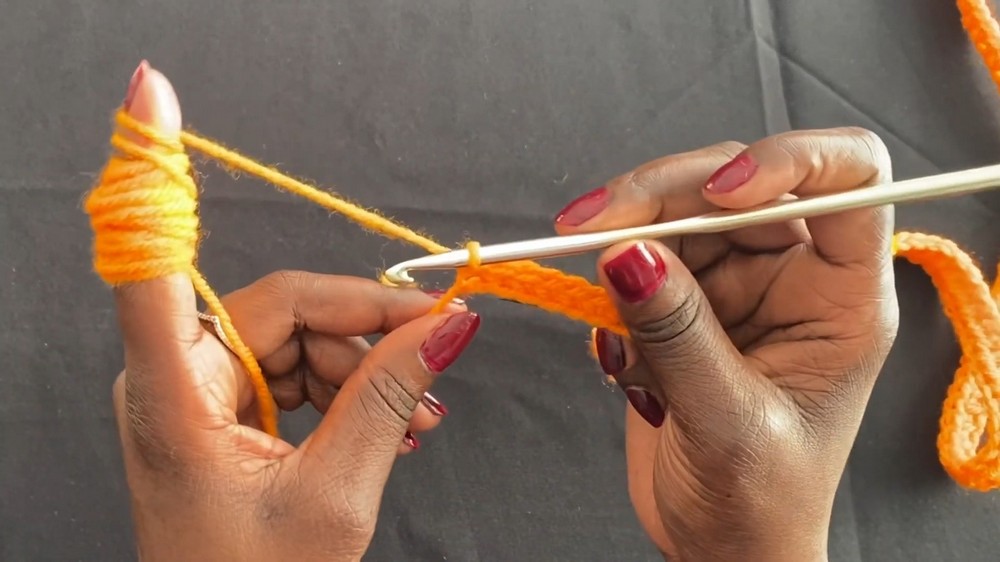
3. Row 1:
- Skip the 1st chain and begin working into the 2nd chain.
- Use half-double crochet stitches (hdc) worked in the back loop only for most of the row. This technique creates the ribbed texture of the leg warmers.
- Leave 12 stitches at the ankle section to work single crochet stitches (sc) instead. This ensures the fabric hugs the ankle snugly.
4. Row 2 and Beyond:
- Begin Each Row:
- Chain 1 (does not count as a stitch).
- Turn your work to start the new row.
- Continue working single crochet stitches into the back loop at the bottom section (12 stitches, or adjust for your desired ankle fit).
- Work half-double crochet stitches in the back loop for the rest of the row.
- At the end of each row, Angel uses both loops (not just the back loop) for the final stitch. This creates a firmer edge.
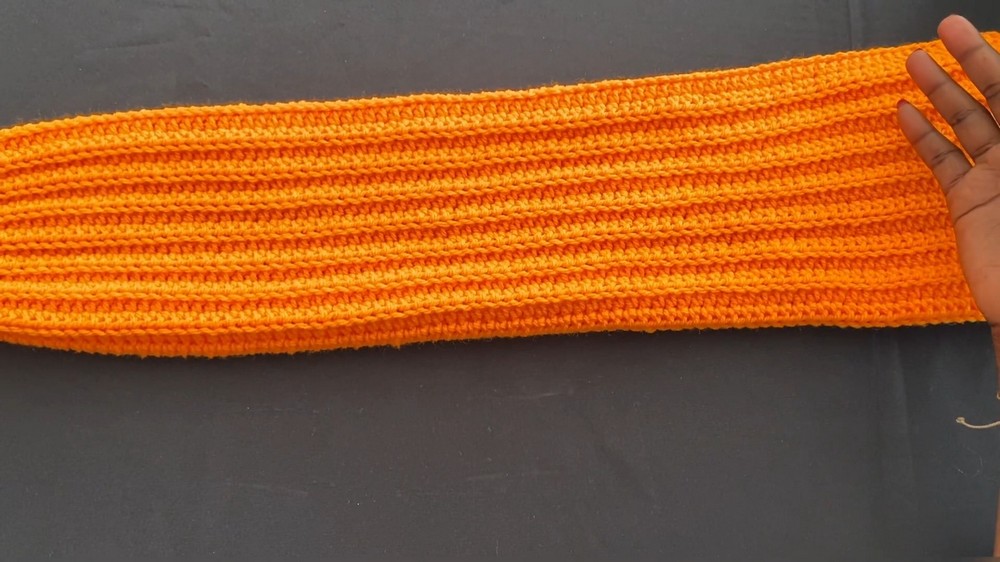
5. Determining Width:
- Crochet rows and stretch your work periodically to ensure you’ve achieved the proper width for the widest part of your leg (e.g., the thigh).
- For Angel, this meant stretching the fabric to a circumference of 22 inches for her thigh. She stopped at approximately 32 rows.
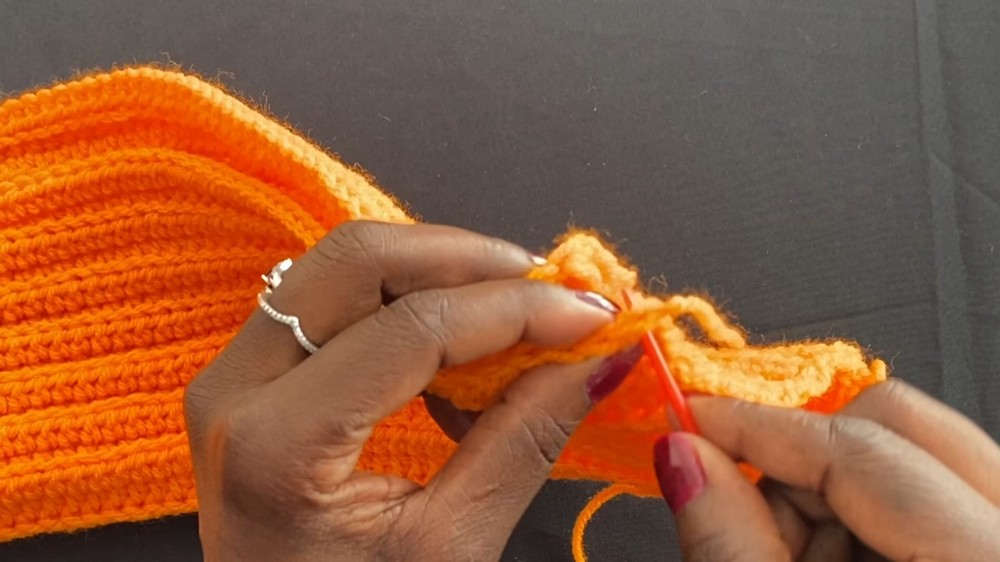
6. Joining the Leg Warmers:
- Once the desired width is reached, cut the yarn, leaving a long strand for joining the edges.
- Fold the leg warmer inside-out and use a darning needle to sew the edges together, aligning the stitches.
- Use single-loop sewing for a seamless finish.
7. Finishing Touches:
- Securely weave in any remaining yarn at both the beginning and end.
- Flip the leg warmer to the right side. Test the fit to ensure it hugs snugly around the ankle and thigh.
Special Features:
- Beginner-Friendly: The project features simple stitches (hdc and sc).
- One-Row Repeat Pattern: No need to learn multiple rows; repetition is key.
- Ribbed Texture: Achieved by consistently working into the back loop of the stitches.
- Custom Fit: Instructions include personalization options for both length and width.
- Stretchy and Cozy Design: The acrylic yarn and stitch methodology result in a durable and flexible fabric.
Level of Difficulty:
- Beginner-Friendly
The tutorial is ideal for beginners. The instructor explains every step in great detail and offers alternative methods suitable for those still learning.
Tutor’s Key Suggestions:
- Hook Size Consideration:
Beginners should stick to the recommended crochet hook size (3.5-4 mm) to maintain consistent tension unless they can comfortably manage larger hooks. - Stitch Marker Use:
While the instructor uses a hairpin as a stitch marker, she emphasizes their importance, especially for beginners, to avoid losing track of stitch counts at transitions. - Measuring for Fit:
- Use a tape measure to determine thigh circumference for accurate size and fit.
- Stretch the work periodically while crocheting to mimic how the finished piece will fit around the leg.
- Customization Tips:
- Adjust chain length for shorter leg warmers or alternative fits (e.g., above-knee or under-knee styles).
Uses:
- Wardrobe Addition: Perfect for cold weather to pair with skirts, shorts, or leggings.
- Personalized Gift: An excellent handmade present tailored to the recipient’s preferences.
- Fitness Wear: Use for extra warmth during workouts or yoga sessions.
Materials List:
- Yarn: Lightweight #3 acrylic yarn (50g skeins, approx. 140 meters each). One leg warmer used 1.5 skeins (about 2 for both).
- Hook: 5 mm crochet hook (or size of choice).
- Darning Needle: For sewing the seam.
- Scissors: To cut the yarn.
- Measuring Tape: To achieve precise dimensions.
- Stitch Markers: To help track stitch locations during rows.
Tip for Success:
- Consistent Tension is Key!
While ribbed patterns are naturally forgiving, maintaining even tension will give the finished leg warmers a professional and polished look. Practice even pulling on stitches and adjust your grip if needed.
Conclusion:
Through this tutorial, Creator masterfully teaches us how to create thigh-high leg warmers using basic stitches and techniques. With its simple yet unique design and options for customization, this project is perfect for crocheters of all skill levels. Whether for cozy comfort or a stylish statement, these leg warmers will be a proud addition to any wardrobe.