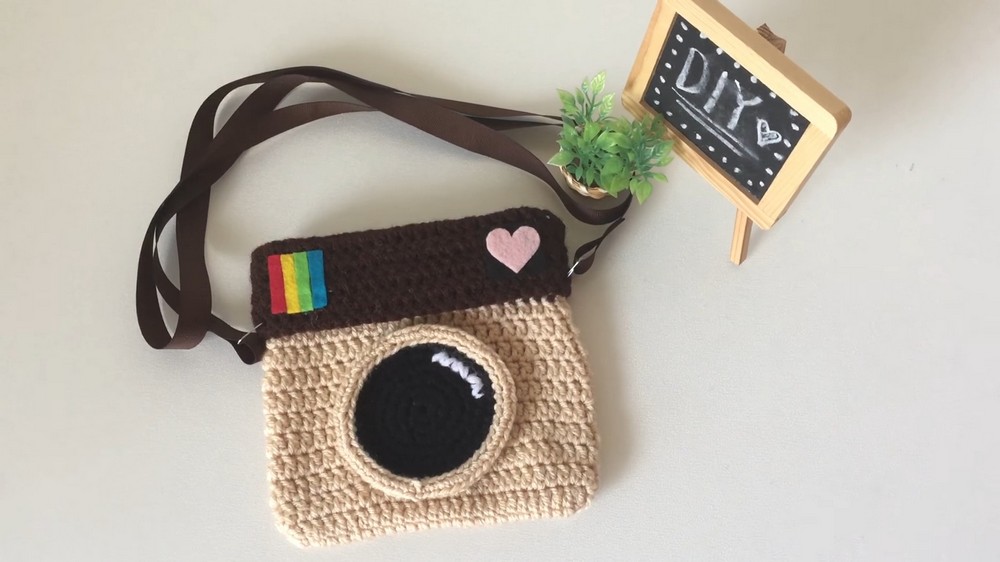
Crochet Instagram Icon Purse Pattern For Social Media Fans
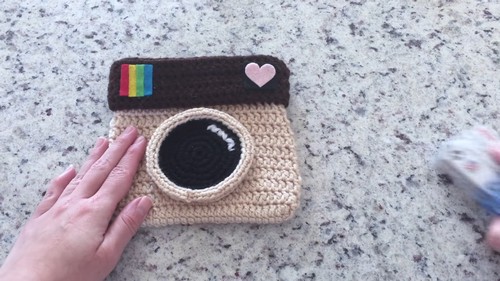
Craft an adorable and nostalgic Instagram icon purse with this simple crochet pattern! The purse shines with a cute, square shape, complete with a three-dimensional black camera lens and colorful felt strips that mimic the old Instagram logo. Personalize it with a heart “flash” for extra charm. Perfect for holding small, light items, this DIY purse makes a fantastic handmade gift for the holiday season!
![]()
Why Love This Pattern?
- Retro Aesthetic: The pattern has a nostalgic charm by resembling Instagram’s original icon, creating a “kick back” to the past which the creator finds “really cool.”
- Versatility: Different color variations of the purse can be made, and it can be personalized with photos, making it a unique and thoughtful gift, especially for the holiday season.
- Practical and Fun: The pattern results in a cute, functional purse that can hold small, light items, making it both practical and fun to use or gift.

How To Crochet Instagram Purse
Materials
- Light tan yarn
- Dark brown yarn
- Black yarn
- White yarn (or the same base color)
- Primary colored felt strips plus green
- Light pink felt
- Black felt
- Crochet needle (2.75 mm or appropriate size for the yarn)
- Scissors
- Hot glue gun and glue sticks
- Paper clips (for optional strap)
- Ribbon (for optional strap)
- Yarn needle (optional but recommended)
Step-by-Step Instructions
- Start with a Chain:
- Using the light tan yarn, create a slip knot and make a chain as long as you want the width of the bag. This should be around 4-5 inches.
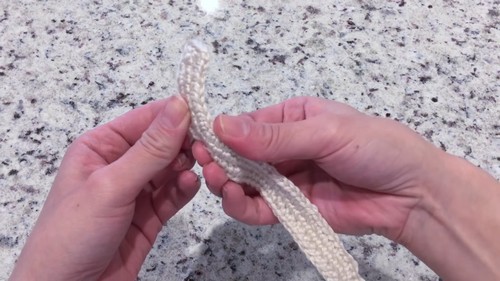
- Create Simple Knots:
- Insert the needle into each loop of the chain and pull some yarn through, creating two loops on the needle.
- Pull yarn through both loops to form a knot.
- Repeat this across the entire chain.
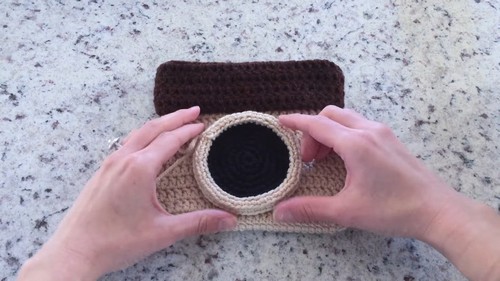
- Forming the Base:
- After completing the chain, crochet around the perimeter of the base in the same way to form a continuous row. Do not expand, except on the edges, where you can add 2-3 knots per loop.
- Continue crocheting in circles around the perimeter until the base starts forming upward edges, creating the body of the bag.

- Switching to Dark Brown Yarn:
- Once the bag is almost the desired height, cut the light tan yarn and tie on the dark brown yarn.
- Continue crocheting in the same manner until you achieve the desired height.
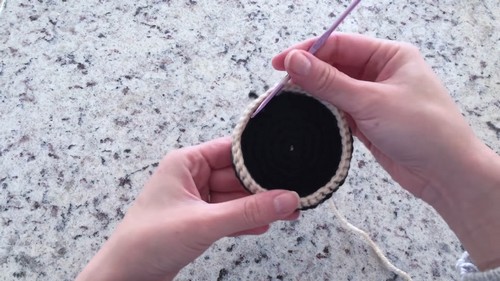
- Create the Camera Lens:
- Using black yarn, start with a simple chain and form a small ring.
- Create 5-6 knots in the ring, then join the starting knot to close the ring.
- Expand by putting multiple knots (two) in each previous knot.
- Add a rim around the lens using white yarn by crocheting through just the front or back loops to create a 3D effect.
- Adding Lens Glare:
- Using a needle or your crochet hook, thread a piece of white yarn through the black lens to create a glare effect.
- Colored Strips and Heart Decoration:
- Cut one-inch long and half-centimeter wide strips of primary colored felt plus green.
- Arrange and hot glue these strips on the top-left corner of the bag.
- Cut out a small heart from light pink felt and a small black square.
- Glue this heart plus black square on the top-right corner to represent the camera flash.
- Finishing Touches:
- Hot glue the yarn ends and the decorations securely onto the bag.
- If desired, create a simple strap:
- Shape paper clips into triangles, insert them through the knots at the bag’s sides, and securely attach ribbon straps.

- Final Assembly:
- Ensure all parts are securely attached and the bag is structurally sound.
- The finished product should resemble the classic Instagram icon.