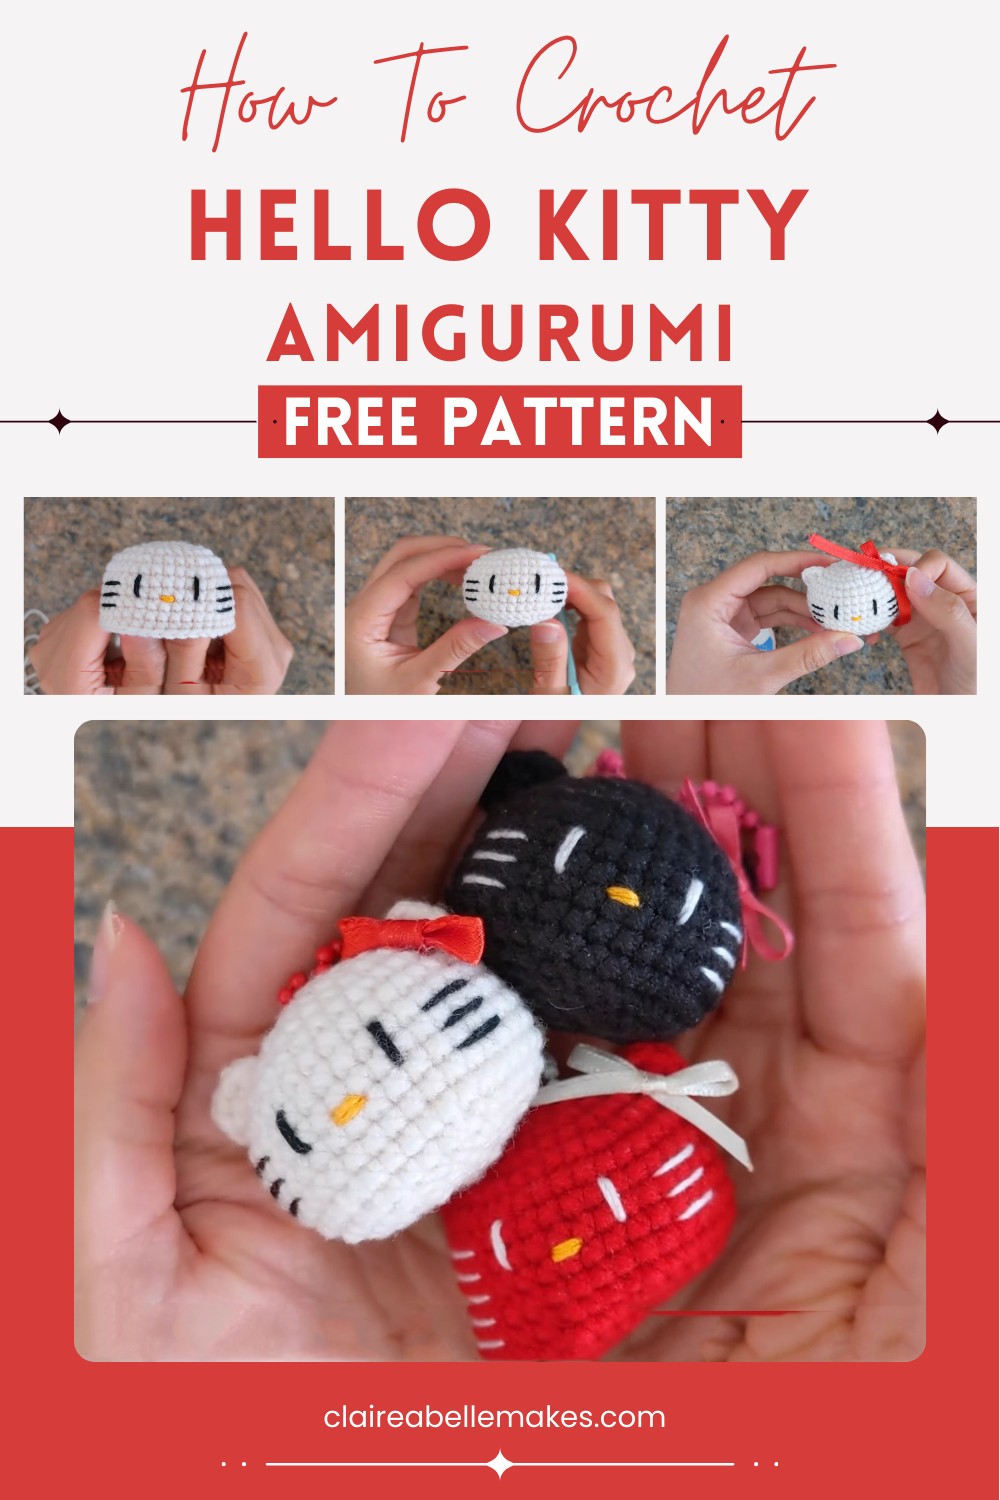
Crochet Hello Kitty Amigurumi Ornament Pattern
Craft a charming Hello Kitty Amigurumi with this easy crochet pattern, perfect for gifting, decorating shelves, and adding nostalgic charm!
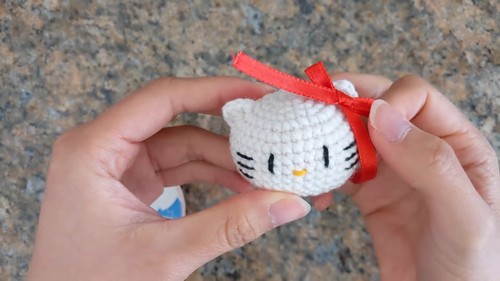
Crochet Hello Kitty Amigurumi Pattern
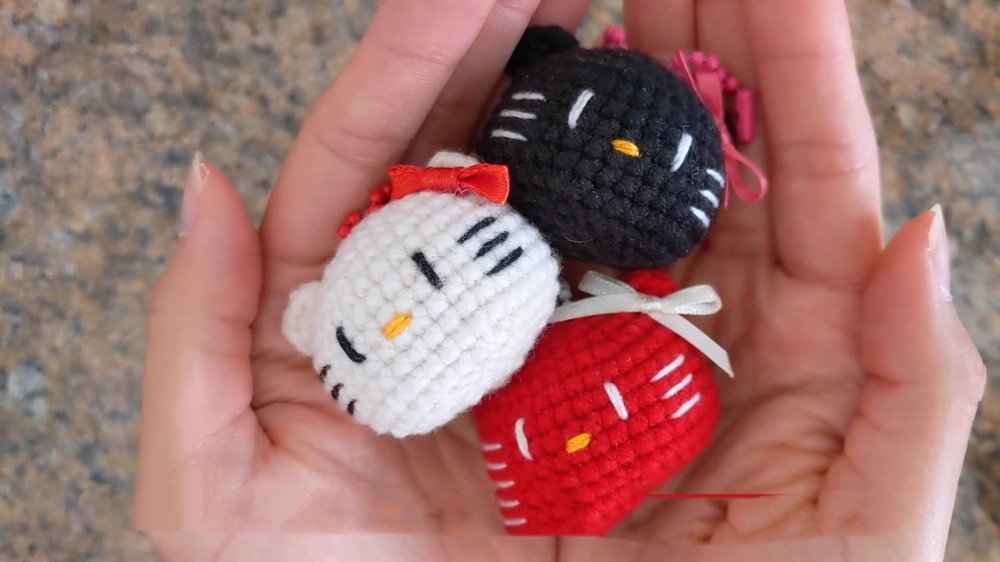
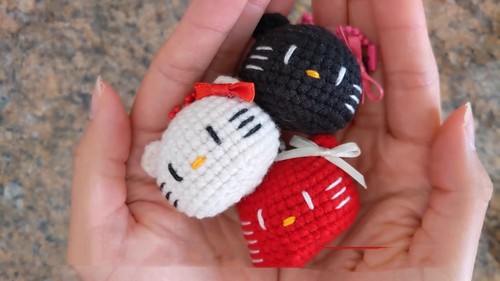
Cute, charming, and full of personality, this Crochet Hello Kitty Amigurumi Pattern brings the beloved character to life in the coziest way! With its signature round head, tiny ears, and adorable bow, this plushie perfectly captures Hello Kitty’s iconic look. The soft yarn and detailed stitching make it a delightful handmade gift or collectible. Perfect for decorating shelves, gifting to fans, or adding a touch of nostalgia to any space, this pattern is easy to follow and fun to create!
Uses of Crochet Hello Kitty Amigurumi
1. Decorative Item
- You can place the crocheted Hello Kitty on a shelf, desk, or any other surface to add a cute and unique touch to your home decor.
2. Gift
- Handmade gifts are special, and a crochet Hello Kitty amigurumi can be a thoughtful present for friends, family, or anyone who loves Hello Kitty.
3. Keychain or Bag Charm
- By adding a keychain or clip, you can turn the amigurumi into a charming accessory for your keys, backpack, or handbag.
4. Toy for Children
- The amigurumi can be a soft and safe toy for children to play with, especially if made with child-friendly materials.
5. Collectible Item
- Fans of Hello Kitty can add the amigurumi to their collection of Hello Kitty memorabilia.
How To Crochet Amigurumi Hello Kitty
Materials Needed:
- Light-weight white yarn (Ivory shade suggested, but your choice)
- 3 mm crochet hook
- Tapestry needle
- Sewing needle
- Pair of scissors
- Red ribbon (1/4 inch width)
- Black and yellow embroidery thread
- Glue
- Stuffing
- Optional: Keychain, lighter, stitch marker
Crochet Instructions:
Head (Rounds 1-17)
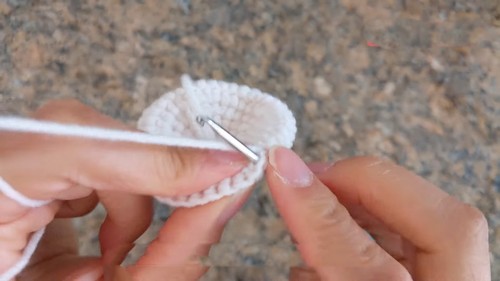
- Round 1:
- Create a magic ring with 6 single crochets (sc).
- Pull the tail to close, slip stitch (sl st) to join.
- Chain 1 (ch 1).
- Round 2:
- Increase in each stitch around.
- (2 sc in each stitch) for a total of 12 sc.
- Sl st to join, ch 1.
- Round 3:
- 1 sc in first stitch, increase in next stitch, repeat around.
- (1 sc, inc) x6 for a total of 18 sc.
- Sl st to join, ch 1.
- Round 4:
- 1 sc in first stitch, 2 sc in the next two stitches, increase in the next stitch, repeat around.
- (2 sc, inc) with an additional 1 sc in the last stitch for a total of 24 sc.
- Sl st to join, ch 1.
- Round 5:
- 3 sc, increase in the next stitch, repeat around.
- (3 sc, inc) x6 for a total of 30 sc.
- Sl st to join, ch 1.
- Round 6:
- 4 sc, increase in the next stitch, repeat around.
- (4 sc, inc) x5, then 2 sc for a total of 36 sc.
- Sl st to join, ch 1.
- Rounds 7-12:
- Crochet 1 sc in each stitch around (36 sc).
- Sl st to join, ch 1 after each round.
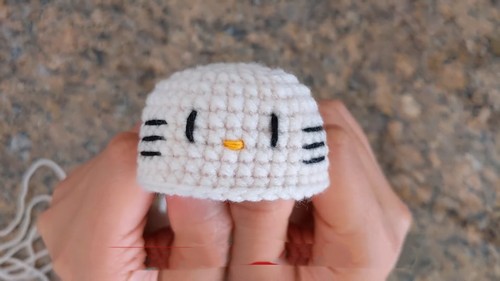
Embroider the Face:
- Eyes: Place between rounds 7 and 8 with 5 stitches apart.
- Whiskers: Use a simple loop technique for thin lines.
- Nose: Embroider a loop between the eyes.
Head (Decreasing Rounds)
- Round 13:
- 4 sc, decrease in the next stitch, repeat around.
- (4 sc, dec) x5, then 2 sc for a total of 30 sc.
- Sl st to join, ch 1.
- Round 14:
- 3 sc, decrease in the next stitch, repeat around.
- (3 sc, dec) x6 for a total of 24 sc.
- Sl st to join, ch 1.
- Round 15:
- 2 sc, decrease in the next stitch, repeat around.
- (2 sc, dec) x5, then 1 sc for a total of 18 sc.
- Add stuffing here.
- Sl st to join, ch 1.
- Round 16:
- 1 sc, decrease in the next stitch, repeat around.
- (1 sc, dec) x6 for a total of 12 sc.
- Sl st to join, ch 1.
- Round 17:
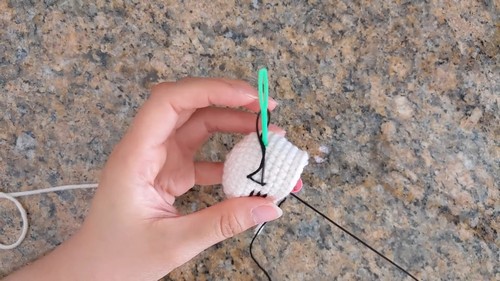
- Decrease all around (dec x6) for a total of 6 sc.
- Sl st to join without chaining.
- Fasten off and weave the yarn tail through the front loops to close.
Ears
- Right Ear:
- Start between rounds 6 and 7, 2 stitches away from whiskers.
- Slip stitch, then create the following: sc, hdc, dc, hdc, sc.
- Fasten off and weave in the tail.
- Left Ear:
- Start between rounds 4 and 5.
- Repeat the same stitch pattern as the right ear.
- Fasten off and weave in the tail.
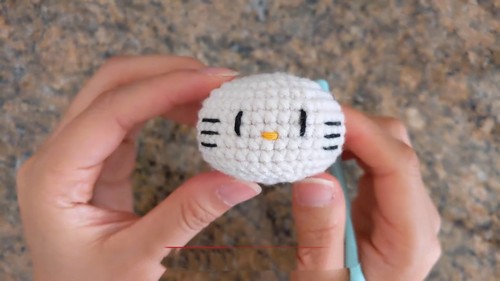
Bow
- Tie a simple bow with the red ribbon and trim the edges.
- Use a lighter to melt the edges and prevent fraying.
- Attach the bow using glue on the right ear and let it dry.
Congratulations, you have completed the Hello Kitty head crochet amigurumi! Enjoy your creation.