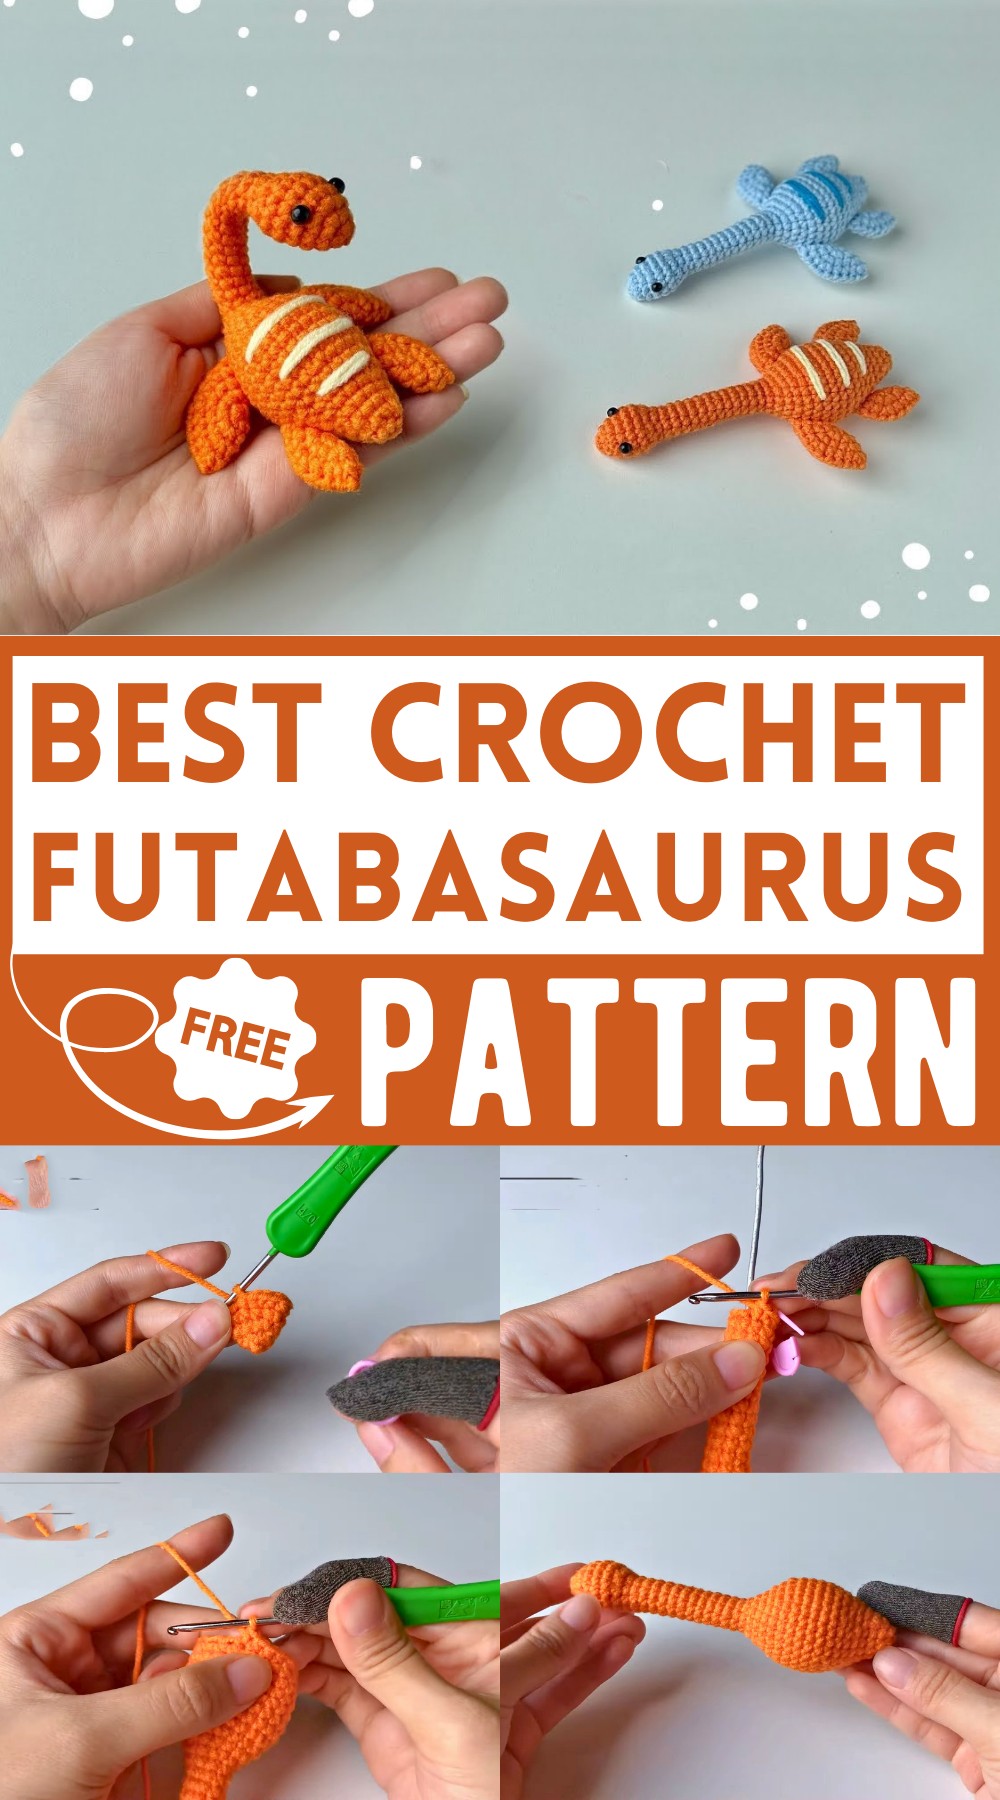
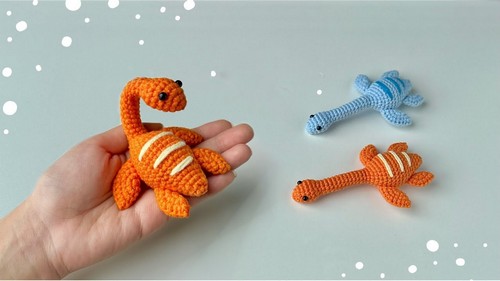
Crochet Futabasaurus With Bendable Neck Pattern
Today’s Crochet Futabasaurus Amigurumi Pattern brings the fascinating Futabasaurus to life in the most charming way! This pattern creates an adorable, small Futabasaurus, easy to hold and cuddle. The design features a round body, long neck, cute flippers, and a smiling face, bringing a prehistoric charm to your crochet projects. This amigurumi is ideal as a gift for kids or dinosaur enthusiasts and adds a playful touch to any room. Crochet this delightful dino and watch your creation come to life, stitch by stitch!
Why Love This Pattern?
- Detailed Instructions: The video provides a step-by-step, detailed guide for creating the dinosaur, making it easy to follow along even for beginners.
- Structured Approach: The pattern is well-organized into rounds, with clear instructions on how many stitches to make in each round, making the process systematic and easy to track.
- Use of Magic Ring: The pattern begins with a magic ring, which is a preferred method for creating amigurumi because it allows you to close the initial loop tightly, resulting in a professional look.
- Customization: Making separate parts like the head, body, and flippers allows for customization in terms of size and even color, letting you add your personal touch to the dinosaur.
How To Crochet Amigurumi Futabasaurus
Materials Needed:
- Yarn
- Crochet hook
- Stitch marker
- Filling (stuffing)
- Wire (approximately 11 cm long)
- Glue for wire ends
Pattern:
Head and Body:
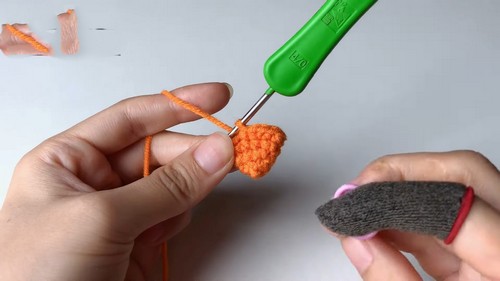
- Magic Ring:
- Create a magic ring.
- Round 1:
- Crochet 6 single crochet stitches (sc) into the magic ring.
- Pull the yarn to close the loop.
- Round 2:
- [sc, inc] 3 times. (8 sts)
- Place a stitch marker into the first stitch of this round to mark your starting point.
- Round 3:
- [sc, inc, sc] 3 times. (12 sts)
- Mark the first stitch.
- Round 4:
- [sc, sc, sc, inc] 3 times. (16 sts)
- Round 5:
- Crochet one single crochet stitch (sc) into each stitch until the end of the round. (16 sts)
- Round 6:
- Crochet one single crochet stitch (sc) into each stitch until the end of the round. (16 sts)
- Round 7:
- Crochet 3 single crochet stitches (1, 2, 3).
- Crochet 2 decrease stitches (dec).
- Crochet 1 single crochet stitch.
- Crochet 2 decrease stitches (dec).
- Crochet 3 single crochet stitches (1, 2, 3).
- Round 8:
- Crochet 3 single crochet stitches (1, 2, 3).
- Crochet 1 decrease stitch (dec).
- Crochet 1 single crochet stitch.
- Crochet 1 decrease stitch (dec).
- Crochet 3 single crochet stitches (1, 2, 3).
- Round 9:
- Crochet 1 single crochet stitch into each stitch around.
- Stuff the piece with filling.
- Insert the wire, covering both ends with glue for safety.
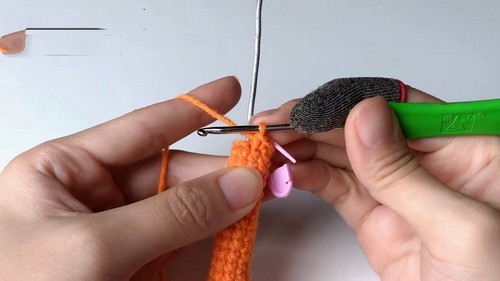
- Round 10-20:
- Crochet 1 single crochet stitch into each stitch around.
- Add more stuffing as needed.
- Round 21:
- Crochet 3 single crochet stitches (1, 2, 3).
- Crochet 3 increase stitches (inc).
- Crochet 3 single crochet stitches (1, 2, 3).
- Round 22:
- Crochet 3 single crochet stitches (1, 2, 3).
- Crochet 1 increase stitch (inc).
- Repeat the order 2 more times.
- Round 23:
- Crochet 2 single crochet stitches.
- Crochet 1 increase stitch (inc).
- Crochet 2 single crochet stitches.
- Repeat the order 2 more times.
- Round 24:
- Crochet 5 single crochet stitches (1, 2, 3, 4, 5).
- Crochet 1 increase stitch (inc).
- Repeat the order 2 more times.
- Round 25:
- Crochet 3 single crochet stitches (1, 2, 3).
- Crochet 1 increase stitch (inc).
- Crochet 3 single crochet stitches (1, 2, 3).
- Repeat the order 2 more times.
- Round 26:
- Crochet 7 single crochet stitches (1, 2, 3, 4, 5, 6, 7).
- Crochet 1 increase stitch (inc).
- Repeat the order 2 more times.
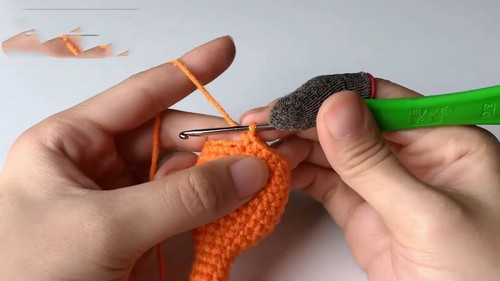
- Round 27-30:
- Crochet 1 single crochet stitch into each stitch around.
- Round 31:
- Crochet 7 single crochet stitches (1, 2, 3, 4, 5, 6, 7).
- Crochet 1 decrease stitch.
- Repeat the order 2 more times.
- Round 32:
- Crochet 3 single crochet stitches (1, 2, 3).
- Crochet 1 decrease stitch.
- Crochet 3 single crochet stitches (1, 2, 3).
- Repeat the order 2 more times.
- Round 33:
- Crochet 5 single crochet stitches (1, 2, 3, 4, 5).
- Crochet 1 decrease stitch.
- Repeat the order 2 more times.
- Round 34:
- Crochet 2 single crochet stitches.
- Crochet 1 decrease stitch.
- Crochet 2 single crochet stitches.
- Repeat the order 2 more times.
- Add more stuffing.
- Round 35:
- Crochet 1 single crochet stitch into each stitch around.
- Round 36:
- Crochet 3 single crochet stitches (1, 2, 3).
- Crochet 1 decrease stitch.
- Repeat the order 2 more times.
- Round 37:
- Crochet 1 single crochet stitch.
- Crochet 1 decrease stitch.
- Crochet 1 single crochet stitch.
- Repeat the order 2 more times.
- Round 38:
- Crochet 1 single crochet stitch.
- Crochet 1 decrease stitch.
- Repeat the order 2 more times.
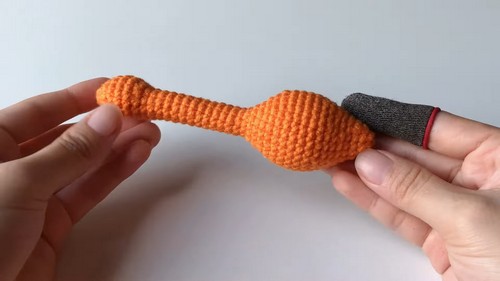
- Leave a piece of yarn, cut it, and stuff more.
- Sew the hole closed.
Back Flippers (Make 2):
- Magic Ring:
- Create a magic ring.
- Round 1:
- Crochet 6 single crochet stitches (sc) into the magic ring.
- Pull the yarn to close the loop.
- Round 2:
- Make 1 slip stitch (slst) into the first stitch.
- Chain 1.
- Make 1 increase stitch (inc) into each stitch around (to the end of the round).
- Round 3:
- Chain 1.
- Crochet 1 single crochet stitch (sc) into each of the first 2 stitches.
- Crochet 1 increase stitch (inc).
- Repeat this sequence 3 more times.
- Make 1 slip stitch (slst) into the first stitch.
- Leave a long piece of yarn, cut it, fold, and sew the two edges together.
Front Flippers (Make 2):
- Rounds 1-3:
- Follow the same instructions as the back flippers.
- Round 4:
- Crochet 1 single crochet stitch (sc) into each of the first 3 stitches.
- Crochet 1 increase stitch (inc).
- Repeat this sequence 3 more times.
- Make 1 slip stitch (slst) into the first stitch.
- Leave a long piece of yarn, cut it, fold, and sew the two edges together.
Finishing:
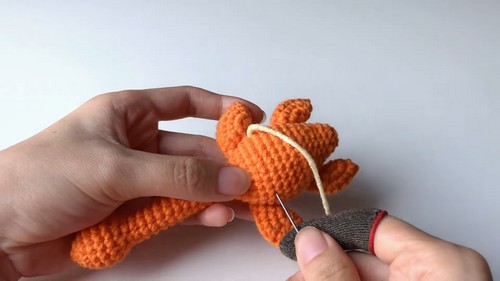
- Complete the head and body, back flippers, and front flippers.
- Attach the flippers to the body using a yarn needle.
- Make sure all parts are securely sewn.
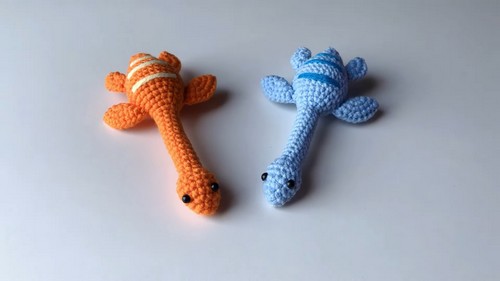
And that completes your crocheted dinosaur! Enjoy your new creation!