Crochet Fried Egg Amigurumi Pattern To Brighten Your Day
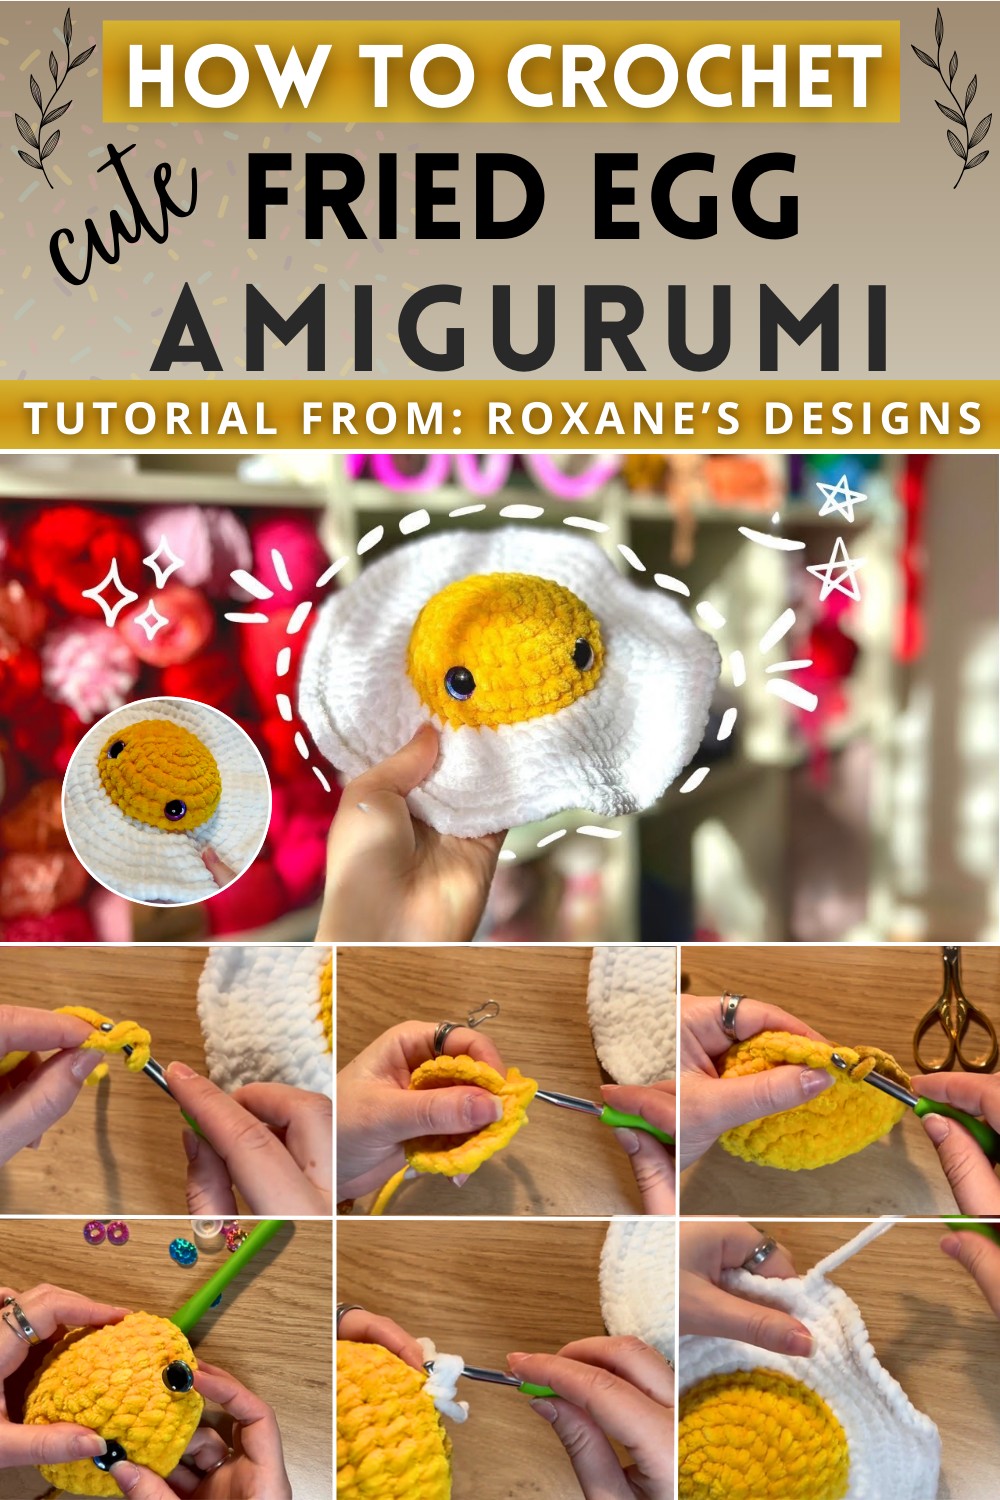
This fluffy, handmade creation is perfect for decorating your room, acting as a cozy friend, or as a gift to someone special. It’s quirky, joyful, and crafted stitch by stitch, making it a unique treasure that adds warmth and a sprinkle of fun to your day.
Materials Needed:
- 6 mm crochet hook
- Yellow yarn (brighter shade for the yolk)
- Yellow yarn (darker shade)
- White yarn
- 16 mm safety eyes (optional)
- Fiber fill (stuffing)
- Stitch marker
- Tapestry needles
Abbreviations:
- MR: Magic Ring
- ch: Chain
- sc: Single Crochet
- inc: Single Crochet Increase (2 single crochets in the same stitch)
- dec: Single Crochet Decrease
- sl st: Slip Stitch
- BLO: Back Loop Only
Instructions:
Yolk (Brighter Yellow Yarn)
Row 1:
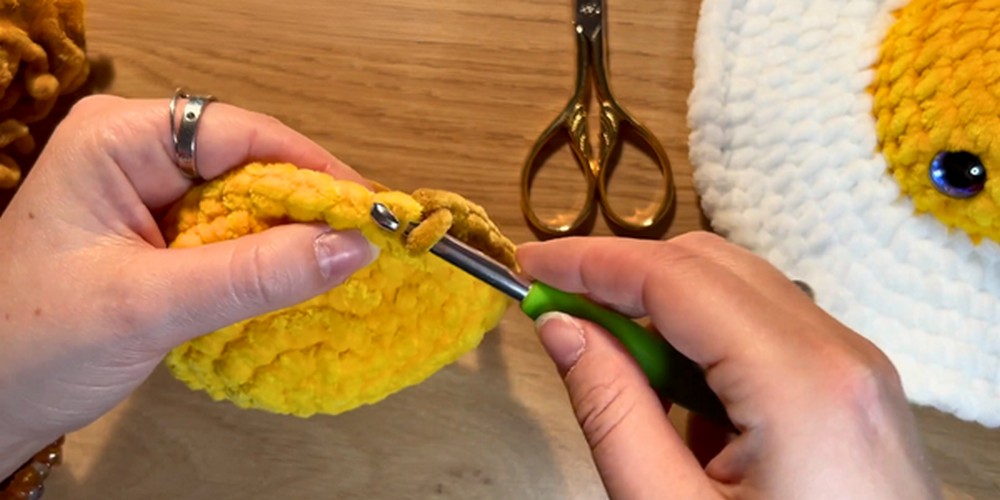
Start with a magic ring.
- Chain 2, then make 6 sc into the magic ring (6 sc).
Row 2:
- Make 1 inc in each stitch around (12 sc).
Row 3:
- Use a stitch marker to mark the beginning of the row.
- 1 sc, 1 inc, repeat until the end of the row (18 sc).
For Row 4:
- 2 sc, 1 inc, repeat until the end of the row (24 sc).
Row 5:
- 3 sc, 1 inc, repeat until the end of the row (30 sc).
Row 6:
- 4 sc, 1 inc, start with 2 sc, 1 inc, then continue with 4 sc, 1 inc, repeat until the last 2 stitches, sc in the last 2 stitches (36 sc).
For Row 7:
- Make 1 sc in each stitch around (36 sc).
Color Change:
- Leave the last stitch unfinished, switch to darker yellow yarn.
- Finish the stitch with the new yarn.
Yolk Decrease (Darker Yellow Yarn)
Row 8: (Working in BLO)
- 4 sc, 1 dec around (30 sc).
Row 9:
- 3 sc, 1 dec around (24 sc).
For Row 10:
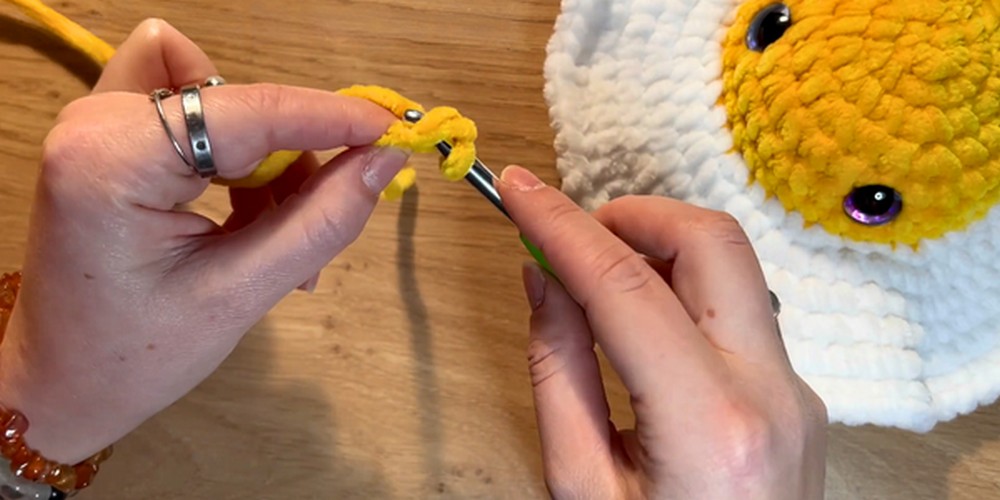
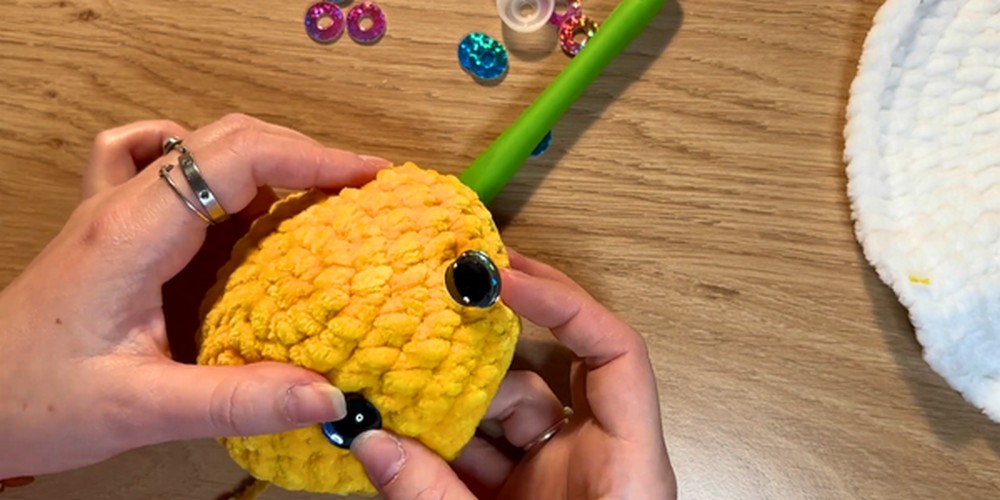
- Start filling the egg with fiber fill.
- Place the eyes between row 5 and 6, leaving about 5-6 stitches between them.
- 2 sc, 1 dec around (18 sc).
Row 11:
- 1 sc, 1 dec until the end (12 sc).
Final Row:
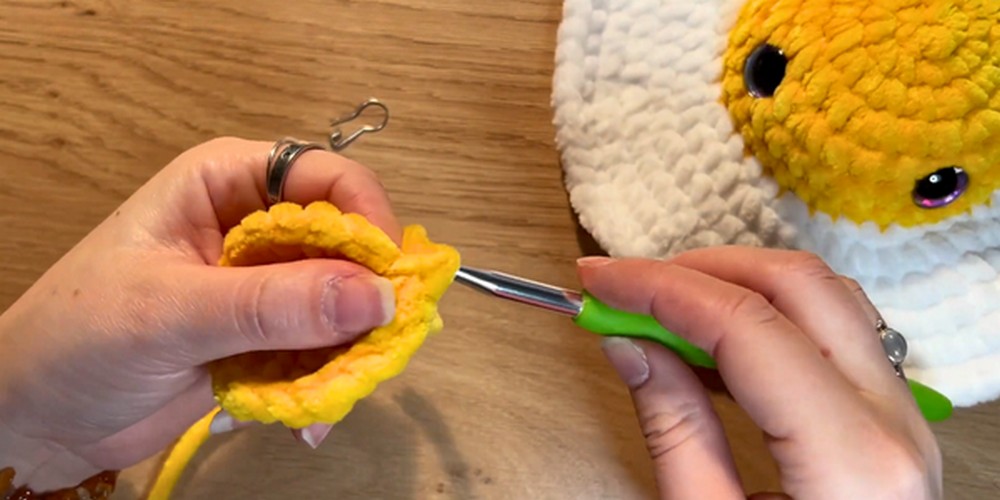
- Make 2-3 decreases, cut yarn, and sew the hole closed.
- The yolk is complete.
Egg White (White Yarn)
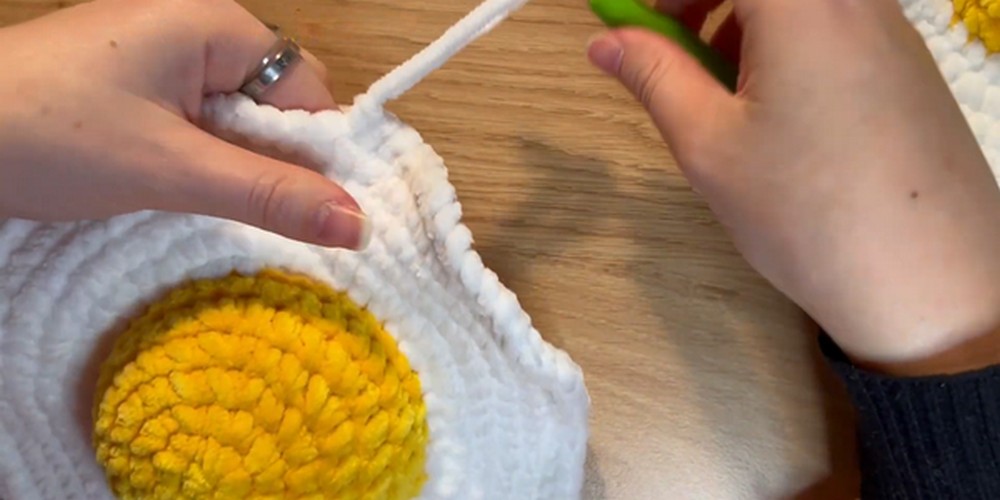
Join White Yarn:
- Attach white yarn to the front loop of the 8th row of the yolk.
- 3 sc, 1 inc around (45 sc).
Row 2:
- 4 sc, 1 inc, start with 2 sc, 1 inc, then continue with 4 sc, 1 inc, repeat until the last 2 stitches, sc in the last 2 stitches (54 sc).
Row 3:
- 5 sc, 1 inc around (63 sc).

For Row 4:
- 6 sc, 1 inc, start with 3 sc, 1 inc, then continue with 6 sc, 1 inc, repeat until the last 3 stitches, sc in the last 3 stitches (72 sc).
Row 5:
- 7 sc, 1 inc around (81 sc).
Final Row:
- 8 sc, 1 inc, start with 4 sc, 1 inc, continue with 8 sc, 1 inc, repeat until the last 4 stitches, sc in the last 4 stitches, sl st, and cut the yarn (90 sc).
Finish Up:
- Use a tapestry needle to hide all the yarn ends inside the egg.
Conclusion:
Your cute egg is now complete! Make sure to neaten all the ends and give your egg a little shaping to make it look perfect.