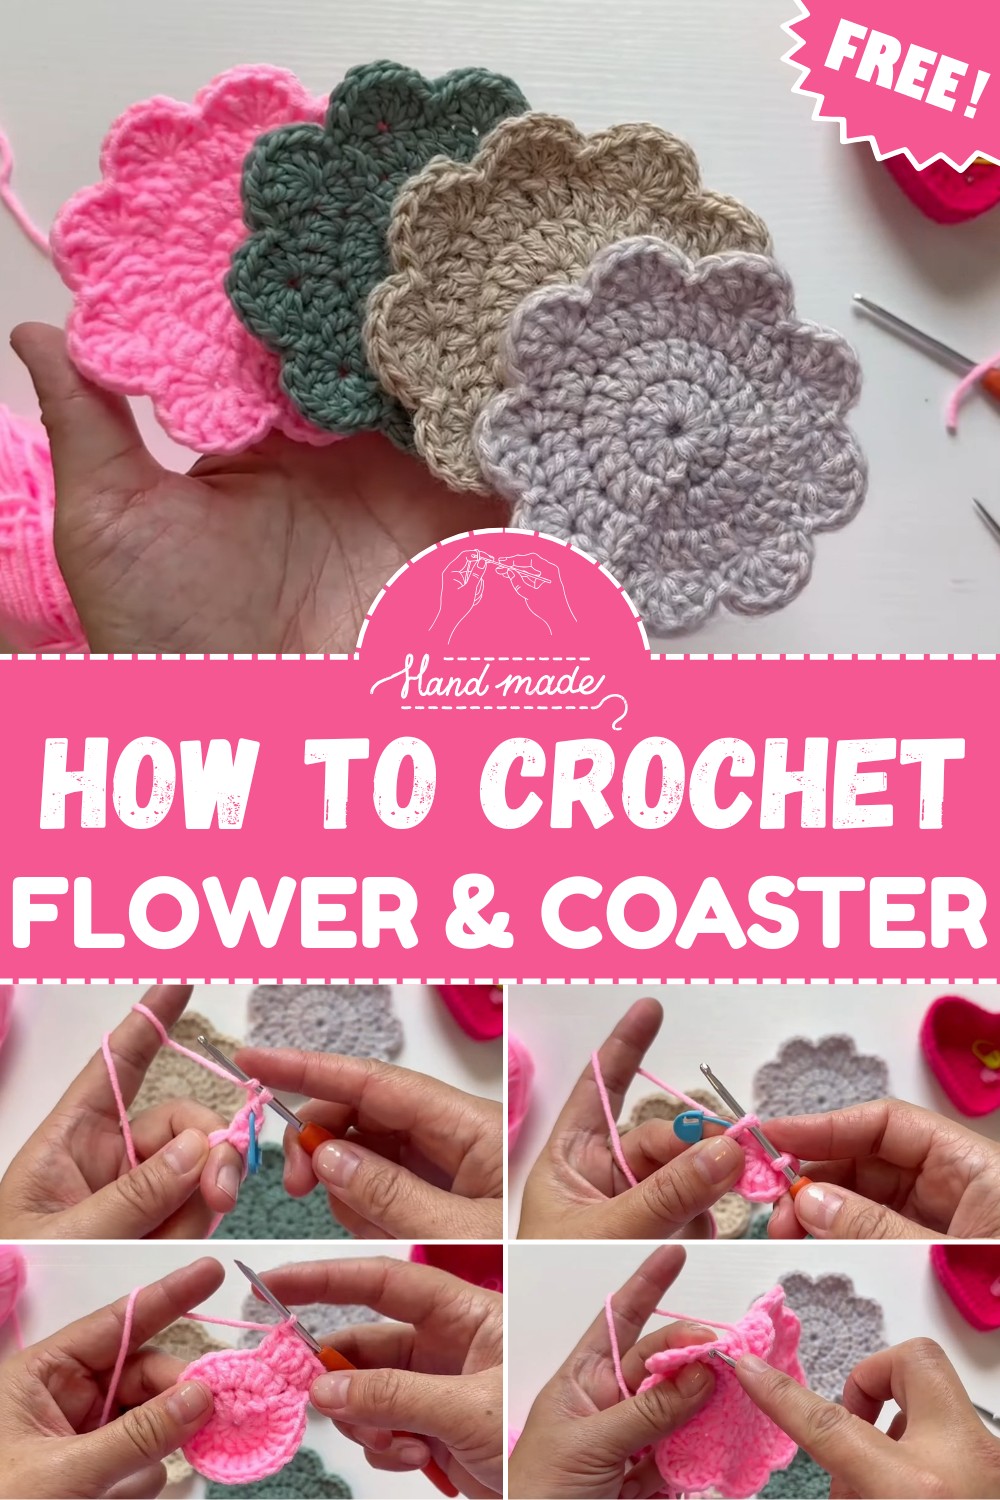
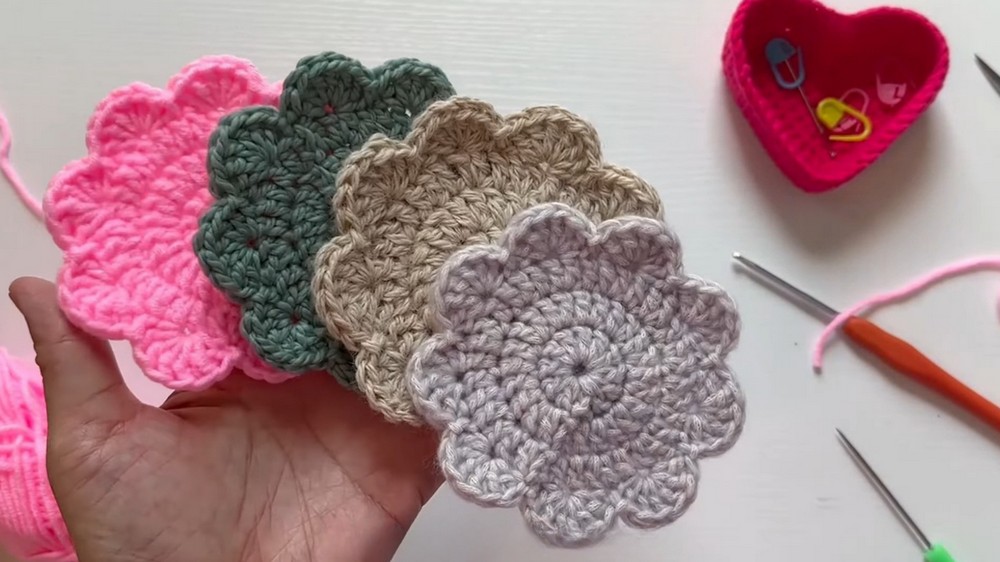
Crochet Flower Coaster Pattern For Handmade Decor
Delight in charming details with the Crochet Flower Coaster Pattern, perfect for adding stylish protection and a fresh floral touch to your table.
Flower-shaped coasters are a lovely way to add a touch of nature to your everyday spaces. They protect surfaces from stains and water rings while making tables look more beautiful. Perfect for kitchens, dining tables, or desks, their small size makes them easy to use anywhere. Lightweight and simple to clean, they’re not only practical but also a thoughtful handmade gift that shows care and creativity.
Crochet Flower Coaster Pattern to Complement Your Mugs
The floral form adds a refreshing softness, breaking away from plain and utilitarian options, and making every coffee break or tea time feel a little more special. Versatile in use, they can be mixed and matched in sets to brighten up gatherings or simply brighten a solitary cup.
Their handmade nature invites a connection between functionality and artistry, turning a simple household item into a conversation starter. Suitable for those who appreciate both beauty and utility, flower coasters offer a subtle way to uplift everyday rituals with their delicate yet practical charm.
Step-by-Step Details
Materials Needed:
- Yarn: Any yarn of your choice. A bright color makes instructions easier to follow.
- Crochet Hook: 3 mm crochet hook recommended.
- Scissors: To cut the yarn.
- Stitch Markers (optional but recommended): Helps track rounds easily.
Steps to Crochet Flower Coaster:
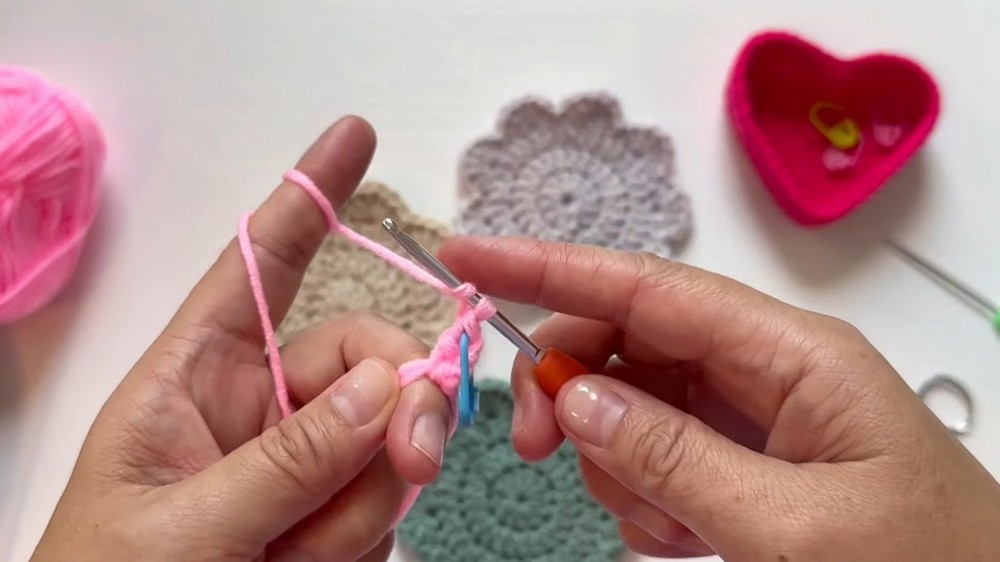
Step 1: Start with a Magic Ring
- Wrap the yarn clockwise around your index finger, creating an “X.”
- Insert the hook into the middle, grab the yarn, pull it through the center, and chain one to secure the ring.
Step 2: Round 1
- Chain 3 (counts as the first double crochet).
- Work 11 double crochets into the magic ring, totaling 12 stitches for the round.

- Use a stitch marker to mark the second stitch of the round (helpful for slip stitching later).
- Tighten the magic ring and slip stitch into the third chain of the initial chain 3 to close the round.
Step 3: Round 2 (Increase Round)
- Chain 3 (counts as the first double crochet).
- Work 2 double crochets into each of the 12 stitches around.
- Start by putting two double crochets into the first stitch and move your stitch marker accordingly.
- Continue working 2 double crochets into each remaining stitch.
- By the end of the round, you’ll have 24 stitches.
- Slip stitch into the top of the chain 3 to close the round.
Step 4: Round 3 (Mixed Increase)
- Chain 3 (counts as the first double crochet).
- Work 2 double crochets into the first stitch. Move your stitch marker to track progress.
- Alternate between an increase step:
- Do 1 double crochet in the next stitch, followed by 2 double crochets in the following stitch.
- Continue this pattern repeat (increase followed by one double crochet) around.
- Slip stitch into the chain 3 from the start to finish the round.
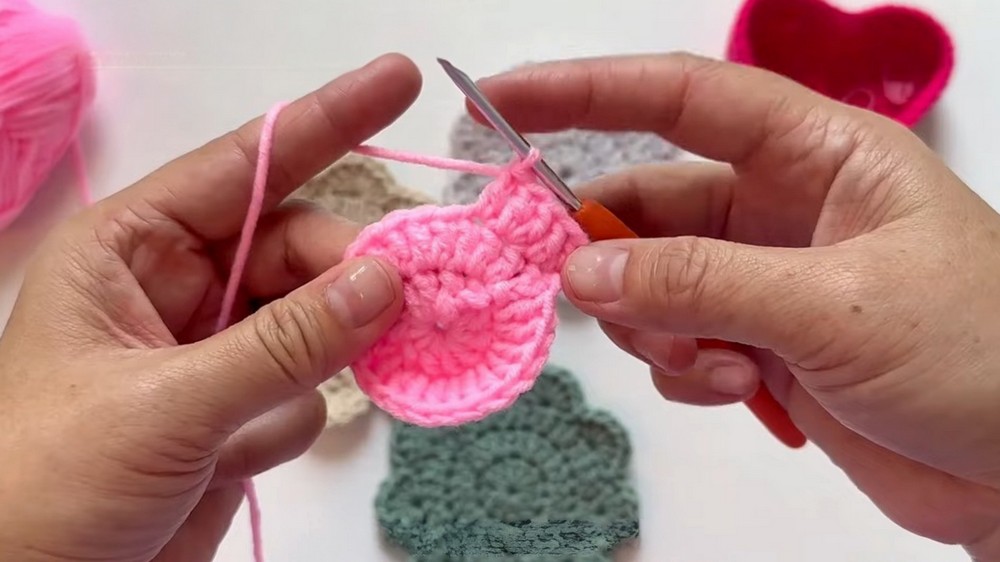
Step 5: Border (Clamshell Pattern)
- Skip the first two stitches, and in the third stitch, work 6 double crochets.
- Skip one stitch and slip stitch into the next.
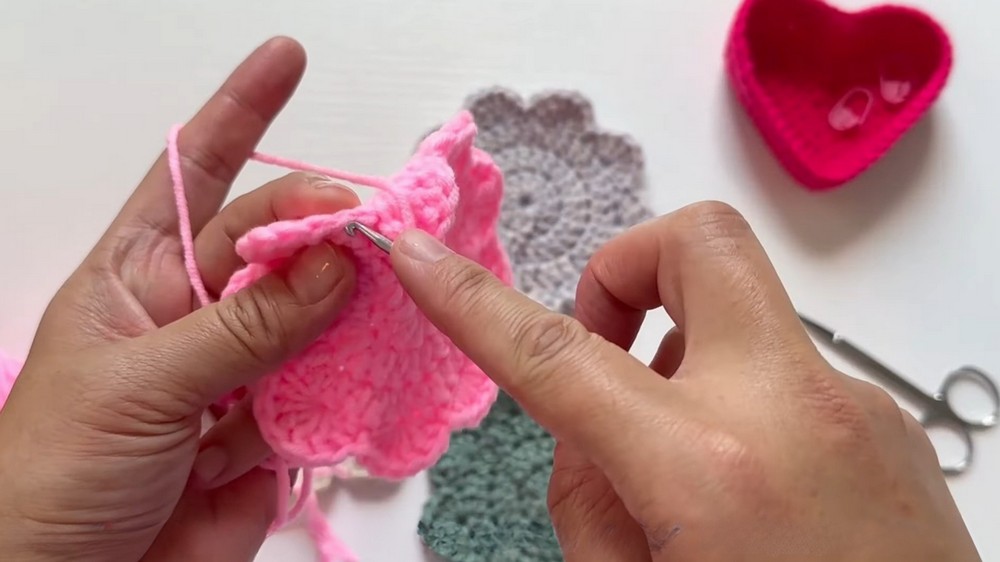 Continue this clamshell sequence (skip two, make 6 double crochets, skip one, slip stitch) around the piece.
- Repeat for 8 clamshells total.
- Slip stitch into the first stitch from the start of the round to close the coaster.
- Cut the yarn, weave it in securely, and finish the piece.
Special Features
- Beginner-friendly: The tutorial makes it easy to follow with detailed explanations.
- Visual clarity: Bright yarn and consistent use of stitch markers make steps easy for viewers to understand.
- Functional design: The finished flower coaster is decorative and can also be used as a coaster for cups or small items.
Level of Difficulty
- Skill Level: Beginner-friendly. This tutorial is targeted toward beginners who want to learn crochet skills like magic rings, double crochet, and slip stitching.
Tutor’s Suggestions
- Use stitch markers: These simplify tracking stitches and help ensure you don’t lose count, especially in rounds involving increases.
- Bright yarn: Using light colors makes stitches easier to see while you work.
- Work methodically: Focus on accuracy with each round and stitch.
Uses
The flower coaster can be used for:
- Protecting surfaces from cups or mugs.
- Decorative elements for tables, kitchens, or desks.
- A thoughtful and handmade gift for friends or family.
Tip
Leave enough yarn tail at the start and end to weave securely into the finished piece. This prevents the stitches from unraveling later.
Conclusion
This Crochet Flower Coaster pattern is an excellent project for beginners looking to dive into crochet. It’s easy to follow yet produces stunning results. By mastering this design, you’ll not only gain a deeper understanding of basic crochet techniques but also create a versatile and functional handmade item.