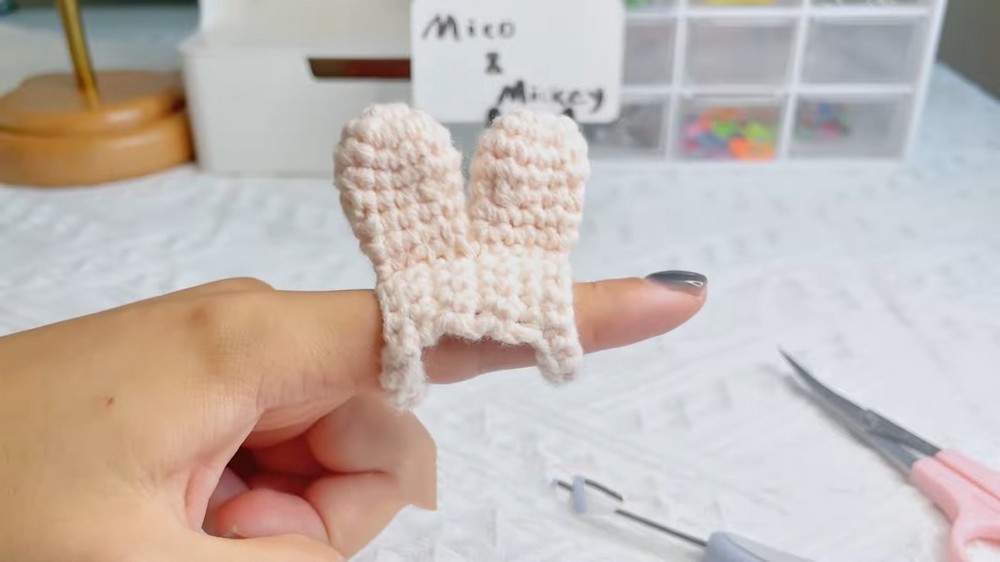
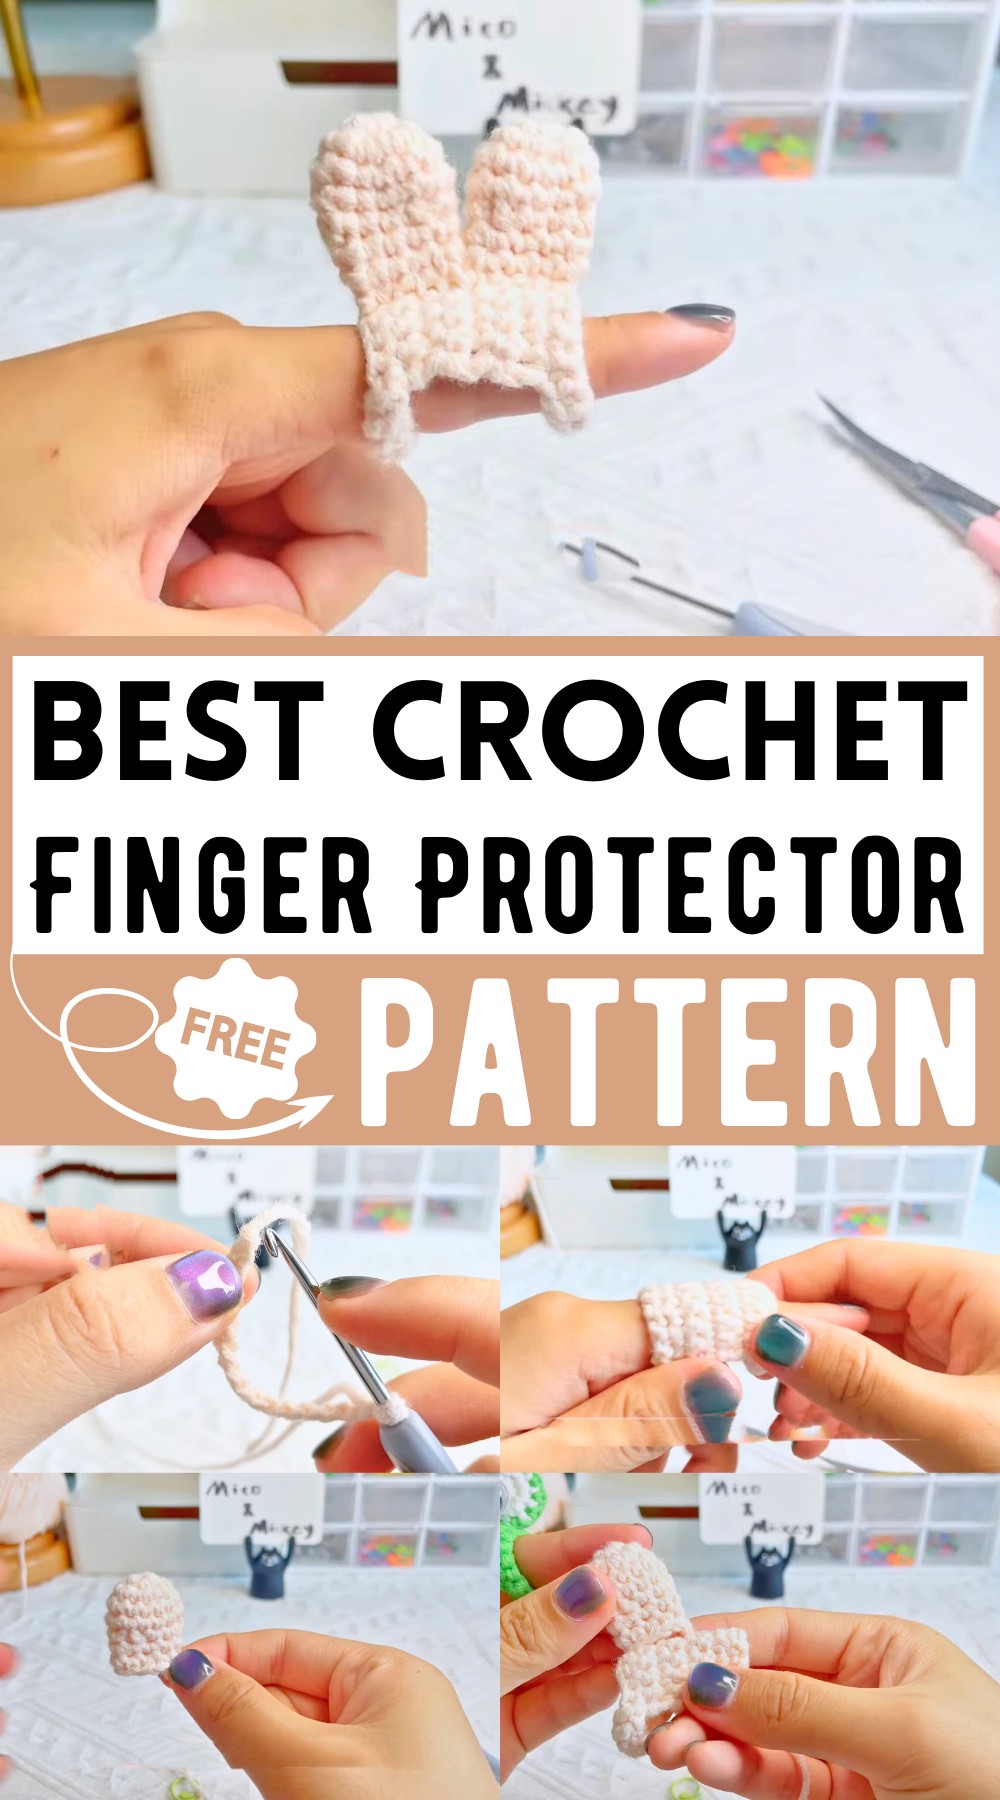
Crochet Finger Protector Pattern (Keep Your Fingers Happy)
Crocheting has never been more fun or comfortable! The Crochet Finger Protector Pattern is a handy tool for avid crocheters. It’s designed to keep your index finger pain-free while you work. This adorable crochet pattern offers two adorable shapes: bunny ears and frog eyes. Wrap it around your finger for a snug fit that stops the yarn from slipping. Customize it to your finger’s size and enjoy both protection and cuteness. Perfect for keeping your fingers happy and your projects on track!
Why Love This Pattern?
- Comfort and Protection: This pattern helps protect your index finger from the discomfort and soreness that comes from the pressure when you crochet. It keeps your finger comfortable, allowing you to crochet for longer periods without pain.
- Prevent Yarn Slipping: The finger protector design ensures that the yarn stays in place and doesn’t slip, making your crochet work smoother and more consistent.
- Customization Options: You can choose from two adorable designs – frog eyes or bunny ears – allowing you to personalize your finger protector according to your style preferences.
- Practical and Cute: Not only is this finger protector practical for regular use, but the added cute design elements (frog eyes or bunny ears) make it a fun accessory to use.
How to Crochet Finger Protector
Materials Needed:
- Yarn
- Crochet hook
- Stitch markers
- Yarn needle
- Scissors
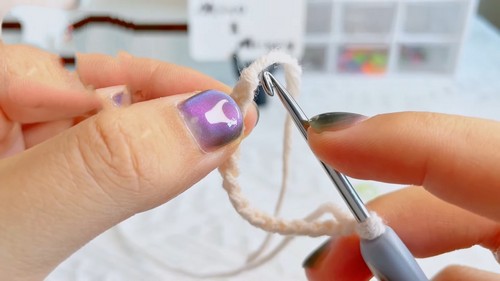
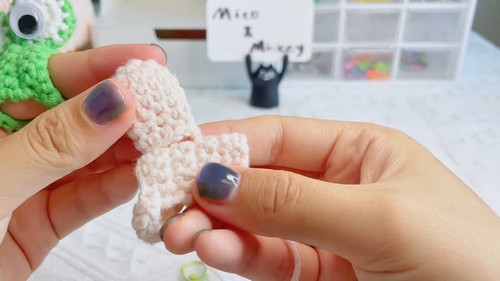
Part 1: The Finger Protector
- Chain Foundation
- Chain a length of stitches (around 40) that is slightly longer than the circumference of your finger. Add 2 extra chains.
- Tip: Check the fit by placing the chain around your finger. There should be a gap of about 2 chains.
- Join the Chain
- Straighten the chain to ensure it’s not twisted.
- Insert the hook into the first chain and make a slip stitch to form a circle.
- Round 1 (Base Round)
- Chain 1.
- Single crochet (sc) into each chain around. Place a stitch marker in the first stitch.
- Join with a slip stitch in the marked stitch to complete the round.
- Round 2
- Chain 1.
- Single crochet into each stitch around, following the original number of stitches.
- Join with a slip stitch in the marked stitch.
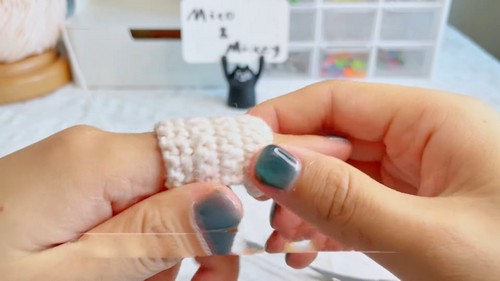
- Round 3 Onwards (Single Crochet)
- Chain 1.
- Single crochet into the next 9 stitches.
- Flip your work.
- Chain 1 and single crochet into the next 9 stitches in the opposite direction.
- Repeat this process for a total of 5 rows.
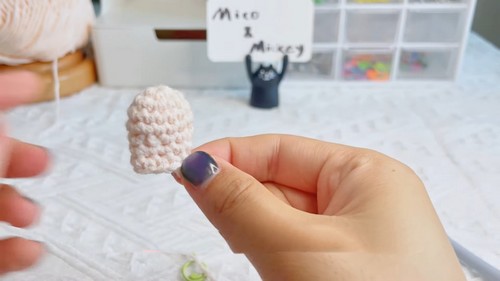
- Form the Circle
- Chain 5.
- Compare the chain’s length to your finger to ensure it fits properly, adding 2 extra chains if needed.
- Join the chain to the initial round with a slip stitch.
- Ensure the chain is not twisted.
- Final Rounds
- Chain 1.
- Single crochet into each stitch around (including the 7 stitches on the chain).
- Join with a slip stitch.
- Finish
- Leave a tail of yarn.
- Fasten off and weave the ends to secure.
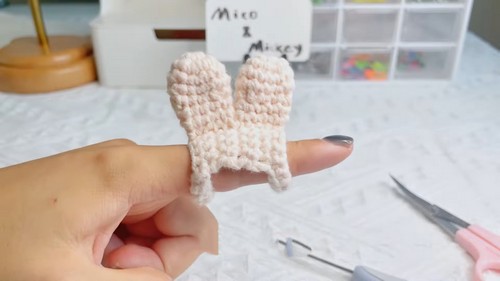
Part 2: Bunny Ears
- Start with a Magic Ring
- Make a magic ring.
- Insert 6 single crochets into the ring. Tighten the ring.
- Increase Round
- Chain 1.
- Make 2 single crochets into each stitch around (total 12 stitches).
- Join with a slip stitch.
- Single Crochet Rounds
- Chain 1.
- Single crochet in each stitch around (total 12 stitches).
- Join with a slip stitch.
- Repeat for 2 more rounds.
- Decrease Round
- Chain 1.
- Single crochet in the first stitch, then decrease in the next 2 stitches (front loop only). Repeat a total of 3 times (total 9 stitches).
- Join with a slip stitch.
- Final Single Crochet Round
- Chain 1.
- Single crochet in each stitch around (total 9 stitches).
- Join with a slip stitch.
- Finish
- Leave a tail of about 10 cm for sewing.
- Fasten off.
- Make a Second Ear
- Repeat the above steps to create a second bunny ear.
Bunny Ears Assembly
- Sew the Ears
- Thread the yarn tail from the ear onto a needle.
- Position the ears in the desired spot on the finger protector.
- Securely sew each ear onto the finger protector.
- Weave in the Yarn Ends
- Tie two knots with the yarn tails to secure.
- Weave the ends into the nearby stitches and trim any excess.
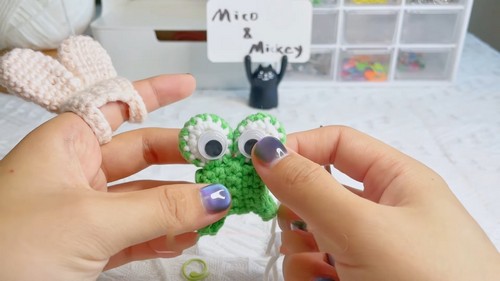
Part 3: Frog Eyes
- Start with a Magic Ring
- Make a magic ring with white yarn.
- Insert 6 single crochets into the ring. Tighten the ring.
- Increase Round
- Chain 1.
- Make 2 single crochets into each stitch around (total 12 stitches).
- Change to Green Yarn
- Before completing the twelfth stitch, switch to green yarn.
- Pull green yarn through the loops on your hook.
- Cut and leave a small tail of white yarn for later weaving.
- Single Crochet Rounds
- Join the round with a slip stitch.
- Chain 1.
- Single crochet with green yarn in each stitch around (total 12 stitches).
- Repeat for another round.
- Finish
- Leave a tail of about 10 cm for sewing.
- Fasten off.
- Eyes Assembly
- Thread the yarn tail onto a needle.
- Position the eyes in the desired spot on the finger protector and securely sew them on.
- Weave in the Yarn Ends
- Tie two knots with the yarn tails to secure.
- Weave the ends into the stitches and trim any excess.
Bonus Step: Signing off
- You’re done! Try the finger protector on and enjoy your new crochet creation.