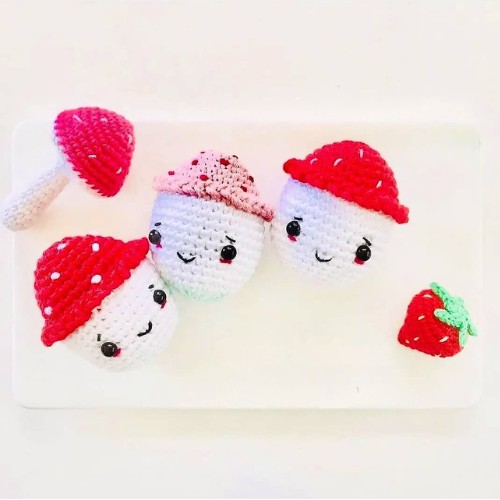
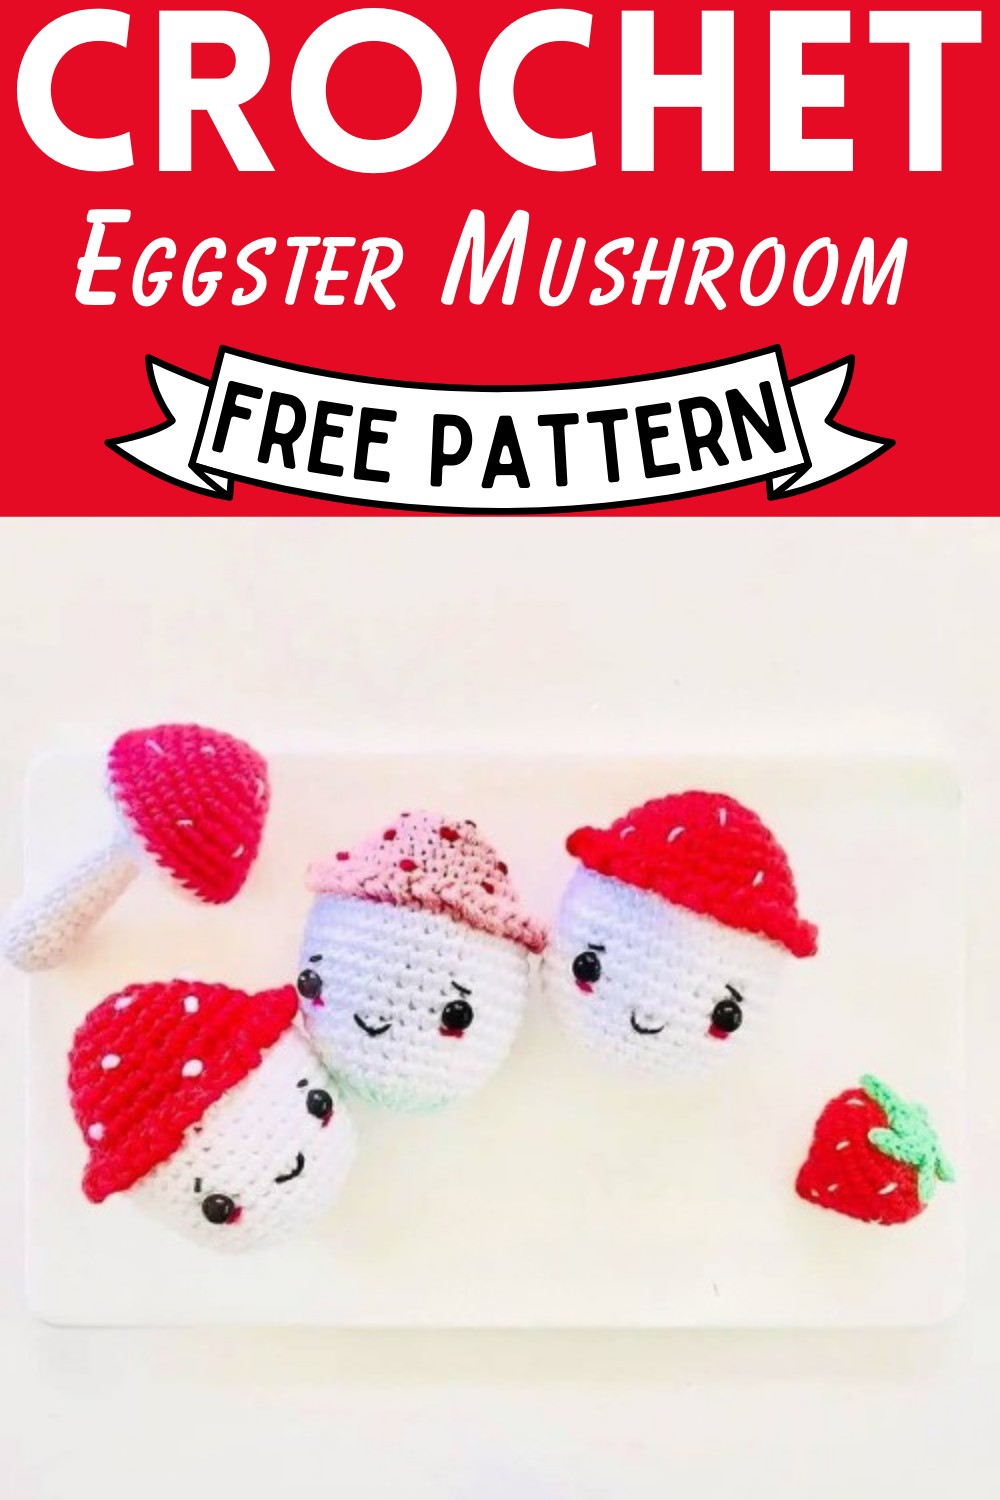
Crochet Eggster Mushroom Amigurumi Free Pattern
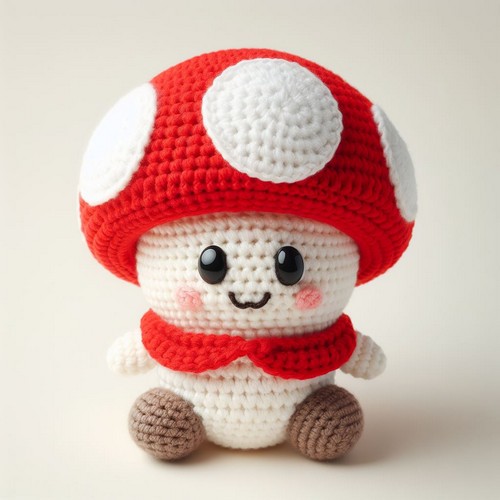
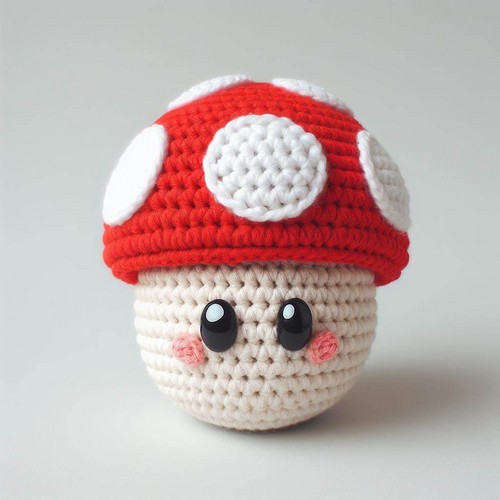
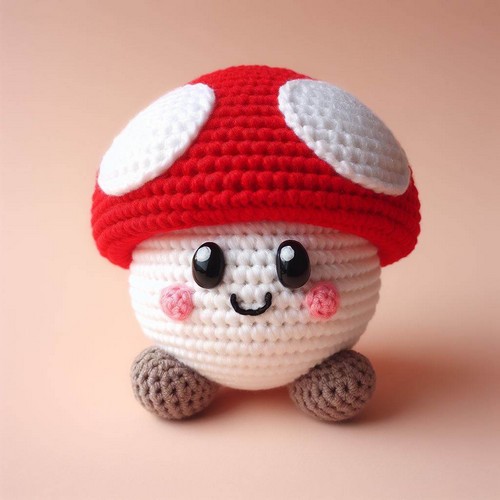
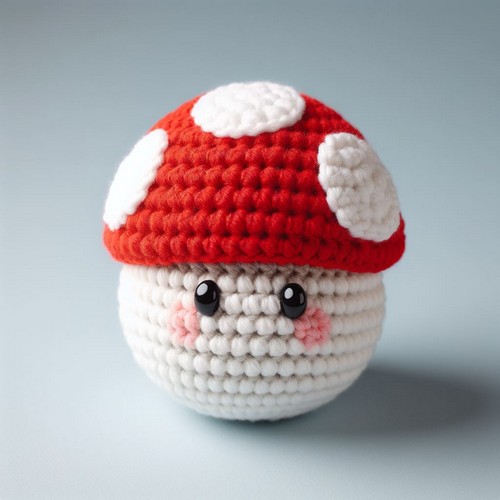
Imagine a cute little mushroom made from soft yarn. Now, think of how sweet it would look, shaped like a little egg. That’s what you get with the Crochet Eggster Mushroom, whose simple pattern we provide below! It has a round egg at the bottom, representing the mushroom’s stem. It has a cute spotted red cap, just like an actual mushroom, styled with white dots for a charming touch. A sweet, friendly face is embroidered onto the egg, featuring small safety eyes and a little smile. Change the expressions depending on your mood or preferences! This amigurumi makes a cozy companion, a unique decoration, or a thoughtful handmade gift for your loved ones.
Making Your Crochet Eggster Mushroom Amigurumi
The pattern uses US terms.
Difficulty: Beginner
Materials
- Yarn: Cotton or any DK yarn in white and red (or any color you wish for the cap of the Eggster Mushroom).
- Black embroidery floss to make the eyebrows and the mouth
- Pink embroidery floss for the cheeks
- 5mm black safety eyes or beads
- 2.0 or 2.5 mm hook
- Scissors
- Yarn needle
- A stitch marker
- Fiberfill
Abbreviations
- SM – stitch marker
- Rnd – round
- MR – magic ring
- ch – chain
- slst – slip stitch
- Sc – single crochet
- inc – increase
- dec – decrease
- […] – repeat pattern x times
- (…) number of stitches in the round
- FLO – front loop only
- BLO – back loop only
Step by step Pattern
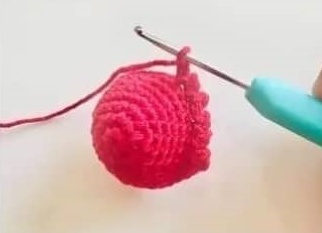
- Start with the red yarn. Use an SM to mark the beginning of each round.
- Rdn1: 6sc in MR (6)
- Rnd2: 6inc (12)
- Rnd3: [inc, 3sc, inc] twice, 1sc, inc (17)
- Rnd4: 4sc, inc, [3sc, inc] 3 times (21)
- Rnd5: [6sc, linc] 3 times (24)
- Rnd6: 4sc, inc, [6sc, inc] twice, 5sc (27)
- Rnd7: [8sc, inc] 3 times (30)
- Rnd8: [14sc, inc] twice (32)
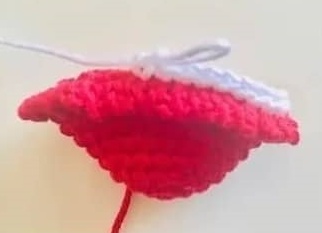
- Rnd9: Work in the FLO of rnd8: slst, 2ch, slst in the same st, [2ch, slst in the next st] repeat around. Fasten off and secure the yarn.
- Attach the white yarn and work in the BL of rnd8.
- Rnd 10: 10sc, inc, 15sc, inc, 5sc (34)
- Rnd 11-15: 34sc around (34)
- Rnd 16: [15sc, 1dec] twice (32)
- Rnd 17: 9sc, dec, 8sc, dec, 9sc, dec (29)
- Rnd 18: [8sc, dec] twice, 7sc, dec (26)
- Rnd 19: [4sc, dec, 5sc, dec] twice (22)
- Insert the safety eyes between rnds 14 and 15, 6 stitches apart.
- Start stuffing the egg.
- Rnd20: [4sc, dec, 3sc, dec] twice (18)
- Rnd21: [sc, dec] 6 times (12)
- Rnd22: 6dec (6)
 Finish stuffing the Eggster Mushroom.
- Fasten off, leaving a long tail (20cm). Using a tapestry needle, weave the yarn tail through the front loop of each remaining stitch and pull it tight
- to close. Pass the tail through the bottom hole. Secure and hide
- the yarn.
- Embroider the eyebrows and mouth using black embroidery floss (I only used 4 strands) and the cheeks using pink color. Use the photos as a guide.
- Using a white-fingering weight yarn embroiderer, some French knots or small lines should be placed on the red top part.
Designer: Imake_youmake On Instagram
Now, you can explore these AI-generated images for inspiration for the most creative and amazing crochet creations.