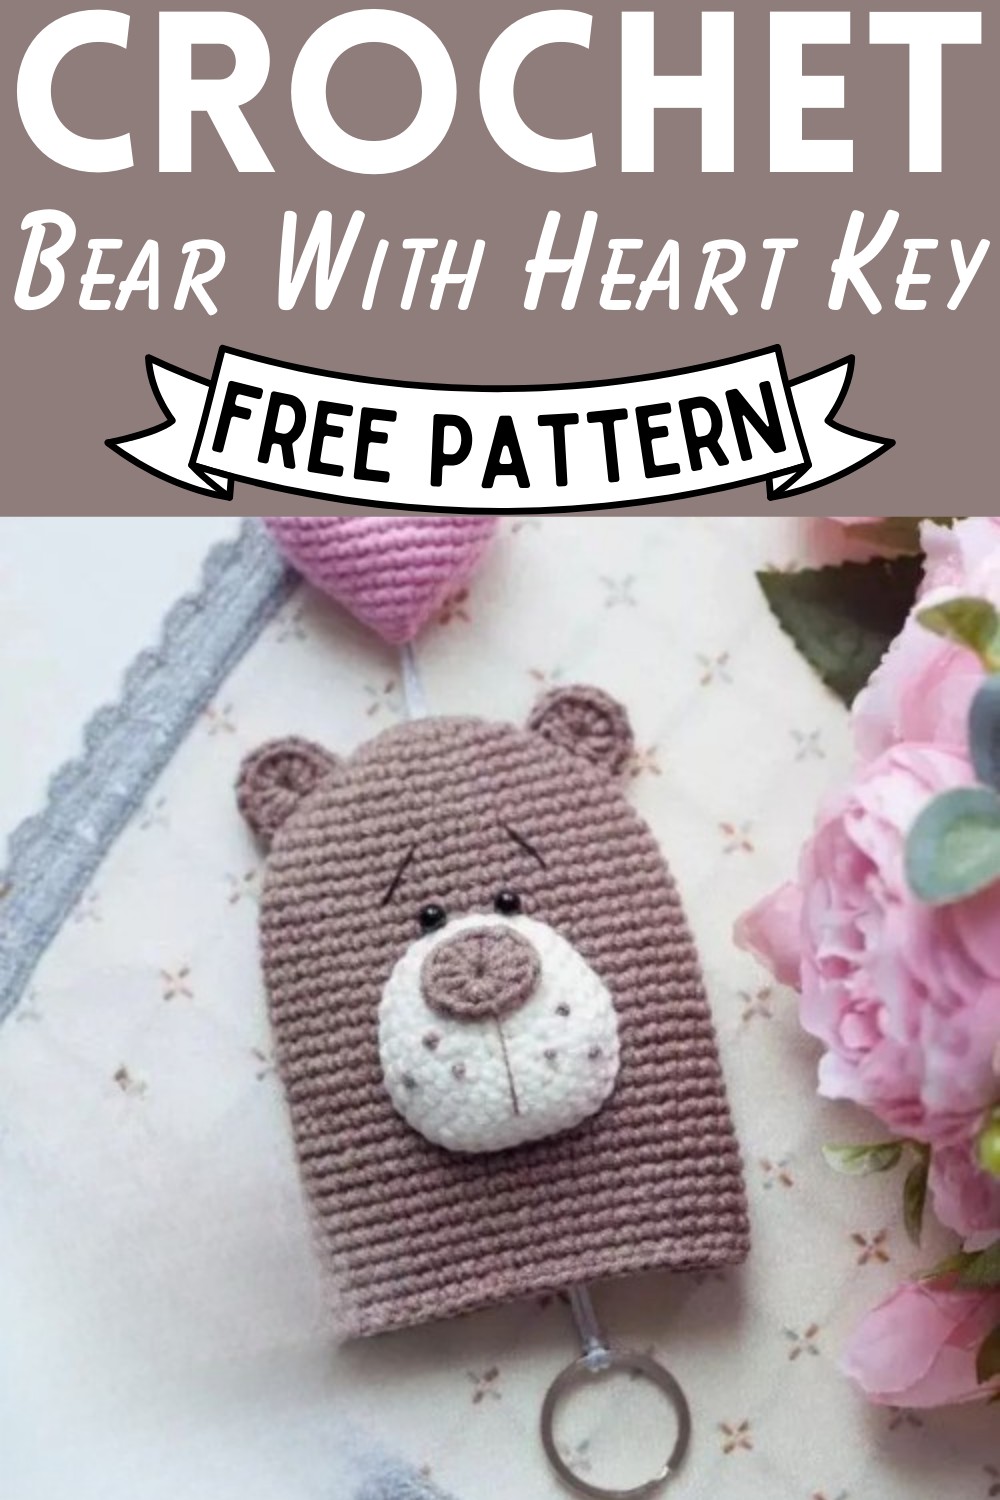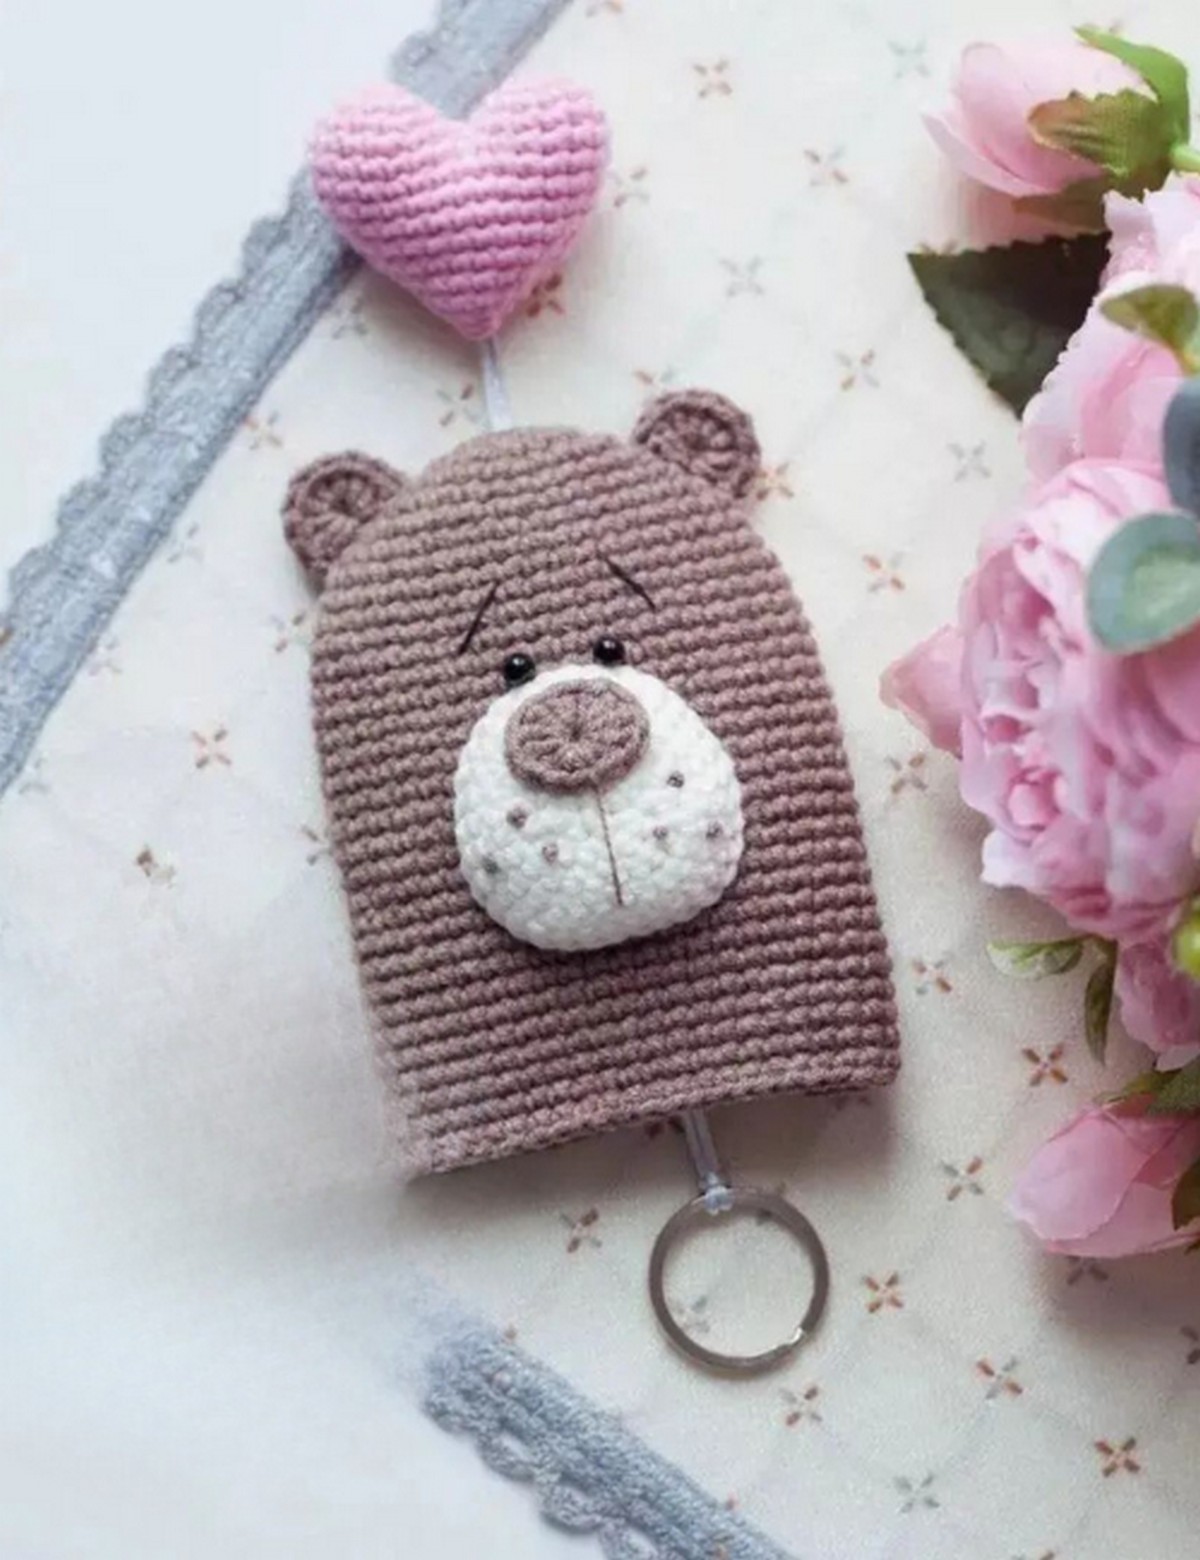
How to Crochet Bear With Heart Key Pattern For Beginners
Ma Ra Boo always comes with unique of all crochet ideas and come them to life. This free crochet bear with a heart key pattern is a nice example. It is a keychain with hollow inside so that you can hide the key inside. It features a bear face and a tiny stuffed heart on top of the head that all looks oh-so cute. It can be a nice anniversary gift or a little one’s toy. So, grab your crochet hook and learn from this pattern for beginners.

Designer: Ma_ra_boo On Instagram
Materials and Tools
If you want to get a similar look for a crochet bear with heart key, below are the supplies mentioned that the designer used:
- Yarn: Alize Cotton Gold, 55% cotton, 45% acrylic; 330 m/50gr
- color #62 milk white for the muzzle
- color #518 pink for the heart
- color #688 cocoa for the main detail and ears • crochet hook that is convenient for you
- when using this kind of yarn (I used a 2.5 mm hook) needles for sewing
- Key chain ring
- Scissors
- Safety pins
- Same stuffing (holo-fiber or fiberfill)
- Nylon cord 1-1,5 mm in diameter (length approx 16" (40 cm))
- One unnecessary bead 10-12 mm in diameter as a stopper
- Plastic beads 4 mm 2 pics for the eyes
How to Crochet Bear With Heart Key Pattern
Are you ready to learn how to crochet this nice bear-themed keychain, follow the instructions provided in this free crochet pattern:
Skill Needed: Intermediate
Techniques and Abbreviations Used in the Pattern:
You can only understand and follow the pattern for bear keychain with a heart ring pattern if you know the abbreviations for which technique you will work after reading this. Here are the meanings of those abbreviations and little guide for each:
- Chain (ch): yarn over and pull through the loop on the hook.
- Magic Ring (Mr)
- Single crochet (sc): Insert the hook into the stitch, yarn over and pull up a loop, yarn over, and pull through both loops on the crochet hook.
- Double Crochet: Yarn over (yo) your hook! Insert the hook into the stitch where you want to make the double crochet. Yo again and pull through the stitch. You’ll have three loops on your hook.
- Half-double crochet: The half-double crochet (hdc) stitch between the height of single and double crochet stitches. Start by wrapping the yarn over your crochet hook! Insert your crochet hook into the stitch you want to work in. Yarn over again and pull up a loop through the stitch. You should have three loops on your crochet hook.
- Increase (inc): Increase needs to work on specific crochet stitches in the same stitch. It starts with doing two crochet stitches in one stitch. For example, single crochet 1 inc means working two stitches in one stitch.
- Decrease (dec): It means working a particular stitch incompletely in many stitches and then pulling through the loops at once.
- Stitch/es (st)s
- (…) = the figure inside the parenthesis
equals the number of stitches in the round X = repeat the instruction X times
Pattern:
Main detail (body)
Rnd 1: 6 SC in MC (6)
Rnd 2: 6 INC (12)
Rnd 3: (INC, SC) X 6 times (18)
Rnd 4: 3 SC, 2 INC, 3 SC, INC, 3 SC, 2 INC, 3 SC, INC (24)
Rnd 5: 4 SC, 2 INC, 10 SC, 2 INC, 6 SC (28)
Rnd 6: 5 SC, 2 INC, 5 SC, INC, 6 SC, 2 INC, 5 SC, INC, 1
SC (34)
Rnd 7: 6 SC, 2 INC, 15 SC, 2 INC, 9 SC (38)
Rnd 8: 8 SC, INC, 18 SC, INC, 10 SC (40)
Rnd 9: 40 SC (40)
Rnd 10: 9 SC, INC, 19 SC, INC, 10 SC (42) Rnds 11-33 (23 rounds): 42 SC (42) Cut the thread, hide the tail.
Muzzle
Crochet with milk white color thread.
Chain 2 + 1 CH for turning.f the chain (6)
Rnd 1: INC in the second chain from the hook; 3 SC into the next chain, 1 SC along the other side of the chain (6)
Rnd 2: 6 INC (12)
Rnd 3: (2 INC, 1 SC) X 2 times, 3 INC, 2 SC, INC (20) Rnd 4: 1 SC, 2 INC, (2 SC, INC) X 2 times, 2 SC, 2 INC, 1 SC, INC, 4 SC, INC (28)
Rnd 5: 7 SC, INC, 4 SC, INC, 7 SC, INC, 6 SC, INC (32) Rnd 6: 32 SC (32)
Crochet 3 SC more for an even oblong piece.
Cut the thread, hide yarn tail inside the detail.
Nose
Crochet in magic circle: 1 SC, 1 HDC, 3 DC, 3 HDC, 3 DC, 1 HDC, 1 SC, fasten off the circle (13) Fasten and cut the thread, join with the thread tail beginning and end of your work.
Carefully secure the thread using the needle.
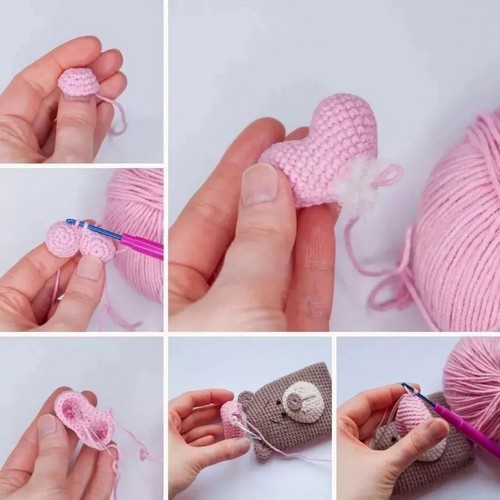
Heart
At first you will make 2 cups which will be joined together to make the heart.
Rnd 1: 6 SC in MC (6)
Rnd 2: (INC, 1 SC) X 3 times (9)
Rnd 3: (INC, 2 SC) X 3 times (12)
Rnd 4: (INC, 3 SC) X 3 times (15)
Cut the thread, leave a 15-20 cm long tail.
Similarly crochet the second cup, but do not cut the thread this time.
With the loop from the second cup on the hook, let's join the details to make the heart:
Rnd 5: starting with the stitch next to the last one where you cut the thread, crochet 15 SC along the first cup. Now crochet 15 SC along the second cup (30)
Please note that the beginning of the row is at the heart's center. And if there is a hole in the place where two cups were joined, Sew it at this stage using the thread from the first cup.
Rnd 6: 30 SC (30)
Rnd 7: 7 SC, DEC, 13 SC, DEC, 6 SC (28) Rnd 8: 7 SC, DEC, 12 SC, DEC, 5 SC (26) Rnd 9: 7 SC, DEC, 11 SC, DEC, 4 SC (24) Rnd 10: 5 SC, 2 DEC, 8 SC, 2 DEC, 3 SC (20) Rnd 11: 4 SC, 2 DEC, 6 SC, 2 DEC, 2 SC (16) Rnd 12: 3 SC, 2 DEC, 4 SC, 2 DEC, 1 SC (12)
Stuff your heart at this point. I recommend to stuff the heart as tight as possible. When you finish stuffing, insert the stopper bead located at the cord's tail into the opening and continue to crochet:
Rnd 13: 2 SC, 2 DEC, 2 SC, 2 DEC (8)
Rnd 14: 4 DEC (4)
Fasten off, close the hole. Cut the thread, hide yarn tail inside the detail.
Your key cover is ready! Enjoy it)
Ears
Make two ears.
Into MC: 3 CH, 8 DC.
Pull MC tight, but do not form the circle. Fasten and cut the thread, hide yarn tail inside the detail.
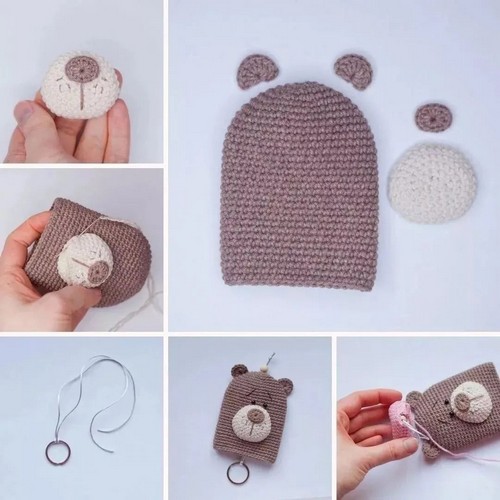
Assembling
At this point, finish the bear completely: sew the nose on, embroider the specks on the muzzle, and sew the muzzle to the main part. I sewed the muzzle on with the wrong side out. Sew the ears and eyes on; embroider the brows with black thread. I placed the muzzle between rows 13 and 26. I recommend splitting the thread and using two out of four threads in this case the result will be neater rather than sewing with a thick thread.
Fix the cord on the ring as shown on the photo. Feed the cord through the magic circle opening on the main item. Put a spare bead using as stop on to prevent the knot from slipping out when the item is in use, measure the
comfortable length of the cord and tie a knot. Cut the tails.
More Crochet Patterns
- Crochet Bear Hat Free Pattern
- Crochet Polar Bear Patterns
- Animal Ice-Cream Pattern – Bunny, Bear & Cow