
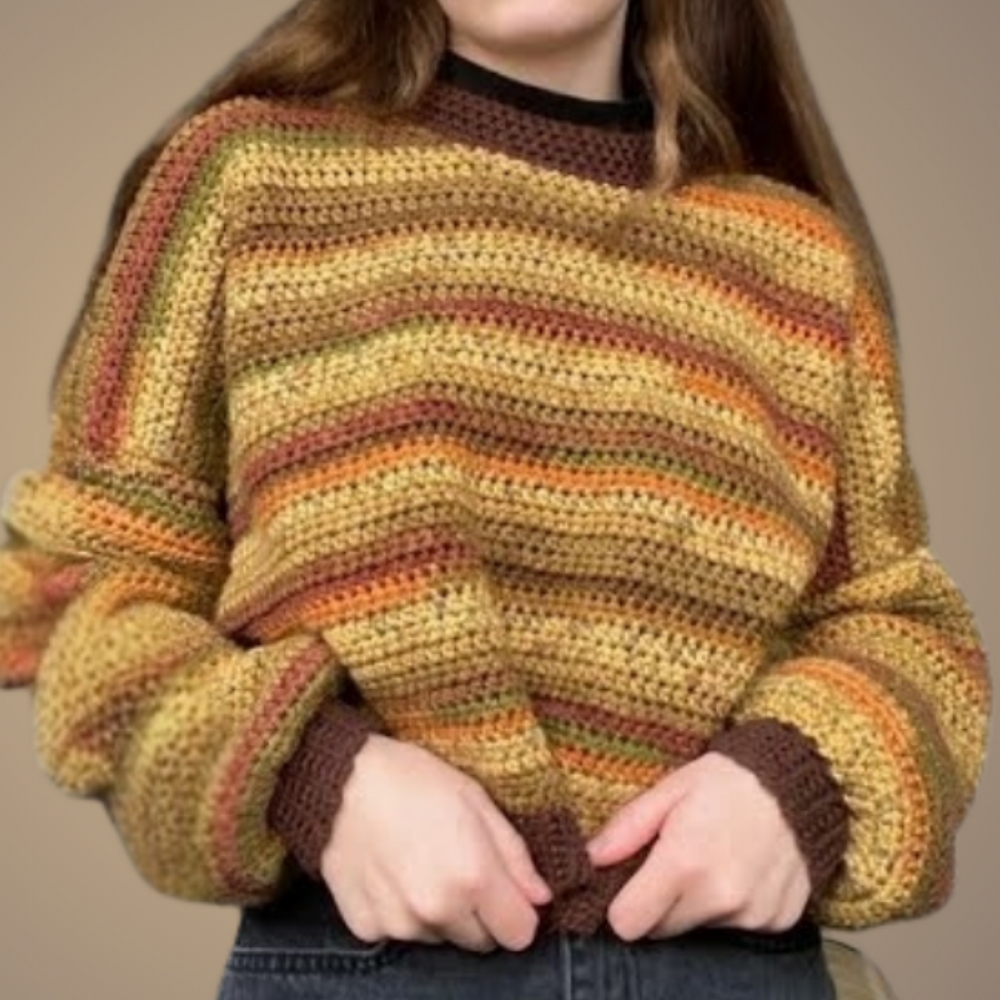
Cozy Crochet Jumper Pattern for Layered Outfits
Cozy up in style with this Crochet Jumper Pattern for a chic, versatile garment that adds warmth and charm to any wardrobe effortlessly.
Warmth and comfort have always been central to clothing, and a jumper serves as both a practical and stylish solution for cooler days. The crochet jumper pattern allows the creation of a garment that combines softness, durability, and visual appeal, providing a cozy layer for everyday wear. Its textured stitches offer subtle dimension and character, while the flexible fabric ensures a comfortable fit suitable for various body types.
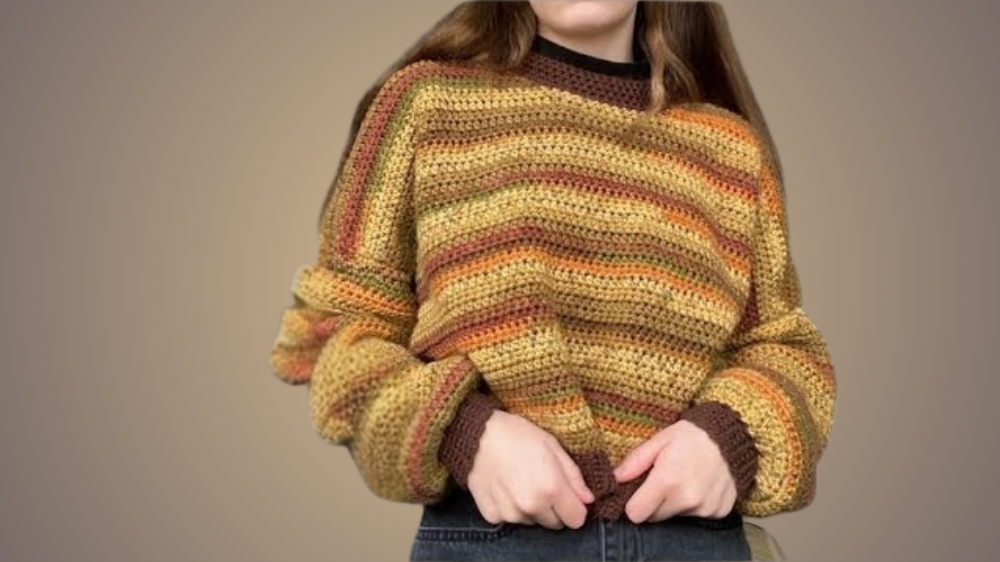
Soft Crochet Jumper Pattern for Daily Wear

Beyond functionality, the jumper offers versatility in style, easily paired with casual trousers, skirts, or layered over shirts for a polished appearance. With a wide range of color choices, from muted neutrals to vibrant shades, each piece can reflect personal taste while harmonizing with different wardrobes. The handmade nature of a crochet jumper adds a unique touch, allowing every stitch to contribute to its individuality and charm.
Lightweight yet warm, it can be worn indoors for comfort or outdoors as a fashionable layer, making it suitable for multiple occasions. Additionally, it makes a thoughtful gift, combining practicality with personal care in every stitch. The crochet jumper pattern transforms yarn into a functional garment that balances comfort, style, and timeless appeal, offering both everyday usability and lasting handmade beauty.
Materials Required
- Yarn: Choose your preferred yarn type (e.g., DK yarn was used in the video). Recommended brands include Signet yarn, Paintbox yarn, and Stylecraft Grace yarn.
- Crochet Hook: 4.5mm hook (adjust size based on your yarn choice).
- Stitch Markers: For marking stitches.
- Measuring Tape: To measure dimensions.
- Darning Needle: For sewing and weaving ends.
- Scissors: For cutting yarn.
Step-by-Step Crochet Jumper
Step 1: Measure Your Jumper Dimensions
- Choosing a Template Jumper:
- Use a jumper that fits you well as a template.
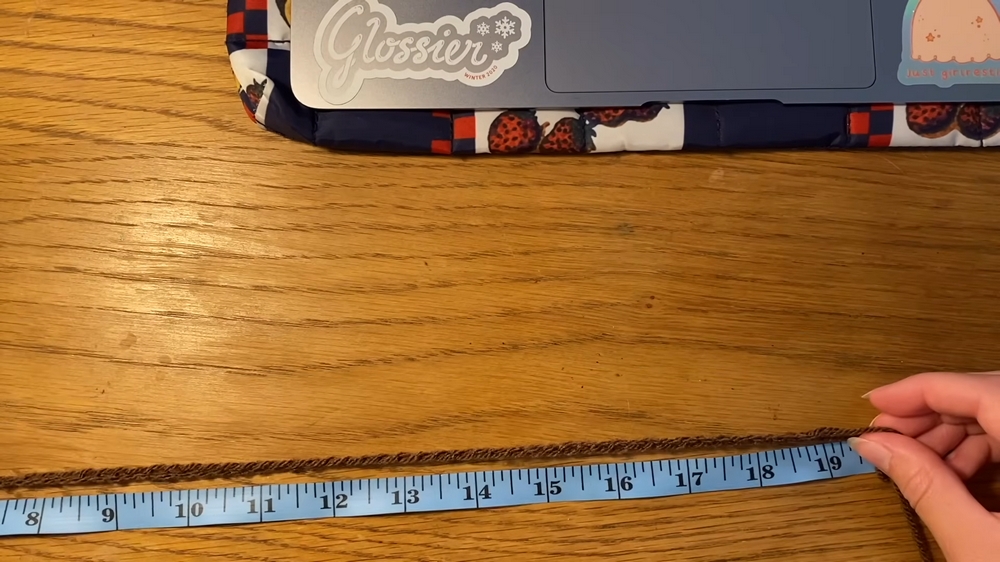
- Measure the width of the front panel and the length from the bottom of the collar to the desired hem (subtract ribbing length if using ribbing).
- Optional: Measure sleeve length from the shoulder seam to the desired cuff length.
- Use a jumper that fits you well as a template.
- Calculate Custom Dimensions:
- If no template is available, measure your shoulders for width and from the collarbone to the desired hem for length.
- Add about 2 inches for an oversized fit. Adjust based on personal preference.
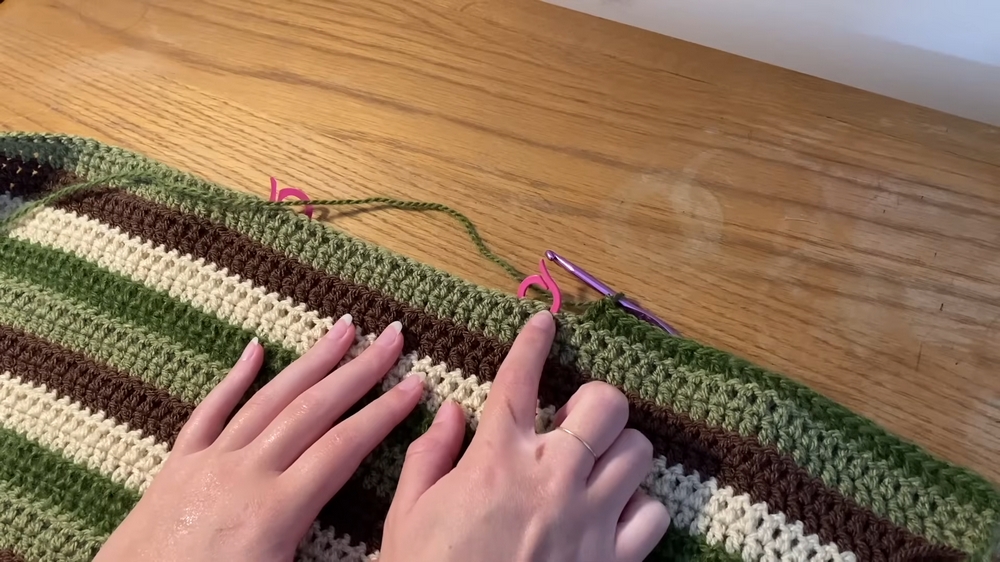
2: Crochet the Body Panels
- Foundation Chain:
- Create a chain matching the width of your front panel measurement.
- Add turning chains: 1 for single crochet, 2 for half double crochet, or 3 for double crochet.
- Crochet Rows:
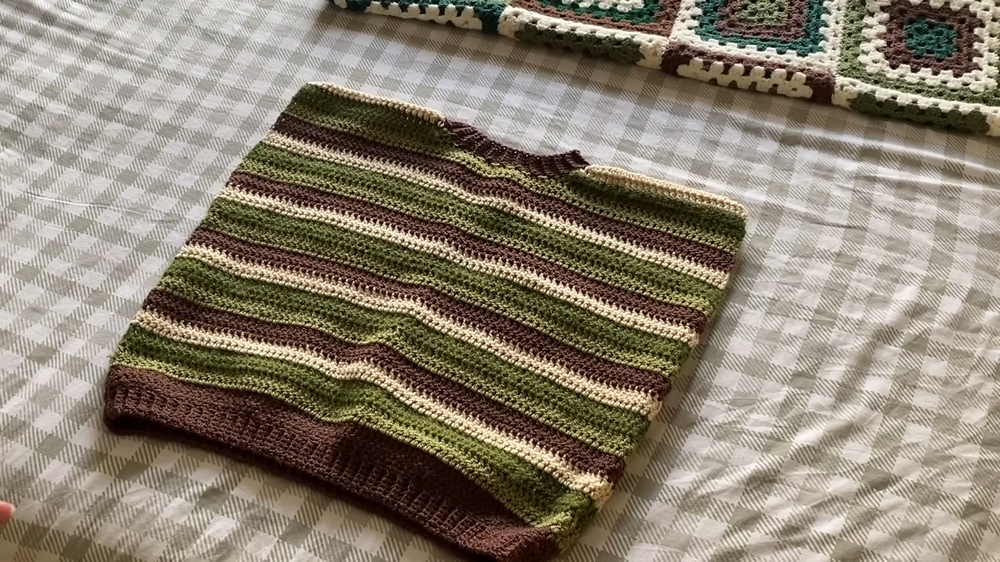
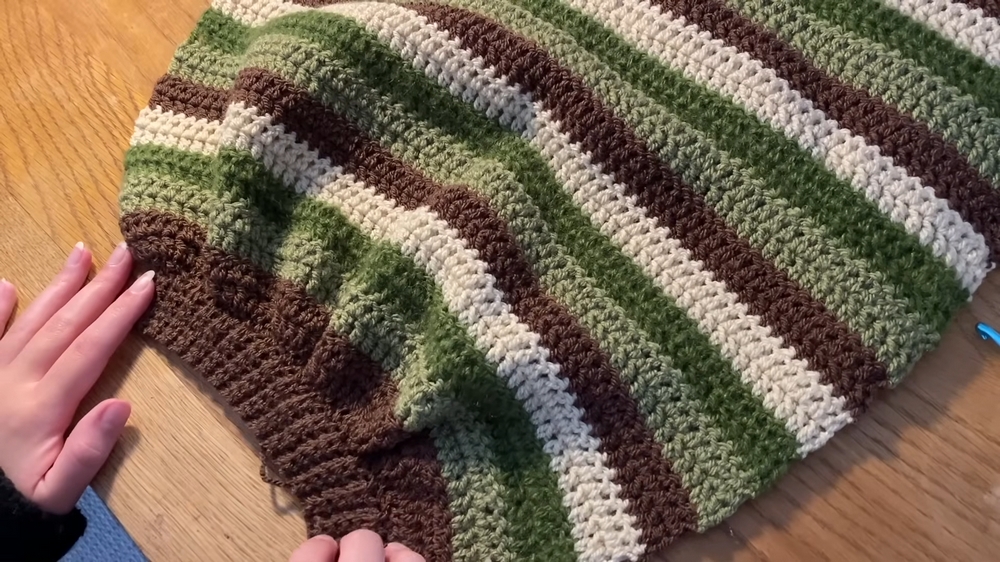
- Work rows in your chosen stitch (e.g., double crochet) until reaching the desired height (e.g., 15.5 inches).
- Include color changes if making striped patterns, securing the new yarn for smooth transitions.
- Shape the Neckline:
- Mark the start of the neckline with stitch markers.
- Decrease stitches on both sides to create a curved neckline, repeating this for 2-3 inches.
- Repeat for Back Panel:
- Create a second panel identical to the first, including neckline shaping and optional ribbing.
- Create a second panel identical to the first, including neckline shaping and optional ribbing.
3: Create the Ribbing
- Attach Yarn for Ribbing:
- Attach yarn to the bottom of a panel.
- Chain for Ribbing:
- Chain to desired ribbing height plus one (e.g., chain 7 for 6-stitch ribbing).
- Crochet single stitches back down the chain.
- Single Crochet in Back Loop:
- Continue single crocheting in the back loop only, attaching ribbing to the panel by slip-stitching after each row.
- Skip a stitch on the panel after two rows to reduce tension.
- Repeat for Second Panel:
- Attach ribbing to both body panels.
- Attach ribbing to both body panels.
4: Assemble the Panels
- Join Shoulder Seams:
- Place panels with right sides facing inwards.
- Single crochet or slip stitch across the shoulders, leaving space for the neckline.
- Form the Armholes:
- Mark desired armhole size with stitch markers.
- Attach yarn at the bottom of the seam and join panels up to the mark.
5: Create the Sleeves
- Crochet the Sleeve:
- Measure the height of the armhole and create a chain double the measurement.
- Work rows to the desired sleeve length, subtracting ribbing length.
- Attach Ribbing to Sleeve:
- Create ribbing as described, attaching it to the sleeve end.
- Join Sleeve Seam:
- Fold sleeve with right sides facing inwards and join the seam.
- Fold sleeve with right sides facing inwards and join the seam.
6: Attach Sleeves to Body
- Position Sleeve in Armhole:
- With the body turned inside out and the sleeve right-side out, insert the sleeve into the armhole.
- Align seams of the sleeve and body panels, then single crochet around to join.
Special Features
- Customizable Fit: Adaptable to any size and yarn type.
- Beginner-Friendly Techniques: Utilizes simple stitches and straightforward assembly.
- Flexible Design: Options for different yarn brands and colors to create unique patterns.
Level of Difficulty
This project is beginner-friendly, though some knowledge of basic stitches (single crochet, double crochet) and simple shaping techniques (increases and decreases) is recommended.
Tutor’s Suggestions
- Use a Template Jumper: Use a well-fitting jumper as a guide for accurate measurements.
- Secure Yarn Changes: Ensure secure knots and weave in ends when changing colors.
- Count Stitches: Regularly count stitches to maintain consistent width and dimensions.
- Work Seamlessly: Attach ribbing directly to panels to ensure a perfect fit.
Uses of the Crochet Jumper
- Fashion Statement: Wearable for casual and comfortable everyday use.
- Gift: Ideal handmade present for friends and family.
- Customizable Wardrobe Addition: Adapt colors, patterns, and sizes for a personalized style.
Tip
When decreasing for the neckline, ensure symmetrical stitching by folding the panel and aligning stitch markers. This ensures even shaping on both sides, leading to a more professional look.
Conclusion
This crochet jumper pattern offers a simple yet effective method to create a stylish and comfortable garment. With customizable options and straightforward techniques, even beginners can crochet a personalized jumper. Follow the steps carefully, take accurate measurements, and enjoy the satisfaction of wearing or gifting your handmade creation.


