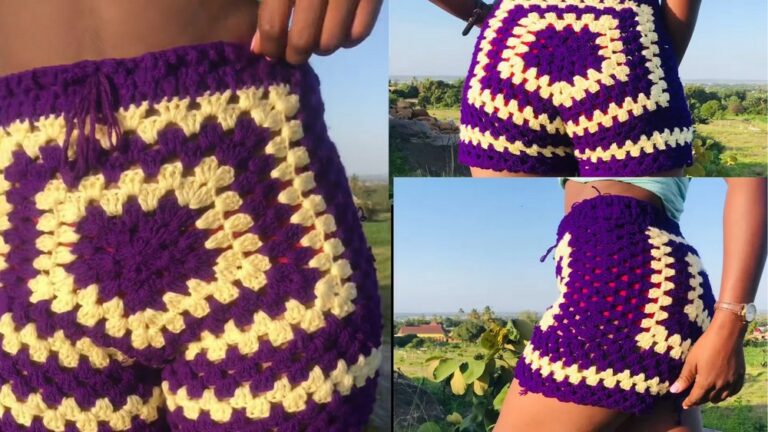
Bright Crochet Star Shorts Pattern To Lift Your Style
Shine bright this summer with the Crochet Star Shorts Pattern, perfect for breathable, stylish comfort that adds playful charm to your casual wardrobe.
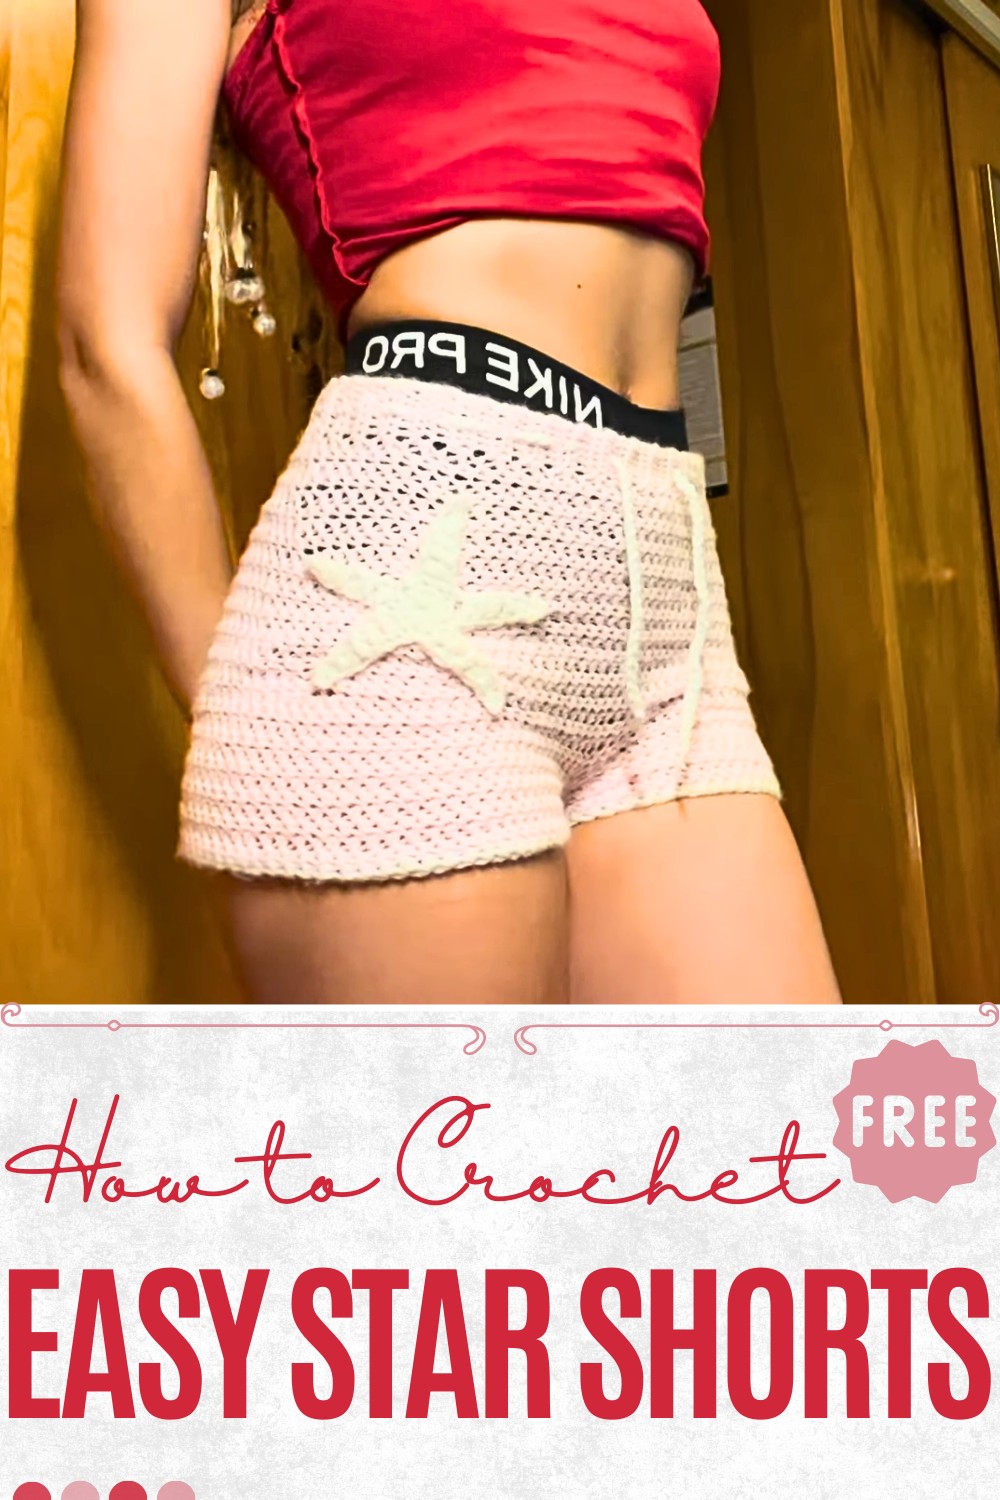
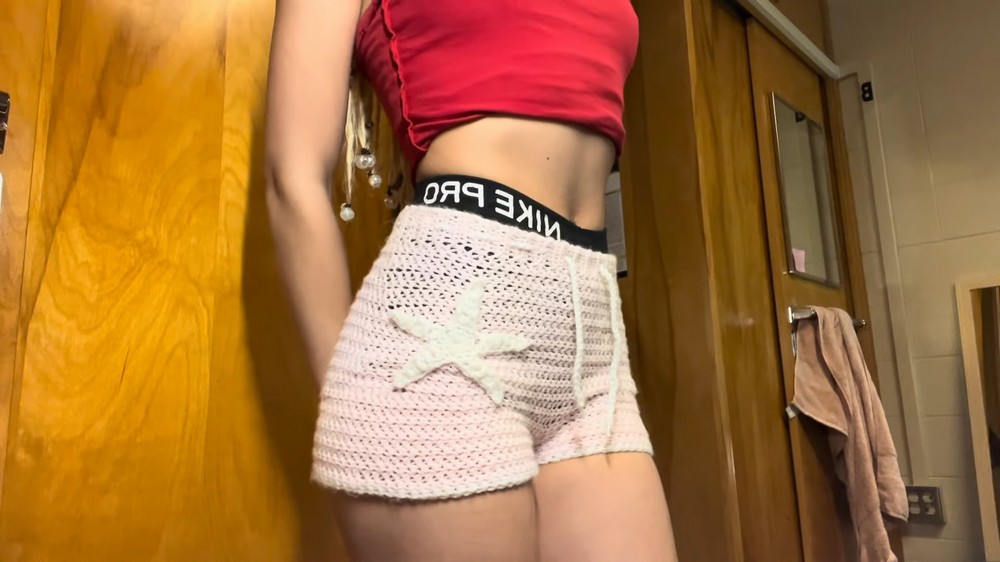
As the days get warmer, lightweight and comfy clothes become essential. The Crochet Star Shorts Pattern is perfect for staying cool and stylish. These shorts feature cute star designs that make them fun and timeless. They’re great for relaxing at home, casual walks, or hanging out at the beach. With a relaxed fit, they suit different body types and feel super comfortable. The crochet fabric is soft, breathable, and keeps you cool while offering enough coverage to feel confident wearing them.
Lightweight Crochet Star Shorts Pattern for Warm Weather
Beyond their aesthetic appeal, these shorts are an excellent project for those who appreciate the satisfaction of handmade items that combine functionality with creativity. The pattern’s simplicity allows for customization in length and color, making it easy to personalize according to taste or season.
Perfect for pairing with tanks, tees, or even oversized sweaters, these star-themed shorts bring versatility and comfort to your warm-weather collection. They also make thoughtful gifts, celebrating the joy of unique, handcrafted wearables that brighten any casual outfit.
Step-by-Step Instructions
1. Gather Materials
- Yarn:
- At least two different colors of yarn (e.g., light pink and white).
- Dk-weight or worsted weight (specific yarn is unlabeled).
- Crochet Hook: 4 mm.
- Other Tools:
- Yarn needle (to weave in ends).
- Scissors.
- At least two stitch markers (can substitute with bobby pins or loose yarn).
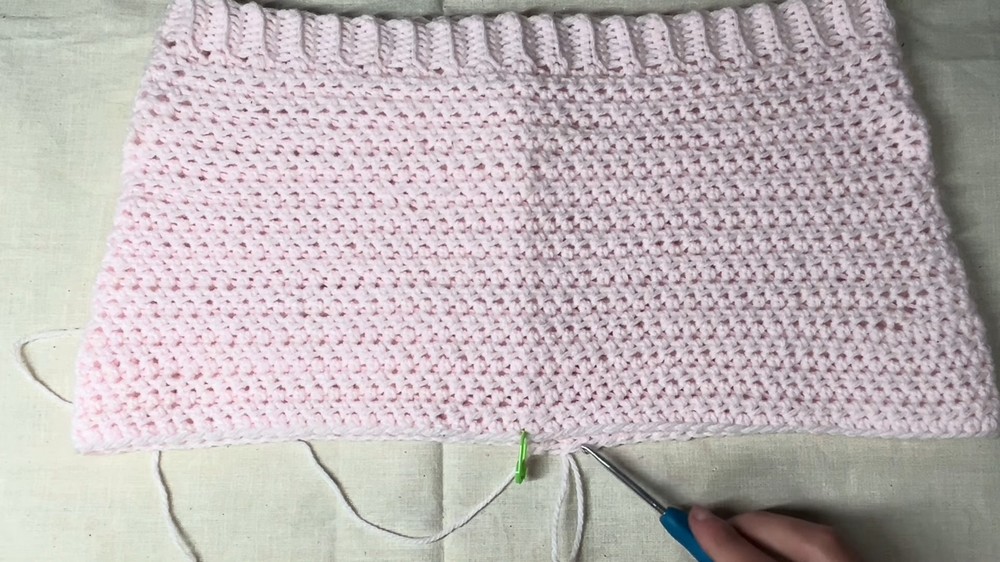
2. Create the Waistband
- Step 1: Start by making a slipknot and chaining 8 (thickness is adjustable).

- Step 2: Work single crochets into the second chain from the hook. Repeat until you reach the end of the chain.
- Step 3: Chain 1, turn your work, and make back loop only single crochets down each row to create a ribbed texture.
Continue until the waistband fits around your waist or hips, usually around 76–77 rows.
- Step 4: Connect ends of the waistband using slip stitches and ensure it’s not twisted. Check the fit. If too tight, add more rows.
3. Crochet the Body
- Round 1: Flip the waistband so the seam is hidden. Chain 2 and begin making half double crochets along the waistband edge. Place them evenly in spaces and slip stitch at the end.
- Subsequent Rounds: Alternate between rows of regular half double crochets and increase rounds (add 2 half double crochets in marked stitches). Use stitch markers to evenly mark at the sides of the shorts for increases.
- Continue until the shorts fit the widest part of your hips.
4. Form the Leg Holes
- Step 1: Work rows of regular half double crochets until you reach the crotch area.
- Step 2: Divide the shorts by marking the middle of the opposite side, forming two leg sections.
- Step 3: Create a bridge for the leg holes using chains:
- Extra Small/Small: Chain 8.
- Medium/Large: Chain 10.
- XL/XXL: Chain 12 (add/subtract 2 chains per size up/down).
- Step 4: Attach the chain to the marked stitch to create leg divisions.
5. Crochet the Legs
- First Leg: Work half double crochet rounds around the leg opening. Repeat for desired length (e.g., 4 rows). Fasten off.
- Second Leg: Attach yarn to the marked stitch of the other leg and repeat the same process to ensure both legs have the same length. Fasten off.
6. Add a Border
- Attach a second color of yarn to each leg and work a single round of half double crochets along the border.
- For the waistband, follow a similar process and work single crochets around the edge. Fasten off.
7. Make the Starfish
- Step 1: Create a slipknot and chain 3. Work 10 half double crochets into the first chain. Tighten the center circle and slip stitch into the first half double crochet.
- Step 2: Create the starfish arms:
- Chain 8.
- Work into the second chain from hook:
- Slip stitch → Single crochet → Half double crochet → 4 double crochets.
- Skip 1 stitch on the circle and slip stitch into the next stitch. Repeat for five arms.
- Step 3: Fasten off with a long tail. Adjust size by using a smaller or larger hook.
8. Attach the Starfish
- Sew the starfish onto the shorts using a yarn needle. Ensure not to sew through the back side to avoid ruining the design. Adjust placement continuously while sewing. Secure with double knots and weave in ends.
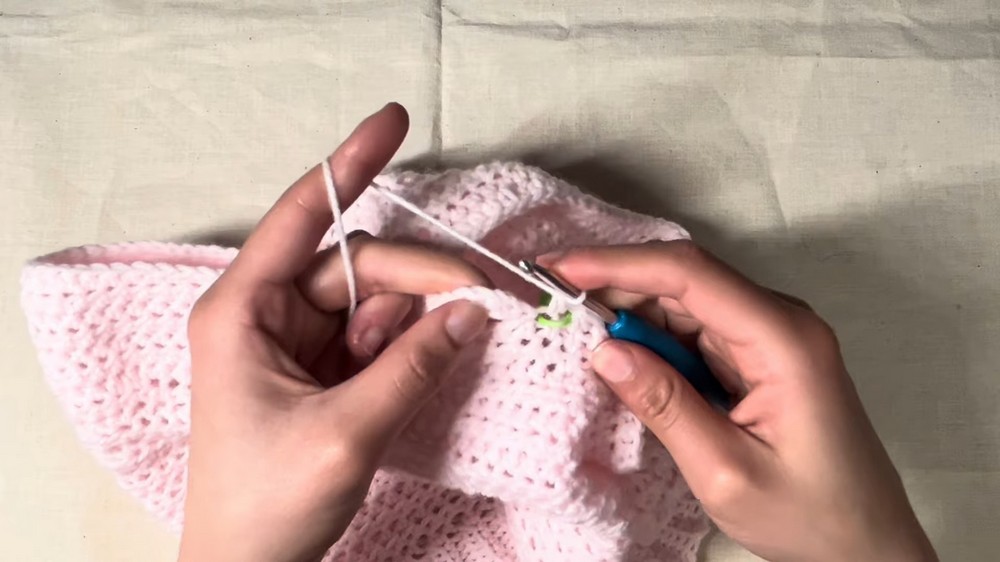
9. Add the Drawstring
- Step 1: Chain your desired length (e.g., 150 chains). Optionally, make the drawstring thicker by working slip stitches or single crochets down the chain.
- Step 2: Thread the drawstring through the waistband’s ribbed edge by alternating under-over stitches across the length.
Special Features
- Beginner-Friendly: Designed using basic stitches (single crochets, half double crochets, slip stitches).
- Customizable: Add starfish patterns, adjust size, length, and colors to suit your preferences.
- Functional Design: The drawstring ensures a snug fit and allows you to adjust the waistband size.
Difficulty Level
- Beginner: Suitable for those who are new to crocheting but know basic stitches. The step-by-step instructions simplify the process.
Tutor’s Suggestions
- Use unlabeled yarn cautiously (if using scraps), and include labeled options when possible to measure usage.
- Be patient when forming the legs and waistband for precision.
- Adjust chain counts for customization based on size.
Uses
These starfish shorts are perfect for summer and beach outings. Pair them with casual tops or swimwear for a complete look.
Tip
When crocheting the starfish, ensure your stitches remain consistent to prevent curling. Also, leave enough tail length for sewing, so you don’t run out of yarn.
Conclusion
These adorable starfish shorts are a fun, beginner-friendly crochet project ideal for summer. They offer flexibility and style, with the added detail of a coastal-inspired design element. With patience and creativity, you’ll have a cozy, customizable pair of shorts perfect for sunny days.