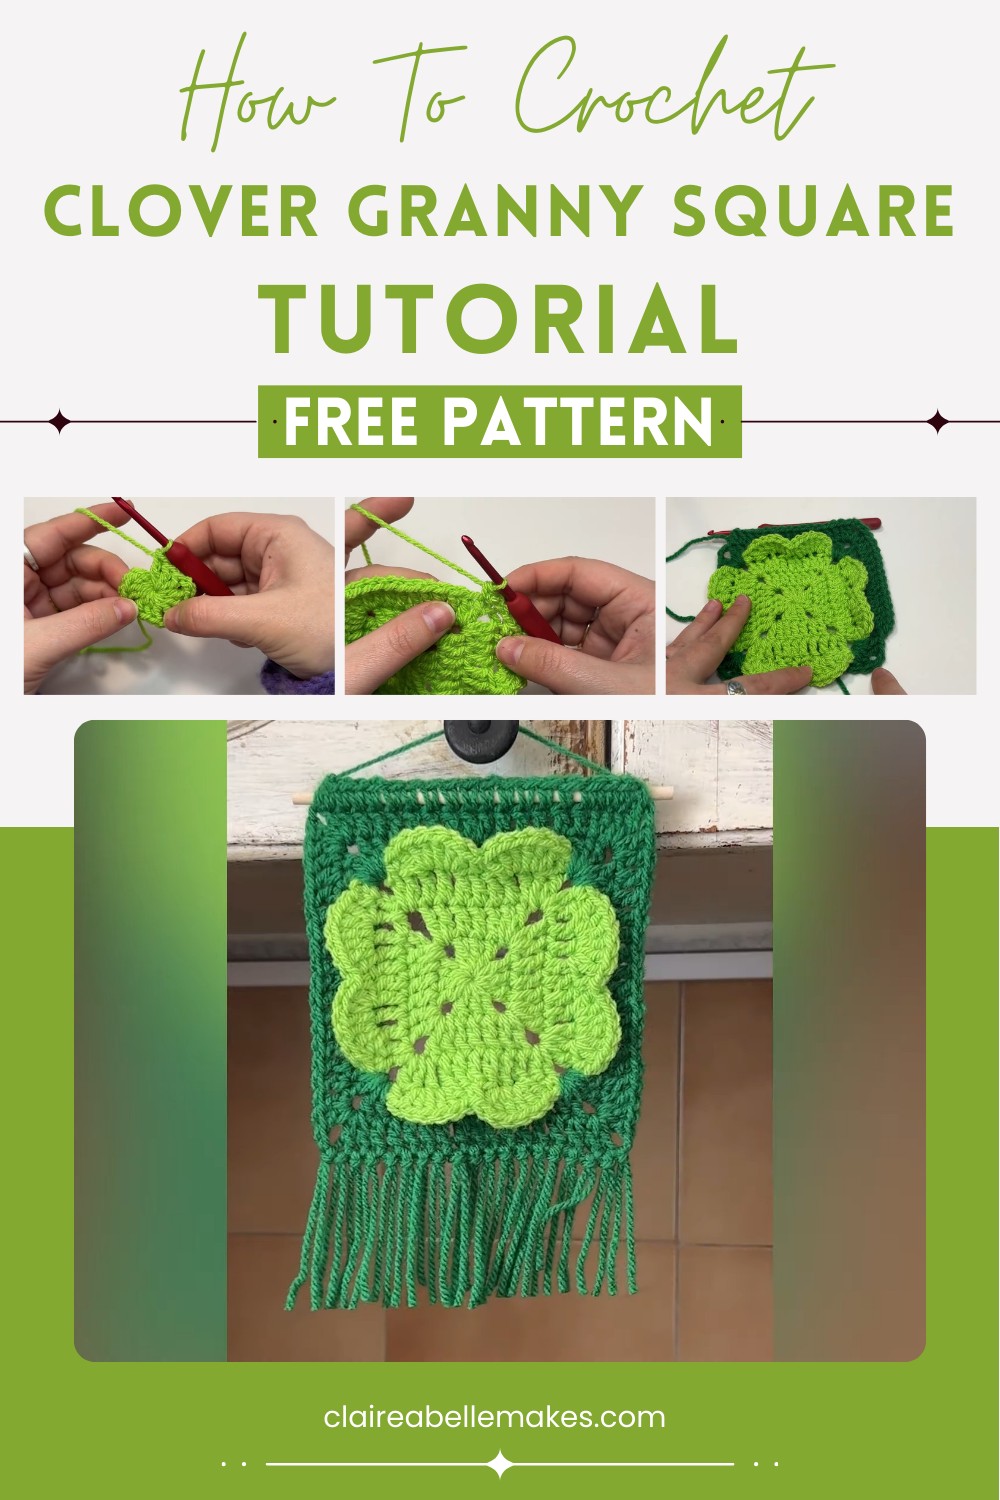
Lively Crochet Clover Granny Square Pattern for Colorful Projects
Fill your home with cheerful vibes using this Crochet Clover Granny Square Pattern as each square spreads a touch of beauty to every project.
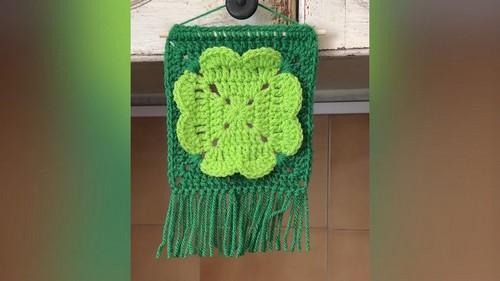
Lucky symbols bring a special charm to all kinds of projects, and the crochet clover granny square pattern fits this idea perfectly. A neat clover in the middle makes the square look friendly and bright, filling any space with comfort and good feelings. This square works well in blankets, pillows, bags, and even on walls, giving your home a gentle touch of color and warmth.
Magical Crochet Clover Granny Square Pattern for Lucky Creations
The steps are simple, whether you are new or have been crocheting for years, so anyone can follow along and feel proud of the result. Picking your favorite shades or mixing colors lets your creative side shine through and makes each piece unique. Sharing or gifting this square spreads joy and luck to family and friends. Every crochet clover granny square pattern brings happiness, making ordinary items feel cheerful and lively wherever you use it.
Materials Needed
- Yarn: Worsted weight acrylic or cotton in at least two colors (Color A for clover/center, Color B for square/edging)
- Hook: US size H/8 (5.0 mm) or appropriate size for your yarn
- Yarn Needle: For weaving in ends
- Scissors
- Stitch Marker (optional)
Key Abbreviations (US Terms)
| Abbreviation | Meaning |
|---|---|
| MR | Magic Ring |
| ch | Chain |
| sc | Single Crochet |
| hdc | Half Double Crochet |
| dc | Double Crochet |
| sl st | Slip Stitch |
| st(s) | Stitch(es) |
| FLO | Front Loop Only |
| BLO | Back Loop Only |
Special Notes
- The pattern starts with a traditional granny square technique.
- For best visual results, use a stacked single crochet instead of a ch 3 to begin rounds for a neater edge.
- Rounds 4–5 use front and back loop techniques to create the clover effect.
Pattern Instructions
Center & Rounds 1–3 (Clover Foundation, Color A)
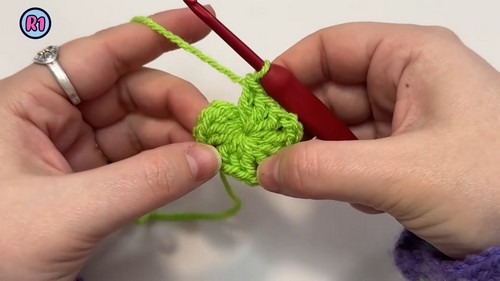
Round 1:
- Begin with a MR.
- Stacked sc: Work 1 single crochet into the ring, then 1 single crochet into the left loop of your sc (counts as 1 dc).
- 2 dc into ring (total of 3 dc for cluster).
- Ch 2 (corner).
- Repeat (3 dc in ring, ch 2) 3 more times (you have 4 corners).
- Tighten MR slightly.
- Ch 1, then hdc into the very first dc/stacked sc to join. (This joins the round invisibly; hdcs create smoother joins for future rounds.)
Round 2:
- Ch 3 (counts as 1 dc), dc in same chain space.
- Dc in next 3 sts.
- In next ch-2 corner space: 2 dc, ch 2, 2 dc.
- Repeat: dc in next 3 sts, (2 dc, ch 2, 2 dc) in corner.
- Repeat around; after last corner, ch 1, hdc into 3rd ch of starting ch-3 to join.
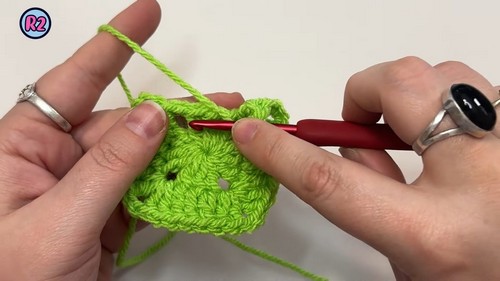
Round 3:
- Ch 3 (counts as 1 dc), dc in same ch-space.
- Dc in next 7 sts.
- (2 dc, ch 2, 2 dc) in next corner.
- Dc in next 7 sts.
- Repeat the process (2 more times).
- In last corner, 2 dc, ch 2, and sl st to 3rd ch of starting ch-3 to join. (Do not fasten off yet.)
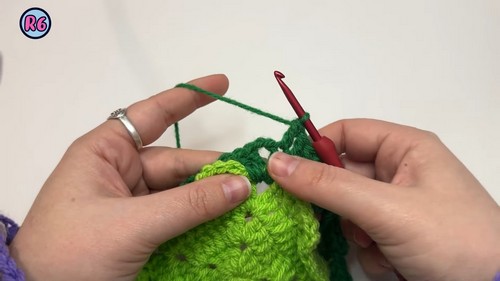
Round 4: Clover Petals (Work in FLO, Color A)
- Working into FLO only throughout!
- [Skip 1 st, (3 dc in next st FLO)] twice.
- Skip 1 st, sc in next st FLO.
- Repeat [skip 1 st, 3 dc in next FLO] twice.
- Skip 1 st, sc in next st FLO.
- At each corner, (ch 2, sc in first st FLO of next side) to turn the corner.
- Continue this sequence around, ending the round with ch 2 and sl st to first st of the round.
- Fasten off Color A.
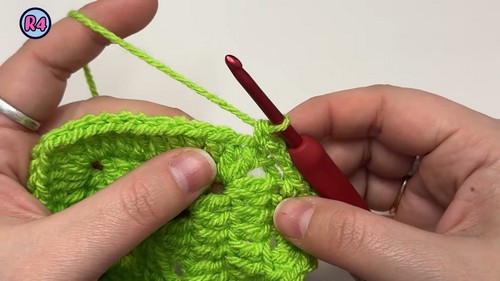
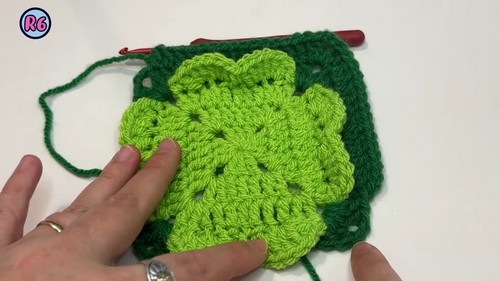
Round 5: Square Border (Work in BLO, Color B)
- Attach Color B with a slip knot to any back loop from Round 4 (fold petals forward to see the unused loops).
- Stacked single crochet in first back loop (counts as dc), dc in next 3 BLO.
- Ch 2 (corner)
- [Skip next 3 blo, 4 dc in next 4 BLO] Repeat across edge.
- At corner: 2 dc in ch space from round 3, ch 2, 2 dc in same space.
- Continue around, repeating on all sides.
- Sl st to first dc to join.
Round 6: Final Granny Round (Color B)
- Ch 1, stacked single crochet in first st (acts as dc), dc in next 3 sts.
- 2 dc in ch-2 corner space, dc in each st across to next corner.
- Repeat on all sides. In each corner, (2 dc, ch 2, 2 dc).
- After last corner, dc to end, sl st to first dc to join.
- Fasten off and weave in ends.
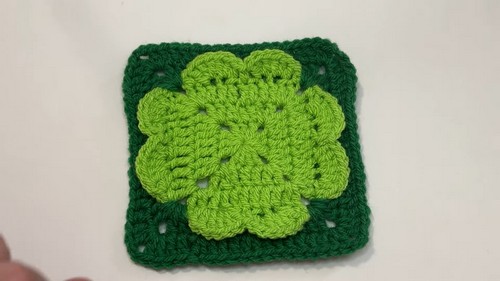
Conclusion
You have now completed a beautiful Clover Granny Square, perfect for festive projects or as a general motif! Enjoy adding it to blankets, scarves, bags, or as a standalone appliqué.
Pattern Correction & Tips
Pattern Corrections
- Always count your stitches after each round, especially when beginning with stacked single crochet or chain 3; missing or adding corners can throw off your square.
- Ensure you only use FLO (round 4) and BLO (round 5) as specified for the petal effect.
Tips
- Block your finished squares for best results.
- Vary your colors for contrasting petals and square background.
- Use a stitch marker to identify your starting point, especially when working into loops only.
- If the center hole is too large, weave through the first round with yarn and pull gently to minimize the gap.