Festive Crochet Santa Claus Perfect for Holiday Cheer
Bring festive cheer with this Crochet Santa Claus Pattern for a charming, playful accessory that adds holiday magic to any décor.
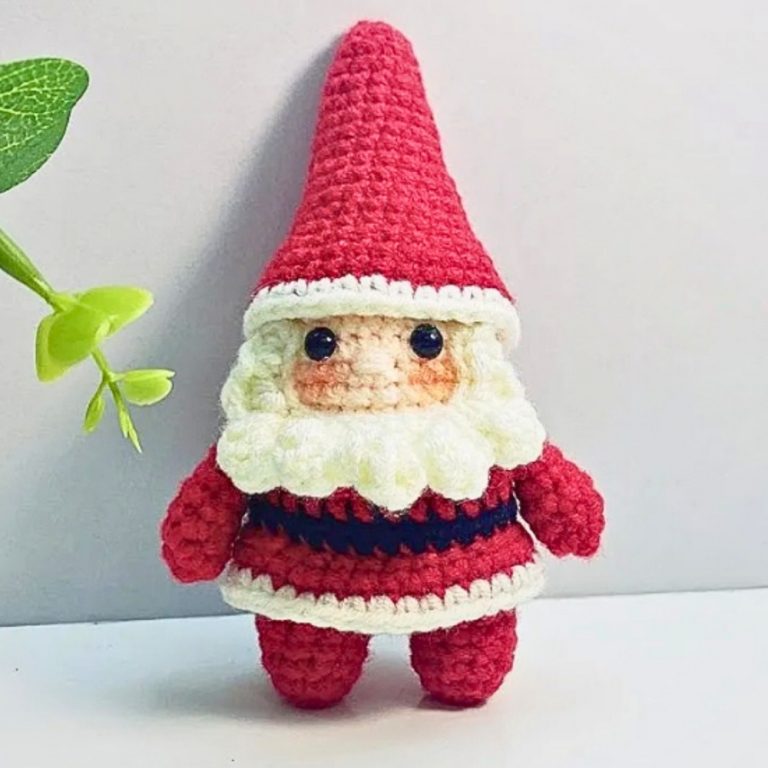
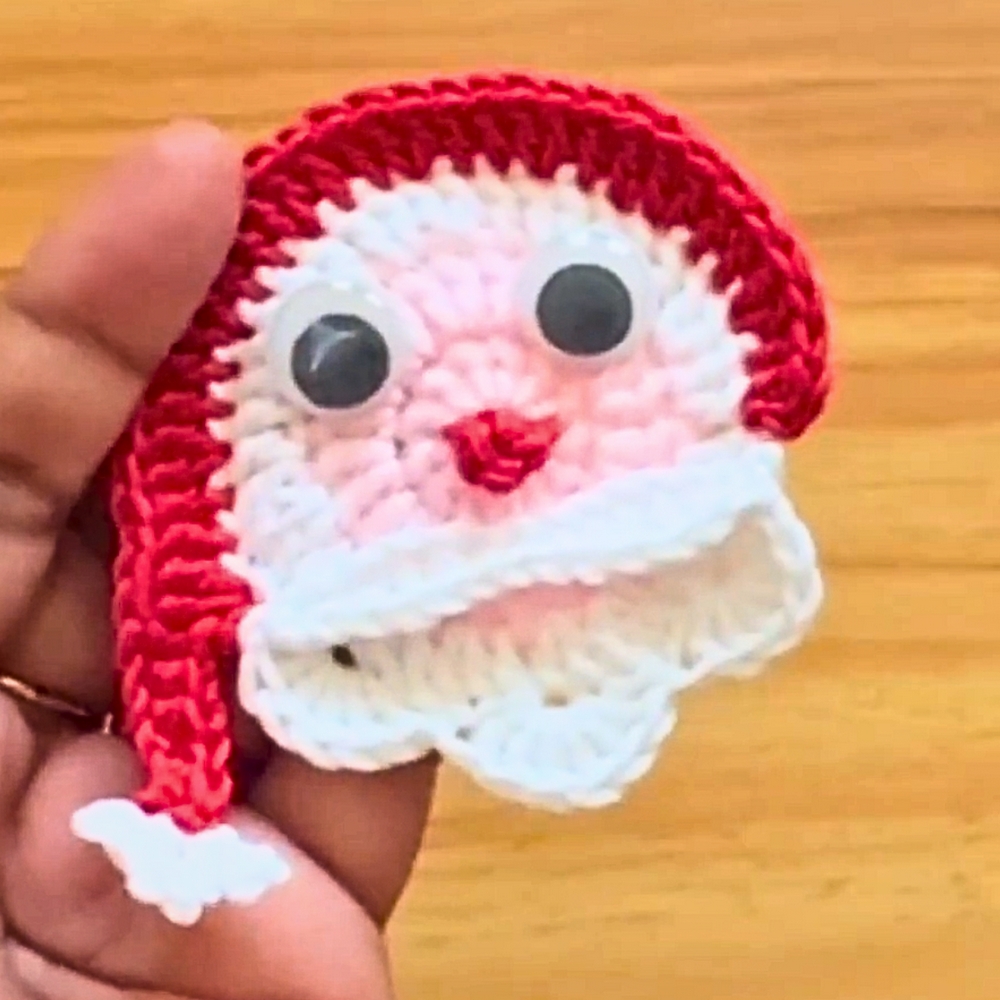
Holiday traditions often center around symbols of warmth, generosity, and joy, and few figures capture this spirit like Santa Claus. The crochet Santa Claus pattern transforms this beloved icon into a charming handmade piece that brings cheer to homes during the festive season. Each figure is carefully stitched to provide texture, structure, and durability, ensuring it maintains shape through repeated use year after year. Vibrant reds, snowy whites, and subtle detailing capture the familiar look and personality of Santa, making each piece instantly recognizable and delightfully festive.
Whimsical Crochet Santa Claus Pattern for Ornaments
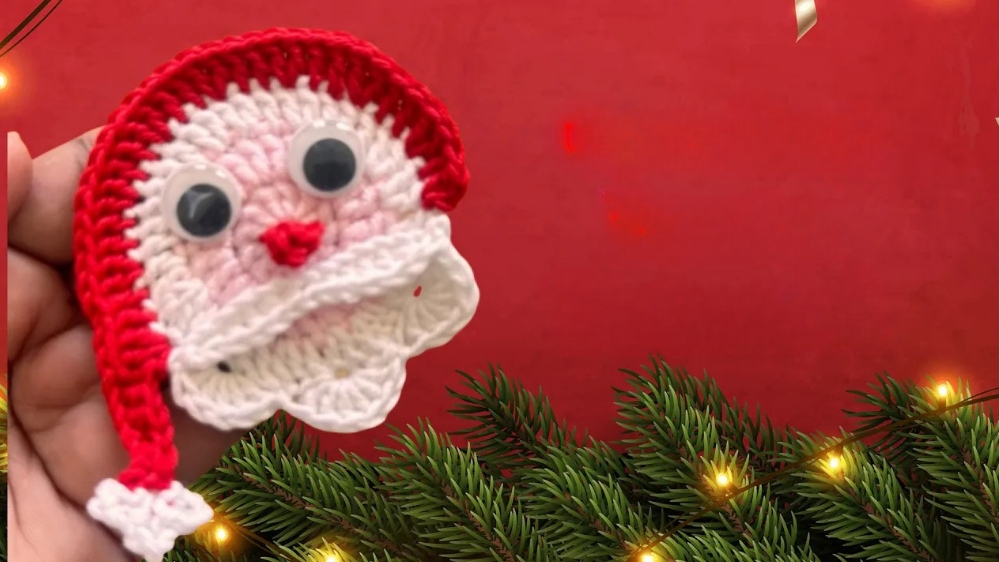
Beyond decoration, these crochet figures are versatile accents, perfect for Christmas trees, mantels, shelves, or themed centerpieces. Their compact, lightweight form allows easy placement, while the handmade nature adds a personal, heartfelt touch. They also make thoughtful gifts or unique stocking stuffers, combining playful charm with lasting quality.
Ideal for adding both aesthetic appeal and sentimental value, each crochet Santa Claus figure conveys tradition, warmth, and holiday magic. From casual displays to elaborate seasonal décor, this pattern creates pieces that celebrate the joy and spirit of the holidays, offering a timeless accessory that spreads cheer and adds a handmade touch to any festive setting.
Materials Required
- Yarn:
- Red yarn for Santa’s hat and nose.
- White yarn for the beard and hat pom-pom.
- Skin-toned yarn for Santa’s face (Fly yarn was used).
- Crochet Hook: 3.5mm hook.
- Scissors: To cut yarn.
- Yarn Needle: For weaving in ends and attaching parts.
- Googly Eyes: Add personality to Santa’s face (attach using hot glue or white glue).
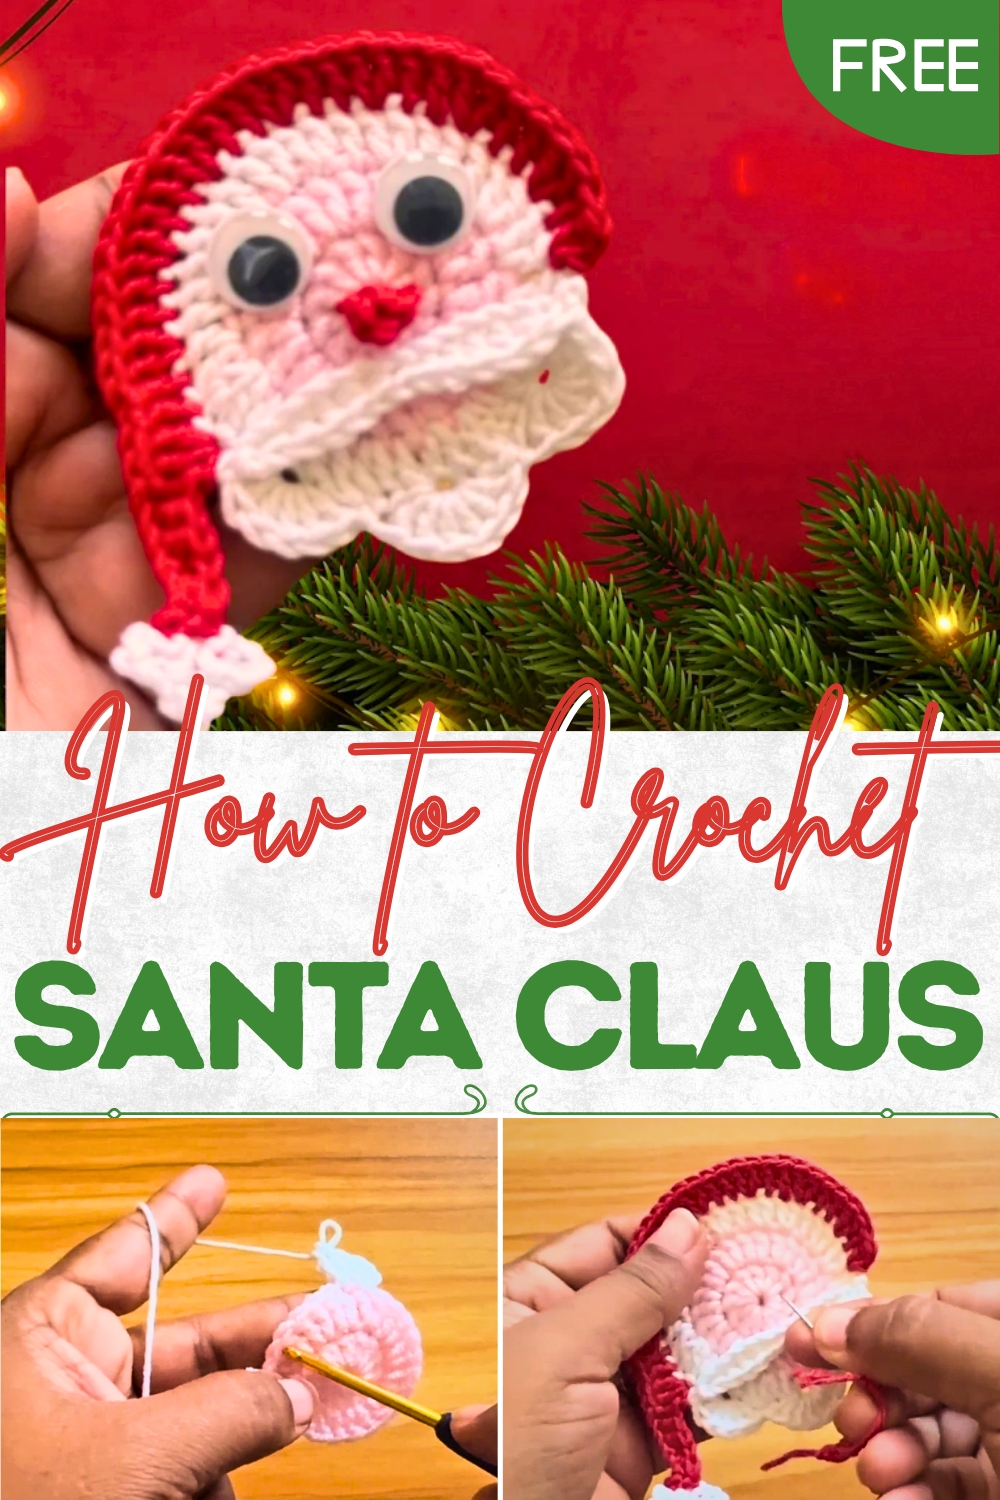
Step-by-Step Crochet Santa Claus Tutorial
Step 1: Crochet Santa’s Face
- Begin with a Magic Circle:
- Create a magic circle to start the face foundation.
- Form the Base of the Face:
- Chain 2 and work 12 double crochets into the magic circle.
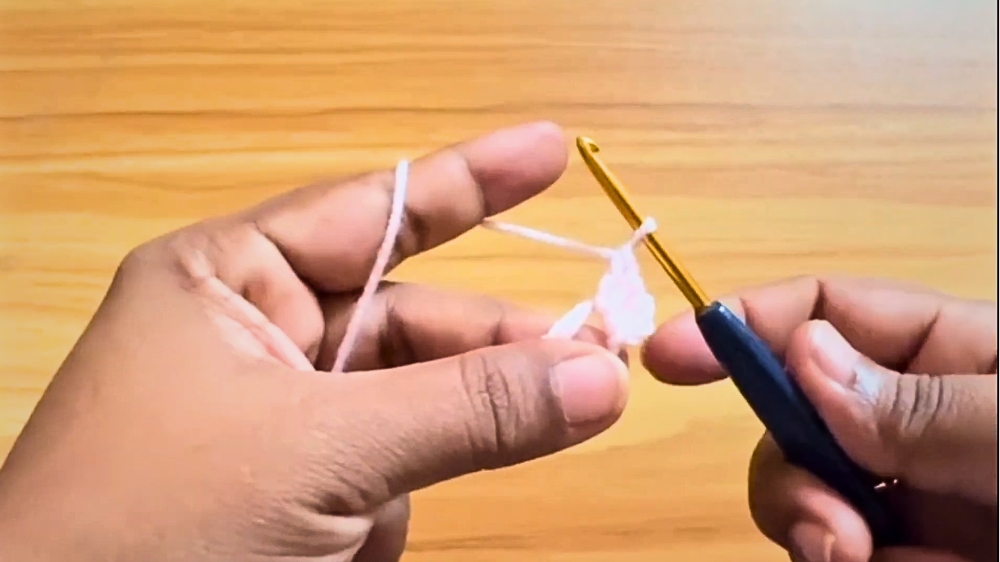
- Slip stitch into the top of the first double crochet to join the round.
- Chain 2 and work 12 double crochets into the magic circle.
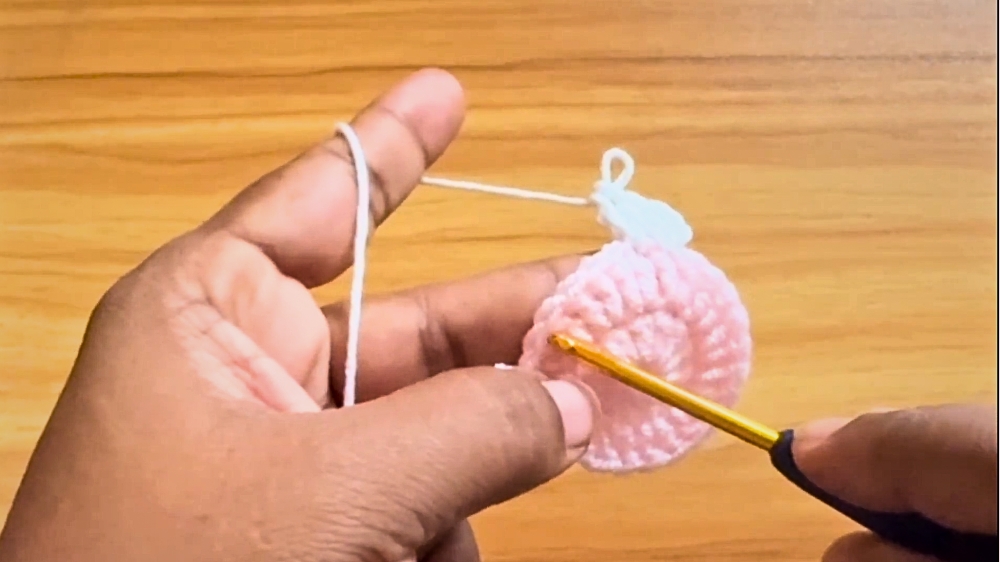
- Increase for the Face Shape:
- Chain 2 and work 2 double crochets into each stitch around the round.
- Slip stitch into the first double crochet to complete the round.
- Fasten Off:
- Pull the yarn tight, cut it, and switch to white yarn.
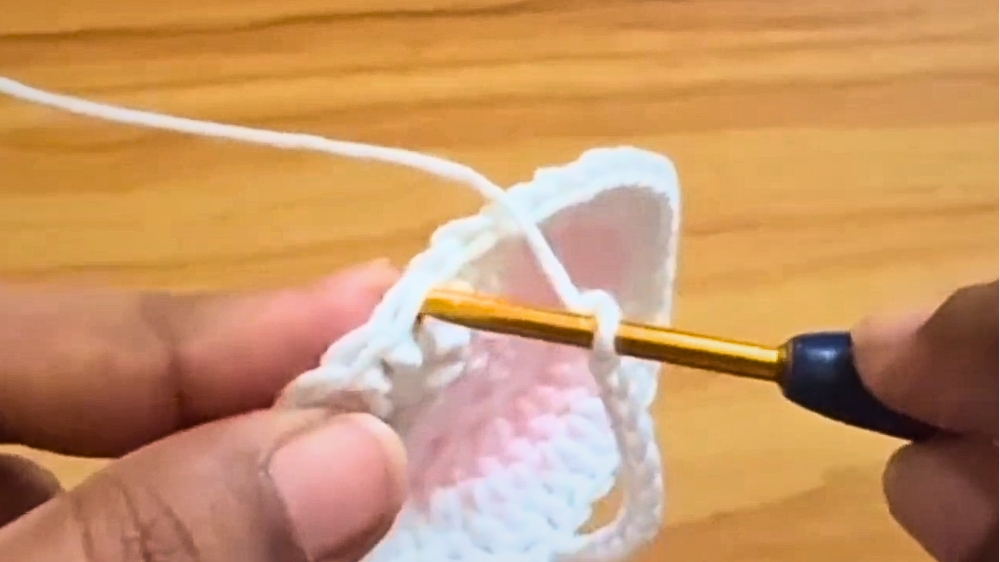
2: Begin Santa’s Beard
- Work Multiple Double Crochets:
- Using white yarn, attach a slip knot to the face base. Start by chaining 2 in the stitch of your choice.
- The pattern alternates:
- Work 2 double crochets in the next stitch.
- Then work 1 double crochet in the following stitch.
- Continue this alternating pattern to create a textured beard.
- Work 2 double crochets in the next stitch.
- Create Beard Edges:
- On the third stitch from the hook, work 6 double crochets, creating a beard curve.
- Skip 2 stitches, then slip stitch into the next stitch.
- Repeat this process until the beard design is complete.
- Fasten Off Beard Area:
- Once the beard area is done, chain 13, and slip stitch on the opposite side to form the beard connections.
- Once the beard area is done, chain 13, and slip stitch on the opposite side to form the beard connections.
3: Add Santa’s Hat
- Attach Red Yarn to Beard Edge:
- With red yarn, start near the beard border using a slip knot.
- Chain 2, then work variations of double crochets:
- 2 double crochets in some stitches.
- 1 double crochet in others to shape the base of the hat.
- Form the Hat Tip:
- Chain 8, and slip stitch into the third chain.
- Create gradual textures using single crochet, half double crochet, and double crochet stitches as you go.
- Slip stitch into the final space to secure.
4: Add Hat Pom-Pom
- Attach White Yarn for the Pom-Pom:
- With white yarn, slip knot and chain 4 at the tip of the hat.
- Slip stitch into the same space to form a loop.
- Repeat chain 4 and slip stitch three times.
- Fasten Off:
- Chain 1, pull the yarn tight, and cut the yarn.
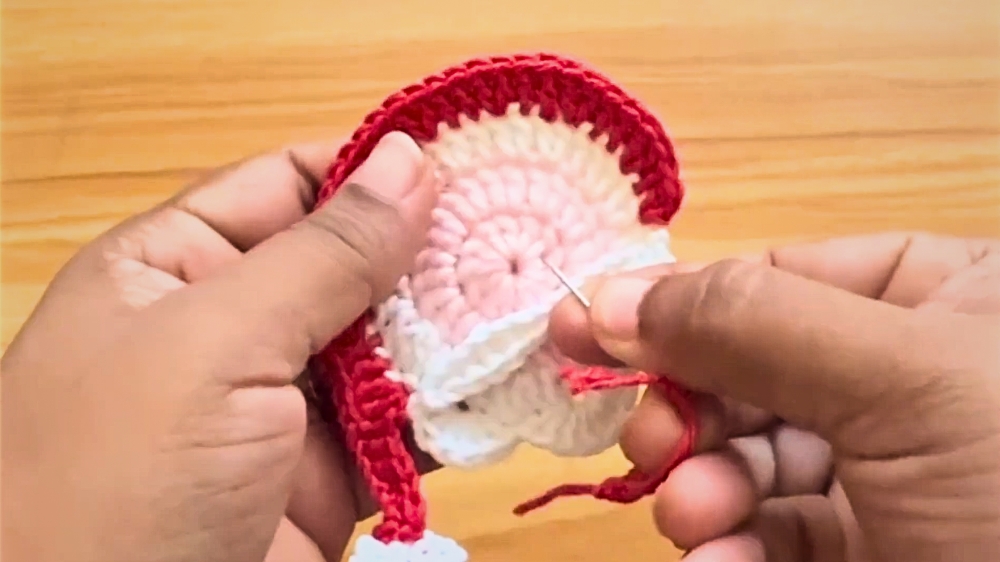
5: Add Santa’s Nose
- Make Nose with Red Yarn:
- Create a slip knot, chain 3, and work 2 half-double crochets into the first chain.
- Fasten off, leaving a tail to sew the nose to Santa’s face using a yarn needle.
6: Attach Googly Eyes
- Position Eyes:
- Locate appropriate spots on Santa’s face for the eyes.
- Use hot glue or white glue to secure the googly eyes.
- Finishing Touches:
- Weave in excess yarn ends using a yarn needle for a clean appearance.
- Weave in excess yarn ends using a yarn needle for a clean appearance.
Special Features
- Festive Design: The classic red, white, and skin-toned combination is perfect for Christmas decoration or gifts.
- Customizable: You can tweak the colors, beard length, or hat shape to create a unique Santa.
- Texture Details: The alternating double crochet pattern adds an interesting texture to the beard.
Level of Difficulty
This project caters to beginners to intermediate crocheters, as it primarily involves basic stitches like single crochet, double crochet, and slip stitches. Some parts (e.g., beard curve and hat tip) may require attention to detail.
Tutor’s Suggestions
- Master the Magic Circle: It’s crucial for creating a seamless base. Practice beforehand if needed.
- Count Stitches: Keep track of stitch counts in each round to maintain the pattern’s symmetry.
- Use Sturdy Glue for Googly Eyes: Avoid using adhesives that are too weak, as the googly eyes may fall off.
- Be Smooth with Beard Curves: Ensure even tension while crocheting the beard edges.
Uses of Santa Crochet
- Tree Ornament: Hang it on your Christmas tree or attach it to wreaths.
- Holiday Décor: Display it as part of your festive decorations.
- Stocking Stuffer or Gift: A creative and personal handmade project for friends and family.
Tip
Always check your tension while working on curving areas like the beard and hat tip to avoid uneven or loose edges. Tighter stitches create sharper details, while looser stitches ensure softer shapes.
Conclusion
This crocheted Santa pattern offers a charming way to prepare for the holiday season with a handmade decoration. Whether you create it for personal use or as a heartfelt gift, the mix of simple techniques and engaging details ensures fun and creativity throughout the process.