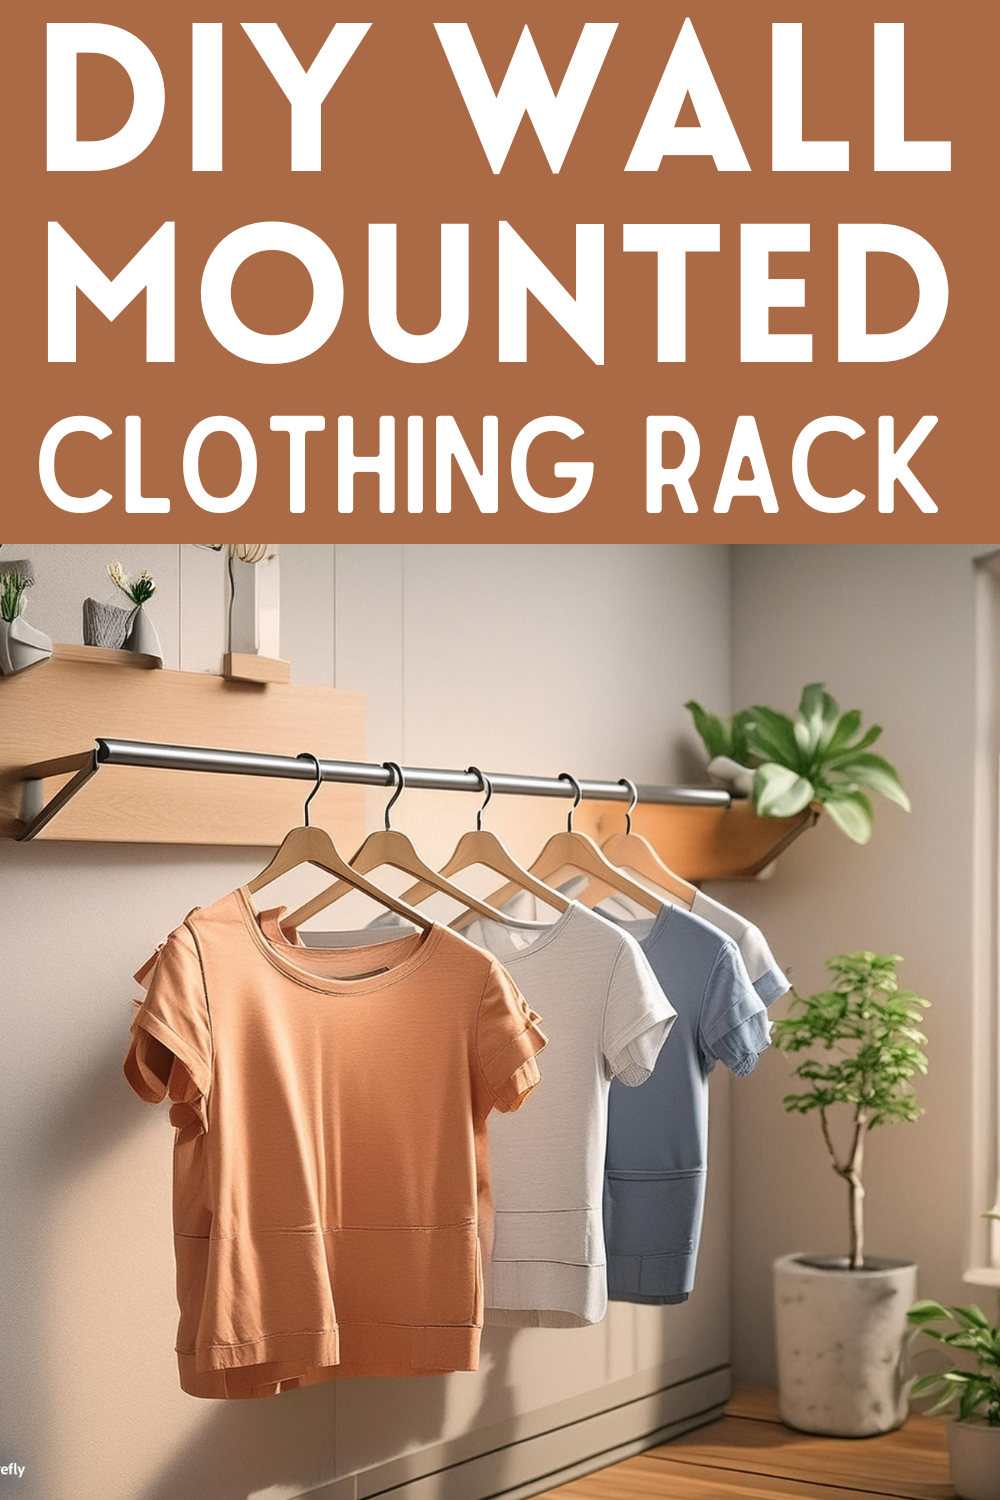
DIY Wall Mounted Clothing Rack For An Industrial-Chic Closet Upgrade
Upgrade a corner of your home into a practical yet stylish space with this simple DIY project that not only serves a purpose but also adds a touch of industrial chic to your decor. Whether you’re battling with a cramped laundry room or simply in need of an extra spot to hang your clothes, this DIY wall-mounted clothing rack is a game-changer. With materials easily gathered and a process that’s more about assembly than it is about crafting from scratch, this beginner-friendly wooden project promises to revamp your space without burning a hole in your pocket or taking up your entire weekend.
DIY Wall Mounted Clothing Rack
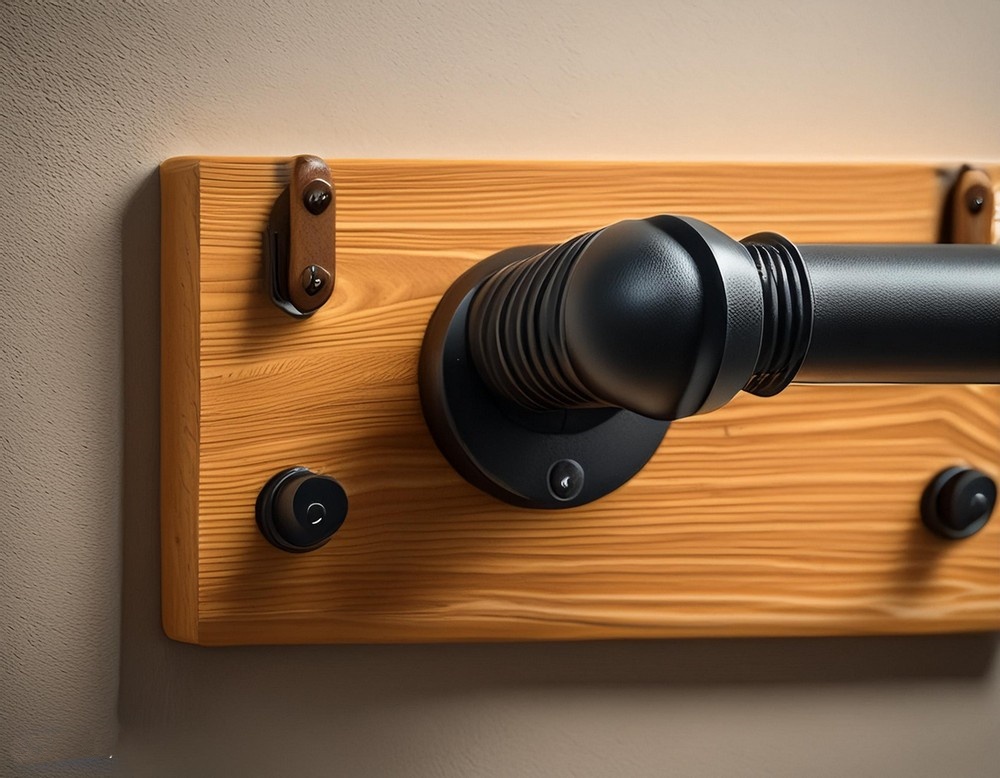
Materials Needed
- (2) 1″ Galvanized Pipe 90 Degree Elbow
- (2) 1″ Galvanized Pipe Floor Flange
- (2) 1″ x 6″ Galvanized Pipe Nipple (length can be adjusted as per need)
- (1) 1″ x 3′ Threaded Galvanized Pipe (length can be adjusted for wider spaces)
- (1) 6ft Fence Picket, 6″ wide (or a 1×6 for a slightly thicker option)
- Minwax Golden Oak Stain (for that perfect finish)
- Oil Rubbed Bronze Spray Paint (optional, for a darker metal look)
- Long Screws (make sure they fit the pipe flanges and are long enough to secure into the wall)
Tools Required
- Pencil
- Tape Measure
- Level
- Stud Finder
- Drill
- Saw (for cutting the wood backing)
Step-by-Step Guide
Step 1: Assemble the Pipe
First off, get all your pipe pieces together. Assemble them to form the frame of your clothing rack. Remember, the backside of your main pipe won’t get much spray paint since it faces the wall, but try to cover it as best as you can if you choose to paint.
Step 2: Spray Paint (Optional)
For those who opt for a sleek, dark metallic look, bust out the Rust-Oleum Oil Rubbed Bronze spray paint. It’s a combo of paint and primer, so it should adhere well to the galvanized metal. Make sure you give it enough time to dry thoroughly.
Step 3: Cut the Wood Backing
Measure and cut your wood backing. It should extend a few inches beyond the pipe on each side. If you’re using a fence picket, trim off the dog ear edge to make it a simple rectangular board.
Step 4: Stain the Wood
If you’ve chosen the rustic charm of a fence picket, now’s the time to give it that rich, golden hue with some Minwax Golden Oak. This stain will complement the industrial look of the metal pipes beautifully.
Step 5: Mounting It Up
The crucial moment—fixing your stunning new clothing rack to the wall. Measure, make sure it’s level, and depending on your wall, secure it either directly into a stud or with drywall anchors to ensure it can support the weight of hanging clothes. Use the pre-drilled holes in the wood to guide you as you affix the whole setup onto the wall.
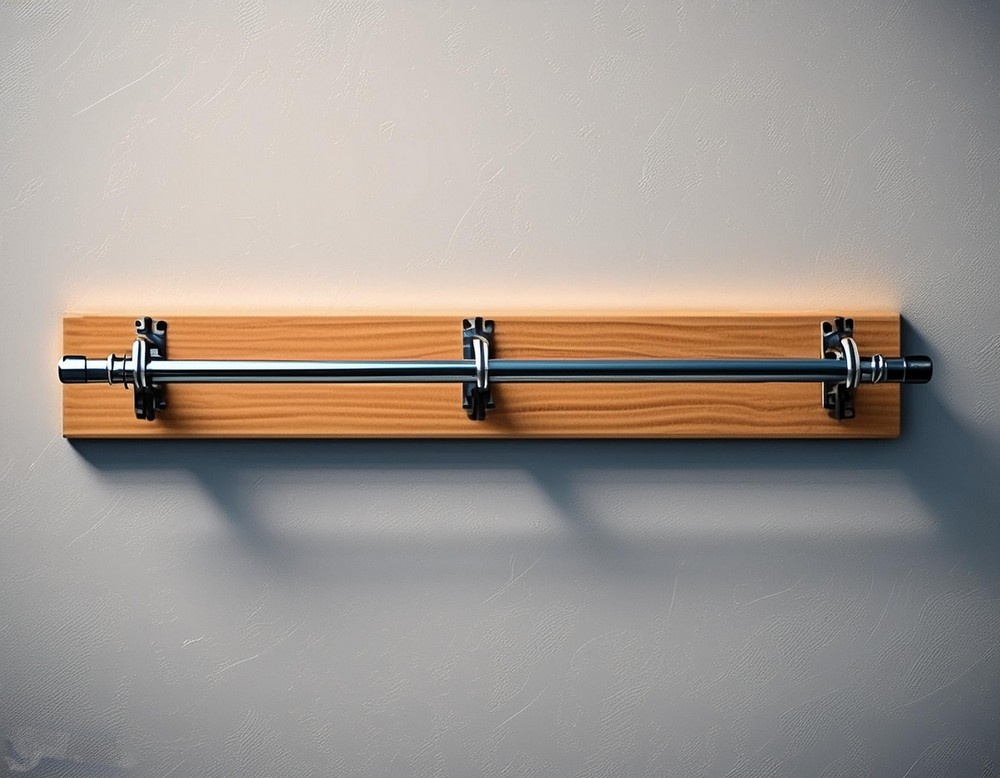
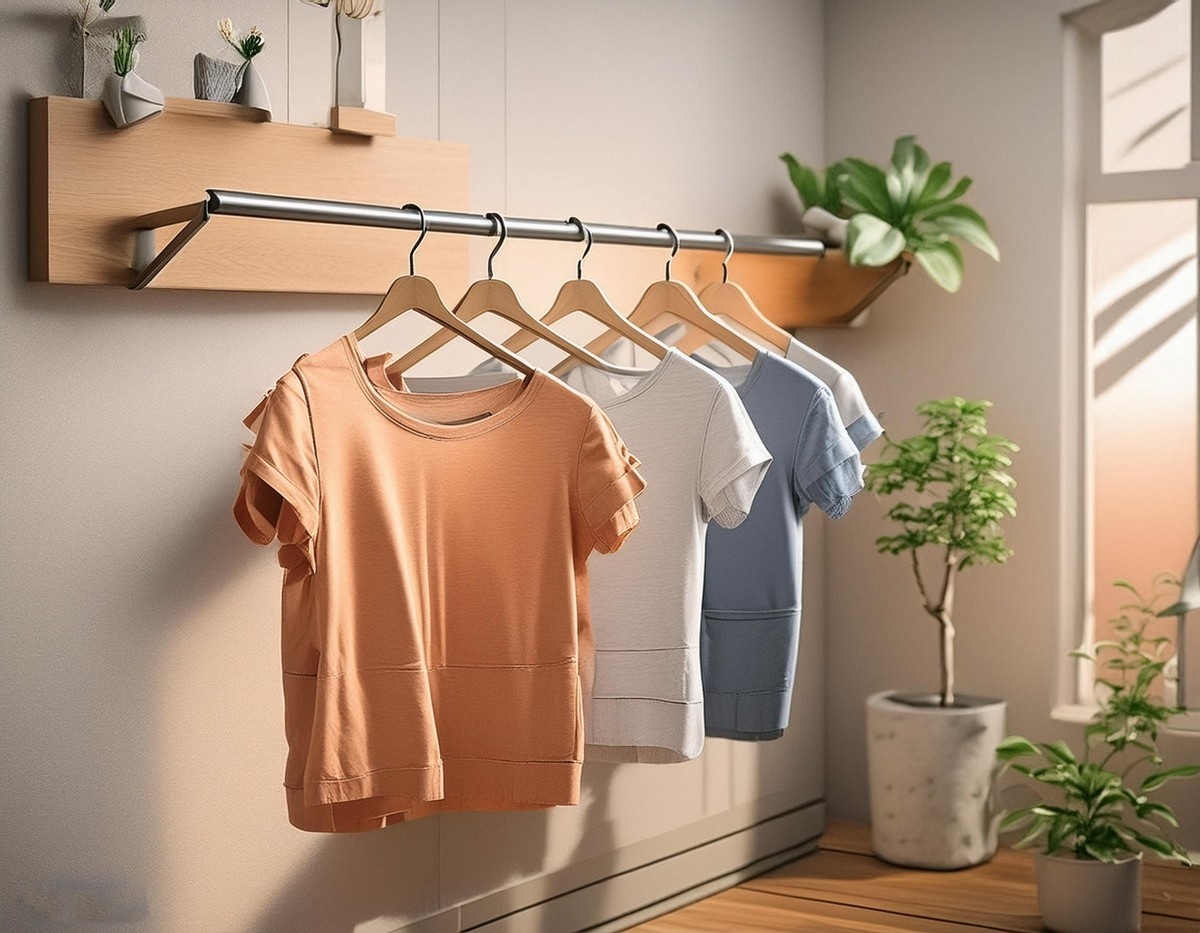
The Final Look
Once mounted, step back and admire your handiwork. This DIY wall-mounted clothing rack not only ups the functionality of your space but does so with an aesthetic flair that store-bought alternatives simply can’t match. Enjoy the added storage and the satisfaction of a project well done.
By following this guide, you’re not just making a spot to hang your clothes—you’re creating a piece of decor that speaks to your skill, creativity, and flair for the unique.