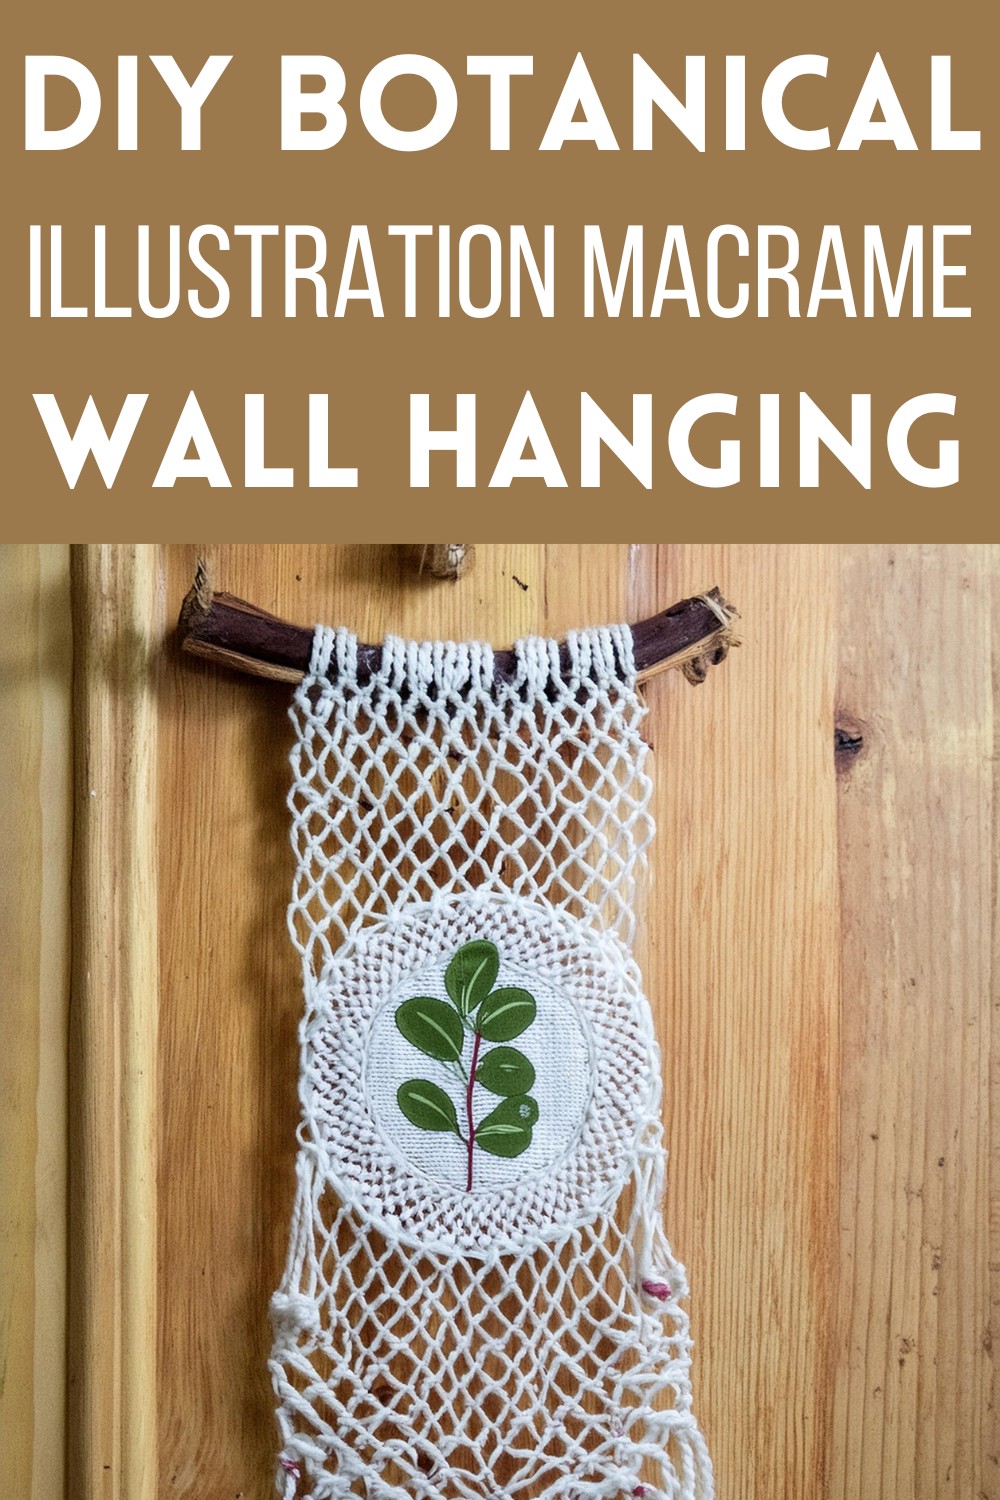
DIY Botanical Illustration Macrame Wall Hanging
Merging the elegance of botanical illustrations with the timeless charm of macrame, this Botanical Illustration Macrame Wall Hanging brings a touch of nature into your home. Crafted with simple materials like cotton rope and fabric, plus a dash of creativity, this beginner-friendly DIY project is perfect for anyone looking to add a personal and artistic touch to their space. With easy-to-follow steps, you’re not just creating art; you’re weaving beauty and tranquillity into your decor. Whether you’re a macrame master or a beginner, this piece promises to bloom splendidly on your wall.

Botanical Illustration Macrame Wall Hanging
Materials Needed:
- Reference Image: Choose any flower, herb, etc., you admire.
- Branch or Stick: Preferably straight, about 15 cm in length.
- Cotton Fiber Rope: Approximately 15 grams, 2 mm in thickness. The thickness of the rope will influence the chunkiness of the macrame knots.
- Unbleached Cotton Fabric: A small piece will suffice. Consider repurposing a branded tote bag or similar fabric.
- Acrylic Paint: Suitable for painting your botanical illustration without the risks associated with watercolour or oily media.
- Plastic Lids: For mixing paints and water.
- Scissors
- Pencil
- Needle for Hand Sewing: Ensure it can penetrate your chosen fabric without difficulty.
Tools and Equipment:
- Iron: Helpful for removing wrinkles from the cotton fabric.
- Ruler or Measuring Tape: For measuring rope and fabric.
- Permanent Fine Tip Marker: For transferring your design onto the fabric.
Step-by-Step Guide
Preparing Your Macrame Base
1. Cutting and Attaching the Rope
- Measure and cut 12 strands of rope, each 135 cm long, and an additional strand 40-45 cm for the top hanging section.
- Secure each of the 12 strands to the stick with a loop knot, ensuring they are aligned in the center.
2. Creating the Top Hanging Device
- Apply adhesive towards each end of the stick and wrap it several times with the reserved strand of rope, securing it with a minimum of two knots.

Crafting the Macrame Pattern
3. Mastering the Macrame Square Knot
- Commence by creating six square knots using 24 strands (considering 12 initial strands each divided into 2), forming the first row.
- For a brick-like pattern, skip the outer two strands on each side for the second row, crafting only five square knots.
- Alternate between six and five knots for subsequent rows until reaching the desired height of the hanging.
4. Finalizing the Macrame Design
- Securely tie off the strands, trimming the ends to create a neat fringe.
Incorporating Botanical Illustration
5. Preparing the Fabric Piece
- Decide on the desired shape for your fabric, adding about 1 cm on each side for hemming.
- Sew the edges, flattening them for a clean finish.
6. Transferring Your Design
- Sketch your chosen botanical illustration onto a piece of cardboard the same size as your fabric piece.
- Use a permanent fine tip marker to transfer this design onto the fabric.
Bringing Your Art to Life
7. The Art of Painting
- Paint your botanical design onto the fabric, aiming for a consistency in your paint mix that’s neither too thick nor too thin.
8. Attaching the Canvas to the Macramé
- With careful, even stitches, secure the painted fabric to your macramé base.
Congratulations!
You’ve now combined the warmth of macrame with the delicate detail of botanical illustration, creating a piece that’s both personal and striking. Hang your new art piece with pride, and let it spark conversations and inspire creativity within your home.