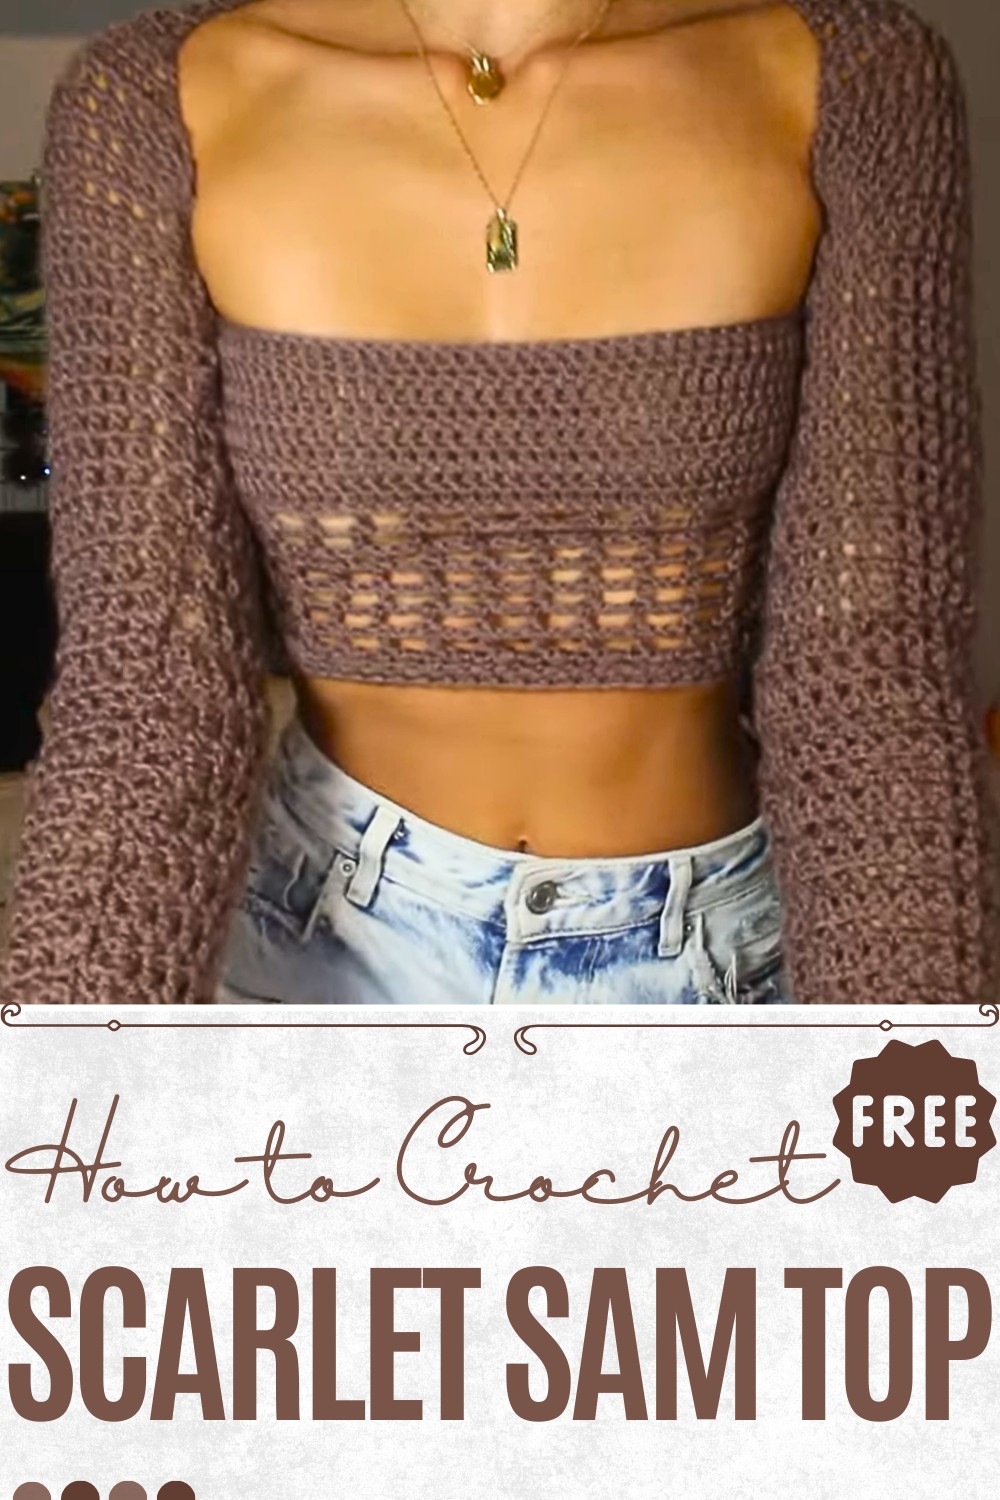
Crochet Scarlet Sam Top Pattern With Unique Texture
Ignite your wardrobe with the Crochet Scarlet Sam Top Pattern, perfect for adding vibrant color and breathable comfort to your everyday style.
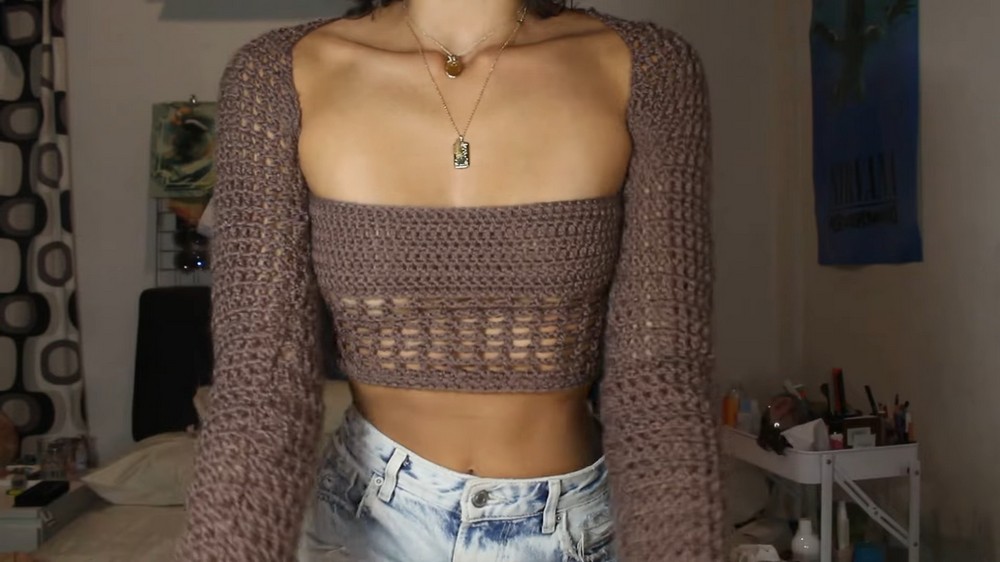
The Free Crochet Scarlet Sam Top Pattern is a beautiful and bold choice for your wardrobe. Its rich red color symbolizes confidence and passion, while the airy, open stitches make it lightweight and breathable. Perfect for warm days or layering in cooler weather, this flattering top suits all body types and allows easy movement. Whether you wear it casually with jeans or dress it up with a skirt, this versatile piece works for any occasion.
Handmade Crochet Scarlet Sam Top Pattern Full of Personality
The thoughtful construction allows for customization in sizing and color accents, ensuring a personalized touch. The combination of softness and durability means it holds up well through regular wear while maintaining its shape and vibrancy.
Beyond its visual appeal, this garment offers a sense of confidence and individuality, inviting wearers to express themselves through color and texture. Practical yet striking, it adds a pop of energy to any wardrobe while being versatile enough for everyday use, making it a favorite choice for those who appreciate both style and comfort.
Step-by-Step Process:
1. Gather Materials:
- Yarn: A worsted weight yarn; the tutor uses a nameless brown yarn she previously worked with in her mesh top tutorial.
- Hook: 4mm crochet hook.
- Stitch Markers: Useful for tracking and adjusting rows.
- No Measuring Tape Needed: The tutor recommends adjusting by trying on the piece as you go.
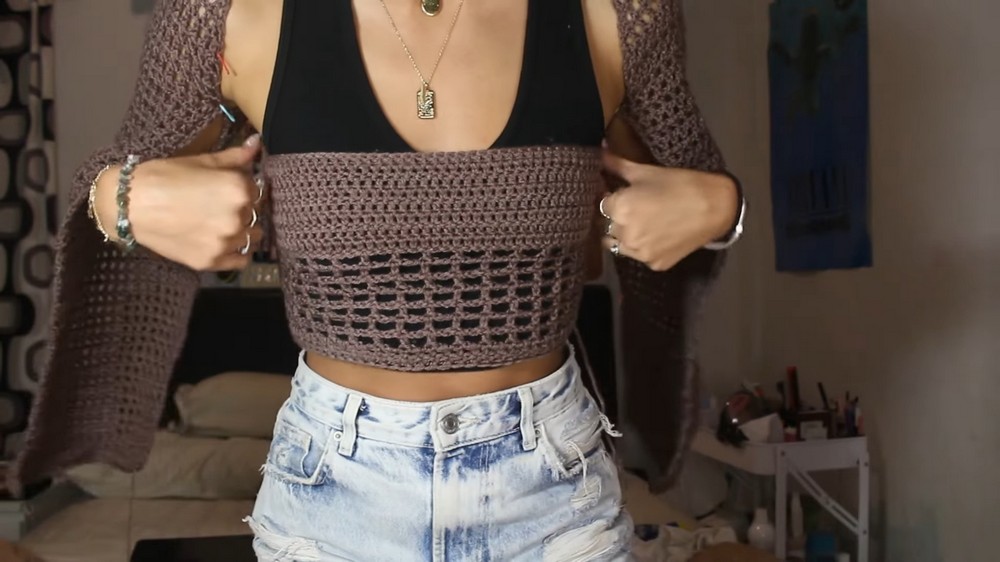
2. Making the Tube:
- Foundation Chain: Start with a foundation double crochet chain. For the tutor, this was 103 stitches to fit the widest part of her bust.

- Tube Formation: Connect the initial chain into a loop with a slip stitch.
- Crochet Rows: Chain two for height and crochet 8 rows of double crochet. Adjust the rows to ensure the tube fits well, covering areas like the bust.
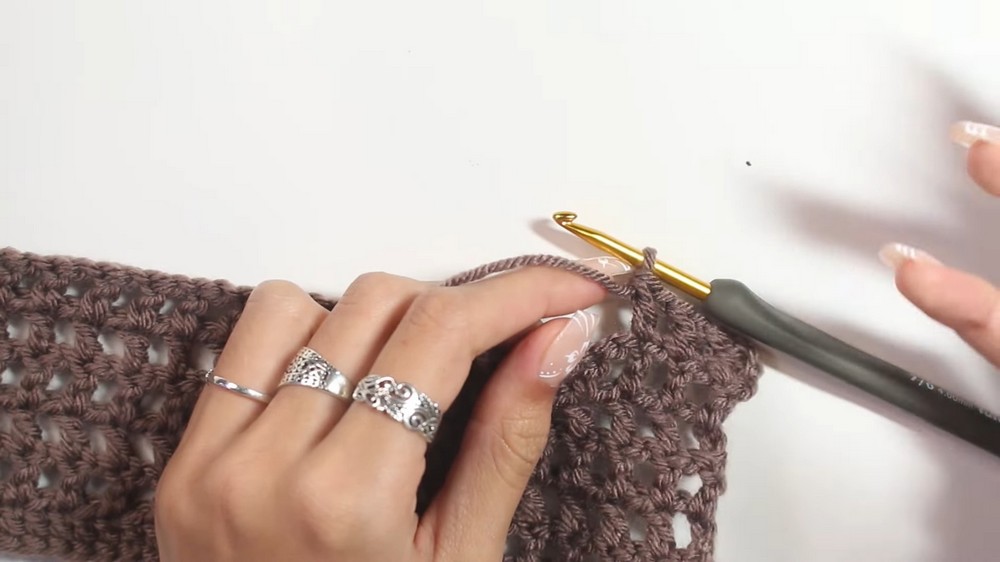
- Mesh Stitch:
- Begin with chain 4 (counts as a double crochet + chain space).
- Skip two stitches, crochet into the third. Chain two and repeat around.
- Complete seven rows of mesh stitch for a breathable design.
- Bottom Border:
- Start decreasing to cinch the waist.
- In the mesh gaps, work one double crochet per gap to create a neat border.
- Crochet one final row of double stitches.
3. Making the Sleeves:
The sleeves are fitted and mirror the design of the tube.
Sleeve Construction Options:
- You can make tight, fitted sleeves with increases/decreases.
- Alternatively, create a continuous rectangle that matches the width of your armpit for simplicity.
- Foundation Chain:
- Begin with 42 stitches (adjust based on arm size).
- Ensure your stitch count is even for the mesh stitch.
- Mesh Stitch:
- Crochet five rows of mesh stitch without increases.
- Increases for Fitted Sleeve:
- Increase by adding double crochet stitches every 6th row.
- Alternate the sides where increases occur to maintain symmetry.
- Continue until you reach armpit width.
- Back Portion:
- Work a straight section up the sleeve with decreases until it matches to shoulder level.
- Use measurements or try it on for adjustment.
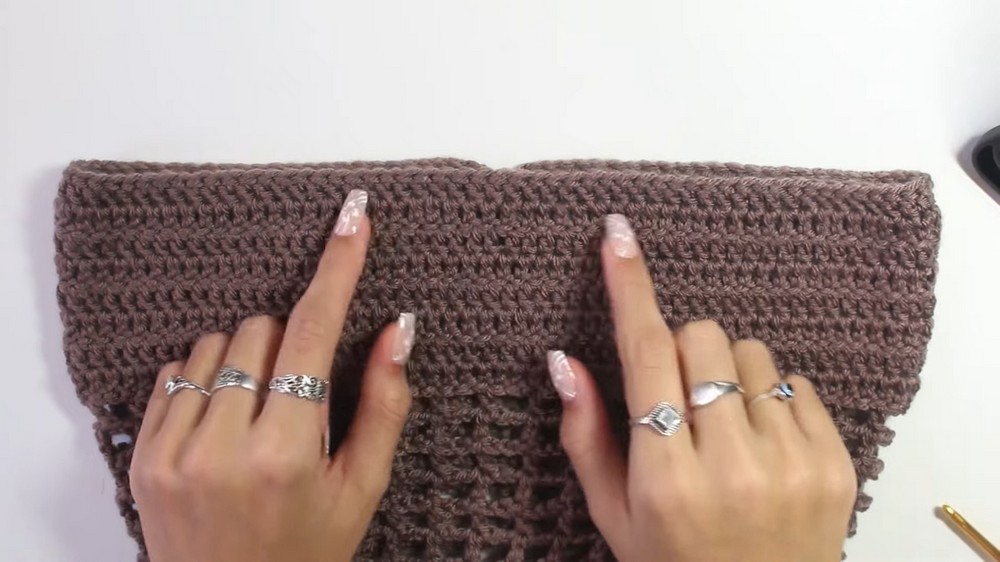
4. Joining the Pieces:
Attach the sleeves to the tube:
- Use a mattress stitch to securely join edges.
- Align and clip pieces together to test fit.
- Stitch sleeves from the armpit to the back piece for seamless integration.
Special Features:
- Customization: Easily adaptable in terms of size, color, fit, and sleeve design.
- Mesh Stitch: Incorporates an airy, breathable look for style and comfort.
- No Measuring Tape Required: Simply try on the components to make adjustments along the way.
- Simple Construction:
- Separated into two parts: tube and sleeves.
- Enhances creativity and ease in altering proportions.
Level of Difficulty:
Intermediate
While the model uses simple crochet stitches (double crochet, chain spaces, slip stitch), managing increases, decreases, and fitting the top can be challenging for beginners. Familiarity with foundational stitches and basic garment forming techniques is required.
Tutor’s Suggestions:
- Try on As You Go: This ensures a proper fit without needing a measuring tape.
- Avoid Tight Mesh Rows: Tighter rows may alter the sizing unintentionally.
- Write Down Rows: Keep track to ensure symmetry between sleeves.
- Skippable Sections: Beginners can opt for simple rectangular sleeves instead of fitted designs.
Uses:
This long sleeve crochet top is perfect for:
- Casual outings.
- Layering under jackets in cooler weather.
- Creating unique wardrobe staples in any color or fiber type.
Materials:
- Worst weight yarn.
- 4mm crochet hook.
- Stitch markers.
Tip:
When working on mesh stitches and border rows, keep your tension consistent to prevent tightness that could distort the overall shape of the garment.
Conclusion:
Crocheting this long sleeve top is a fun and artistic way to design your own clothing piece! Featuring compatibility with various yarn weights, colors, and levels of complexity, the project is beginner-friendly yet offers a satisfying challenge for intermediate crocheters. With its mesh stitch details and fitted sleeve options, this top is versatile for any occasion.