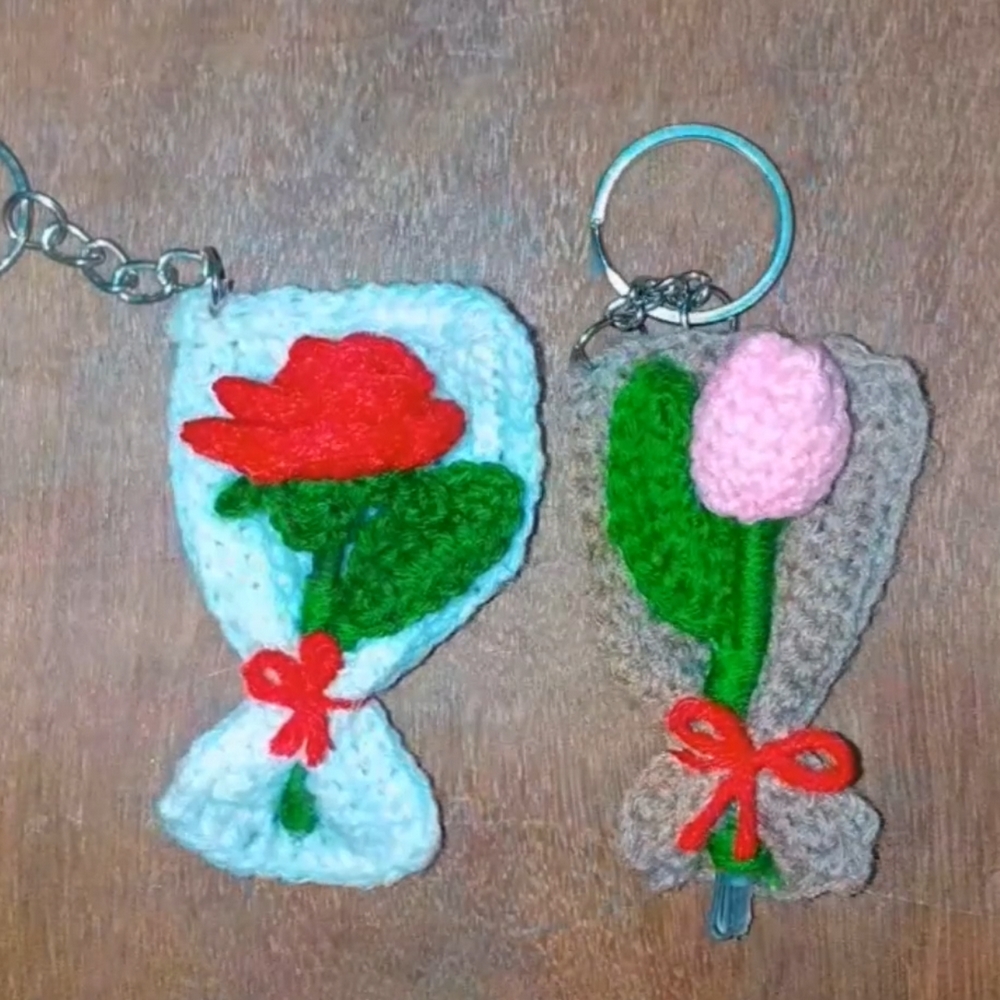
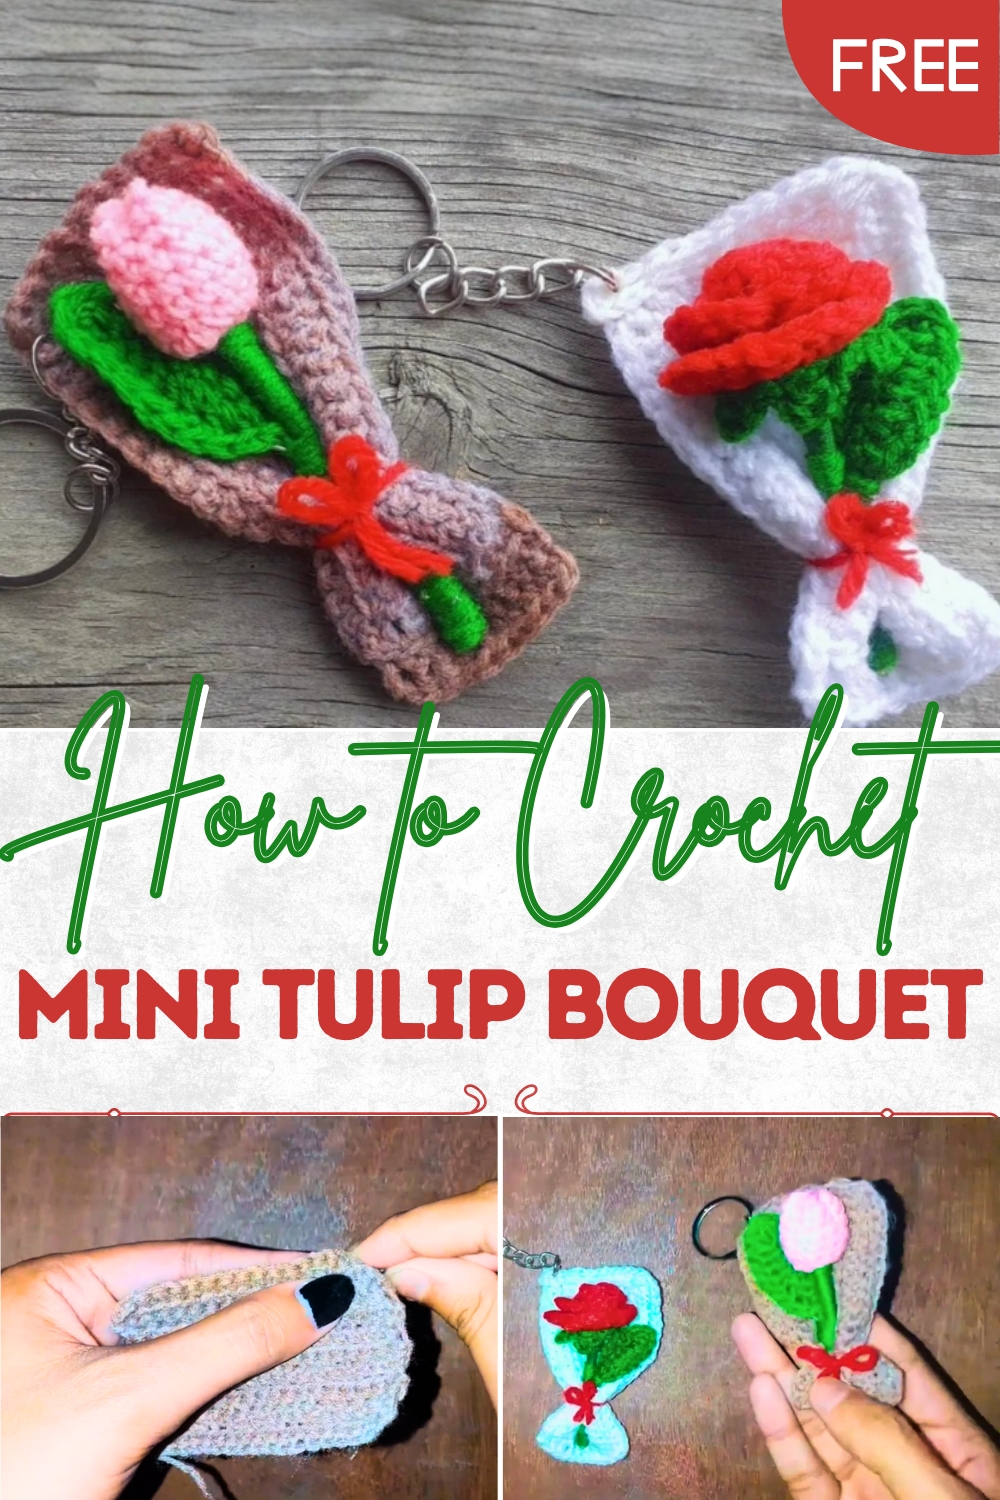
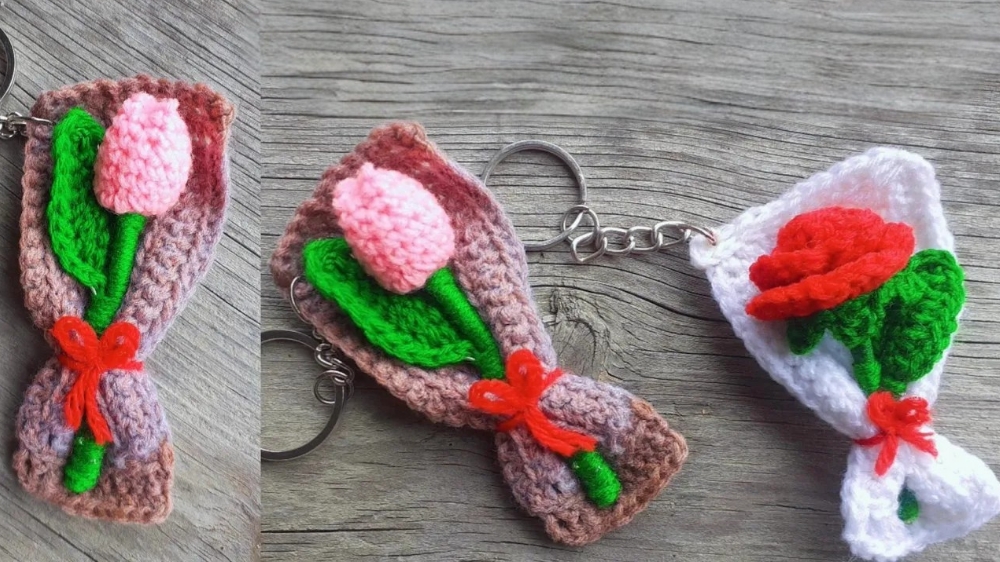
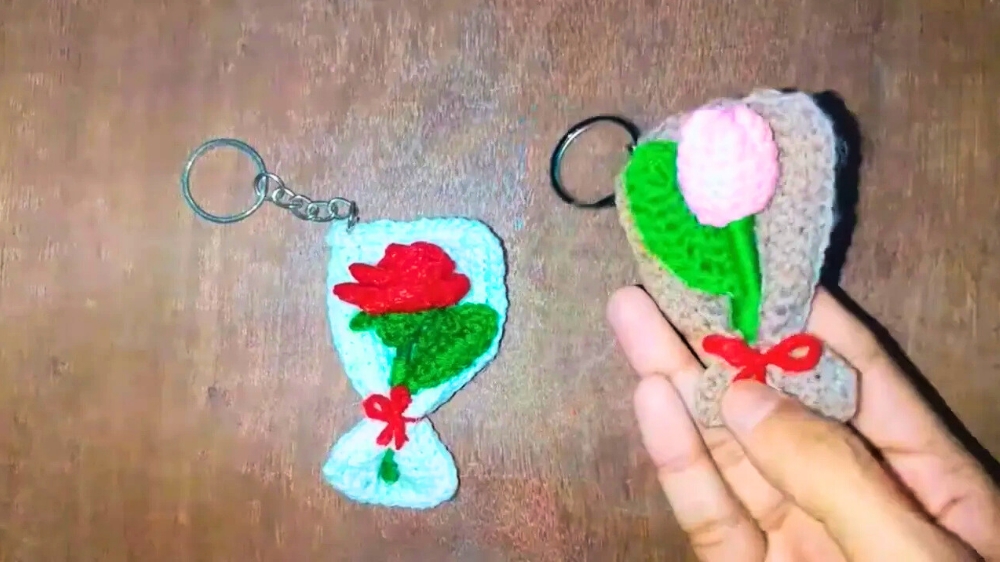
Blooming Crochet Mini Tulip Bouquet for Cozy Touches
Enjoy with this Crochet Mini Tulip Bouquet Pattern for charming floral beauty that delights and refreshes any space effortlessly
Fresh flowers have long brought joy, color, and a sense of celebration to everyday spaces, and a crochet mini tulip bouquet captures that charm in a lasting form. This pattern allows the creation of a small collection of tulips that retain their vibrancy and structure without the need for water or sunlight, making them perfect for display year-round. Each bloom showcases delicate petals and gentle curves, reflecting attention to detail and thoughtful stitching. Lightweight and compact, the bouquet can adorn desks, shelves, or windowsills, or serve as a charming gift for loved ones.
Cheerful Crochet Mini Tulip Bouquet Made for Inspiring Spaces
Beyond visual appeal, the tactile nature of the crochet tulips provides subtle sensory enjoyment, inviting gentle touch and admiration. The sturdy construction ensures that each tulip maintains its form over time, offering lasting beauty and a practical alternative to fresh flowers. Ideal for home décor, seasonal arrangements, or special occasions, the bouquet brings a cheerful and elegant accent wherever it is placed.
Every stitch reflects patience and skill, giving each flower a unique charm and character. This crochet mini tulip bouquet combines visual beauty, durability, and thoughtful detail, transforming ordinary spaces into small celebrations of color, craftsmanship, and timeless floral appeal.
Materials Needed
- Yarn Colors:
- Pink yarn: For the tulip bird.
- Green yarn: For the leaf and stem.
- Brown yarn: For the bouquet wrap.
- Hook Size: 3 mm crochet hook.
- Tools:
- Needle: For sewing and finishing edges.
- Glue gun: To attach pieces together securely.
- Scissors: For cutting yarn.
- Wire: For the stem.
- Key ring: For completing the keychain.
- Stuffing: Cotton or fiberfill for the tulip bird.
Special Features
- Miniature Tulip Design: The tulip bird is small and cute, making it ideal for keychains.
- Customizable Colors: You can personalize the project by using different yarn colors for the tulips, leaves, stem, and bouquet wrap.
- Functional Accessory: It doubles as a decorative item and functional keychain.
- Easy to Sell: The creator mentions selling the finished product, making it a potential item for small business ventures.
Level of Difficulty
- Beginner-friendly: Ideal for those familiar with basic crochet techniques such as magic circles, single crochet, slip stitches, and increases.
Step-by-Step Instructions
Step 1: Making the Tulip Bird
- Start with a magic circle:
- Wrap pink yarn around your finger and pull up a loop using the hook.
- Make a chain stitch to secure the magic circle.
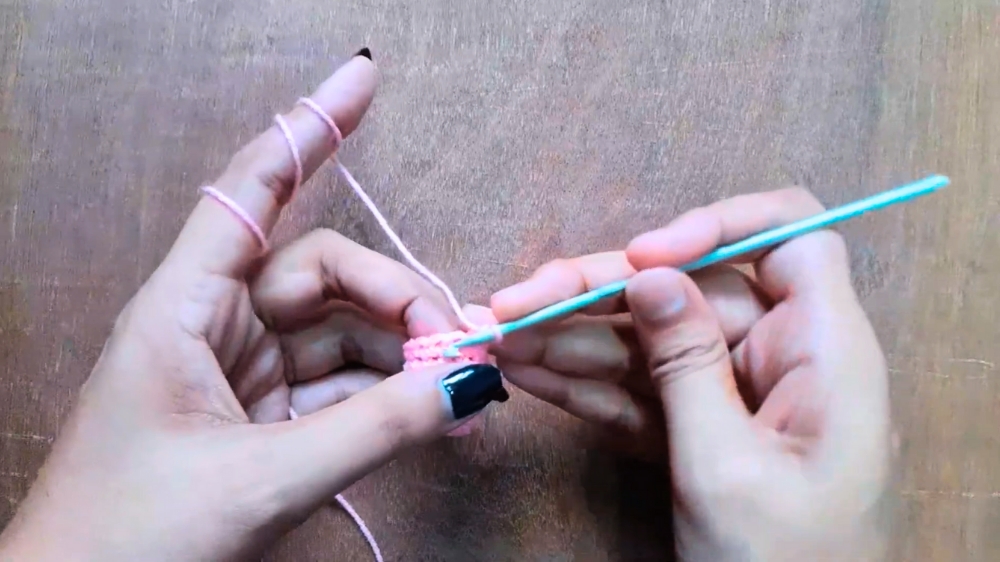
- Round 1:
- Crochet six single crochets into the magic circle.
- Pull the yarn tail tightly to close the circle.
- Slip stitch into the first single crochet and chain 1 to begin the next round.
- Round 2 (Increase Row):
- Work two single crochets into each stitch (increases).
- By the end of the round, you’ll have 12 stitches.
- Slip stitch into the first single crochet to join the round.
- Rounds 3–6:
- Work one single crochet into each stitch for all four rounds.
- This creates the rounded shape of the tulip bird.
- Finish the tulip bird:
- Slip stitch into the first stitch of the last round and leave an extra yarn tail.
- Cut the yarn and fill the bird with cotton or fiberfill for structure.
- Use a needle to secure the top with a knot and thread the yarn through.
- Trim excess yarn.
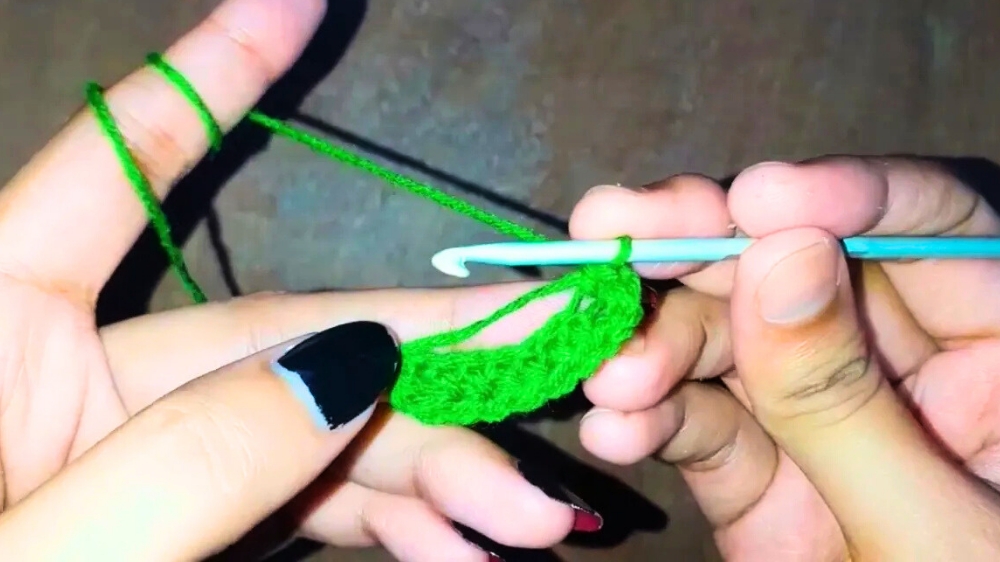
Step 2: Making the Tulip Leaf
- Start with a slip knot:
- Use green yarn and create nine chain stitches.
- First row:
- Skip the first chain and make a single crochet into the second chain.
- Work seven half double crochets into the next chains.
- In the last chain, make three single crochets to create the tip of the leaf.
- Second row:
- Repeat the pattern on the other side by making seven half double crochets back down the chain.
- Work into the extra yarn tail so it doesn’t need to be hidden later.
- Finish the leaf:
- Cut the yarn tail.
- Attach the wire by single crocheting into the surface of the leaf.
- Twist the wire to secure it.
Step 3: Adding the Stem
- Create the stem:
- Attach the tulip bird and leaf to the wire stem using a glue gun.
- Cover the wire stem with green yarn for a neat and finished look.
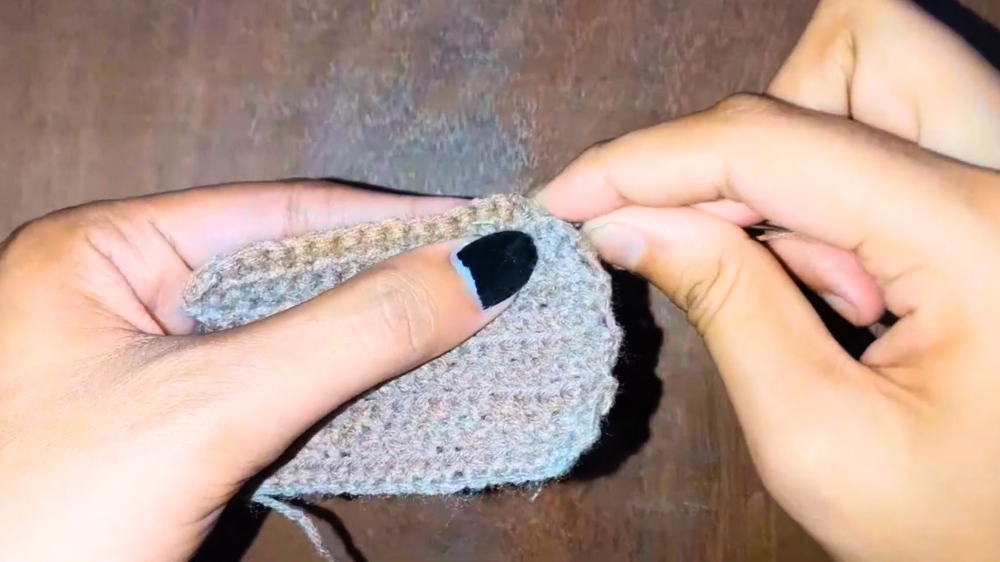
Step 4: Making the Bouquet Wrap
- Start with a slip knot using brown yarn:
- Make 16 chain stitches.
- First row:
- Skip the first chain stitch and make a single crochet into the second chain.
- Work single crochets into the remaining chains.
- Chain 1 at the end and turn the band.
- Rows 2–10:
- Work one single crochet into each chain to form additional rows.
- At the end of each row, make a chain, turn the work, and repeat the process until you’ve completed 10 rows.
- Finishing the bouquet wrap:
- Use a needle to hide the extra yarn tails and trim them for a clean finish.
- Use a needle to hide the extra yarn tails and trim them for a clean finish.
Step 5: Final Assembly
- Stick pieces together:
- Use a glue gun to attach the tulip bird(s) to the bouquet wrap.
- Attach the bouquet to the key ring at the top.
- Add decorative elements:
- For extra flair, attach a small red yarn ball to the keychain.
- For extra flair, attach a small red yarn ball to the keychain.
Tutor’s Suggestions
- Use proper crafting tools: A glue gun ensures secure bonding between the parts.
- Work with clean edges: Use a needle to hide yarn tails for a polished look.
- Customize for sale or gifting: The tutor suggests this project can be sold or given as gifts, making it a great opportunity for small-scale business ventures.
Uses of the Mini Tulip Keychain
- Decorative Keychain: Perfect for everyday use or as a cute accessory for bags and purses.
- Gift Item: Ideal for holidays, birthdays, or special occasions.
- Craft Business: The instructor mentions selling similar products, showing the potential for creating income through custom orders.
Final Tip
When covering the wire stem with green yarn, use a tight wrap to ensure that it looks clean and cohesive while also fully hiding the wire.
Conclusion
The Mini Tulip Bouquet Keychain is a fun and creative crochet project that combines simple techniques to create an elegant accessory. With its versatile design and potential for customization, this project is suitable for beginners and advanced crocheters alike. Create one for yourself, gift it to someone special, or even turn it into a small business venture.