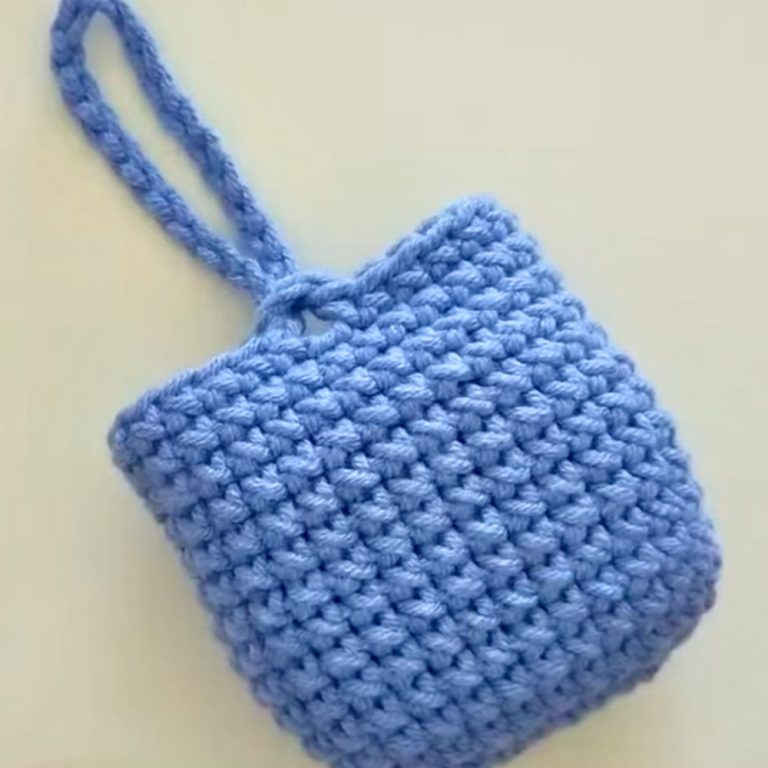
Beautiful Half Moon Handbag Crochet Pattern You’ll Cherish
Slide your essentials into a stylish Crochet Half Moon Handbag Pattern perfect for everyday outings and thoughtful gifts for loved ones.
This special handbag brings style and joy to anyone who carries it. Its unique shape catches the eyes and makes you stand out in a crowd. The Crochet Half Moon Handbag pattern lets you create your own lovely piece at home. You can use this bag in many ways. It is perfect for shopping trips, family visits, or a fun day outside. Its size is just right for holding your phone, wallet, and other small things.
Stylish Crochet Half Moon Handbag Pattern for Everyday Glam

Whether you are wearing simple clothes or dressing up, this handbag adds a charming touch to any look. Making the bag with yarn and simple stitches feels relaxing and fun. Even if you have never made anything before, you will find it enjoyable and easy. With this pattern, you can bring your own style into every day and share the beauty with friends and family.

Materials
- Yarn: 2 skeins of 5 mm polyester cord
- Hook: Size 4–4.5 mm crochet hook
- Notions: Scissors, yarn/tapestry needle, stitch markers, lighter
- Optional:
- Magnetic button or clasp
- Chain strap
- Metal rings or other bag handles/fittings of choice
Key Abbreviations (US Terminology)
| Abbreviation | Meaning |
|---|---|
| ch | chain |
| sl st | slip stitch |
| sc | single crochet |
| st(s) | stitch(es) |
| inc | increase (2 sts in 1) |
| RS | right side |
| WS | wrong side |
Special Stitch:
Herringbone Single Crochet (hbsc):
Insert hook into next st, yarn over and pull through st and the loop on hook at once, repeat as pattern directs.
Notes
- The bag is constructed from two main parts: the back wall with flap (in one piece, with rounded closure) and the front wall (rectangle).
- Use stitch markers to keep track of your increases and sides.
- Always burn cord ends after cutting to prevent unraveling.
- Use US crochet terms.
- Instructions are for one size; adjustments can be made by altering base chain length or number of rows.
Pattern Instructions
A. Back Wall & Flap (Worked as One Oval Piece)
1. Create the Base Chain
- Leave a 1-meter tail.
- Ch 17.
- This will serve as your foundation chain.

2. First Row (Foundation Row)
- Turn; starting in the 2nd ch from hook, work 1 sl st in each ch across – (16 sl st total).
3. Forming the Initial Shape
- Pull the 1-meter tail through the last loop, tightening to secure.
- Now you have the initial base.
4. Set Up for Herringbone Stitch
- Insert hook in first loop, pull up a loop.
- Insert into the next loop, pull up another loop (2 loops on hook).
- Yarn over, pull through both.

5. Herringbone Single Crochet Row
- Repeat: Insert hook through the next st and the loop just made (as per hbsc), yarn over, pull through both – continue across row.
- Work until you reach end of the row.
6. Work Increases at Oval Ends
- At the corners (where the base chain “turns”), work 4 increases (inc):
- In one stitch, work 2 hbsc four times around the end.
- Place marker at the first increase stitch for reference.
7. Continue Working in Rounds
- Side Rows: Work 1 hbsc in each st to the next marker, making sure to insert hook under both front and back loops for sturdiness.
- At the next rounded end, work 4 increases as before; place a marker at the end.
8. Joining Rounds
- To join, pull up the tail through the final loop, forming a neat arch/loop.
- Pass the tail to the inside of your work to finish the round.
9. Shaping Flap and Wall
- Continue working in the round, always making:
- 4 increases at each “oval” end (marker to marker).
- 1 hbsc in each st along the sides.
- Maintain 17 hbsc across the straight edges (between markers).
- Place and move markers each round to monitor increases and sides.
10. Adjust Increase Scheme for Shape
- In each round, increase the regular stitches between increases, following a pattern such as:
- After initial rounds: [inc, 1 hbsc] x4 at both ends
- Next: [inc, 2 hbsc] x4, and so on
- Check that there are always equal side stitches between the increases.
11. Finish the Piece
- After working enough rows to desired bag size (typically about 7–8 total “increase” rounds, or as shown in video), fasten off cord, burn ends with lighter to secure.
B. Front Wall (Rectangle)
1. Foundation Row
- With new skein, ch 7.
- Turn; in 2nd ch from hook, work 1 sl st in each ch across (6 sl st total).
2. Form the Shape
- Pull starting tail through last loop; tighten.
- For all rows, use herringbone single crochet as in the back wall.
3. Increase Rows
- At end of rows, work 4 increases at the “end” to start rounding the edge (to match the curvature of the flap).
- Place marker at first and last stitches to define sides.
- After increasing, work even until 50 stitches total (or as required to align with back wall; check fit).
4. Work without Increases
- Once 50 sts reached, work 3 rows even (no increases). This forms the body of the front panel.
5. Edge Finish
- Work 1 row of sl st around the front panel edge to neaten.
- Leave a 2-meter tail for sewing.
- Do NOT forget to burn all cut ends to prevent unraveling.

C. Assembly
1. Hiding Ends
- Using a smaller hook or needle, weave in any remaining ends through existing stitches.
- Trim and burn remnant ends.
2. Sew The Front Wall to the Back
- Position: Align base edges; the joint/seam will be at the back, flap at the top.
- Using the long tail and needle, sew from 8th st from “flap and wall” join on one side to the 8th st on the other side (leave flap unsewn).
- Repeat stitches 2–3 times at each end for extra strength.
- Weave in (and burn!) ends.
3. Add Closures and Hardware
- Attach magnetic button or clasp at flap and corresponding position on front panel.
- Attach rings for chain/handle if desired.
- Thread in or attach your chain handle.

Conclusion
This elegant herringbone stitch crochet bag is sturdy, stylish, and practical. The dense herringbone texture provides both visual appeal and enhanced durability. The pattern is easy to adapt: simply change the foundation chain or the number of increase rounds for a larger or smaller bag.
Pattern Corrections
- The video alternates between continuous rounds and joined rounds. For a neater join, always move the marker at each row’s first stitch.
- Adjust increases if the oval corners start to pucker or ruffle: you may need to space them further apart in later rounds.
- The front wall should match the number of stitches across as your back wall, minus the flap. Count carefully and add or decrease rows as needed for a perfect fit.
Tips
- Use Markers Generously: Place stitch markers at each increase point and side join for easy counting.
- Cord Tension: Do not crochet too tightly – a relaxed tension results in a softer, less structured bag.
- Cauterize Ends: Always burn cord ends after cutting to prevent fraying. Lightly press the melted end into your work to fix it in place.
- Perfect Fit: Lay pieces together as you work to check alignment before final sewing.
- Hardware: Customize your bag with handles, chains, buttons, or other fittings to suit your style.